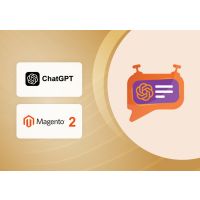
Advanced ChatGPT AI Content Generator Extension for Magento 2
Kategorien
Magento
WordPress
SAP Commerce
Odoo
Shopify
Typo3
Shopware
nopCommerce
Pimcore
Hyvä
OXID eShop


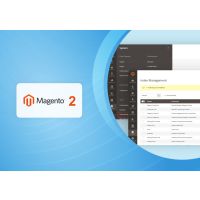


1. Advanced ChatGPT AI Content Generator for Magento2
If you ever get stuck writing product descriptions or are overwhelmed by writing descriptions for too many products, our module can help you write product descriptions instantly with the click of a button. And it is not just any random content; it is the kind that can convert e-window shoppers into repeat customers.
Advanced ChatGPT AI Content Generator Extension for Magento 2 is a powerful Magento 2 extension developed by PIT solutions which is used to generate content from shop backend with the help of ChatGPT chatbot by open AI. Listed below are the features.
2. Features
Key Features of the Advanced ChatGPT AI Content Generator Extension for Magento 2:
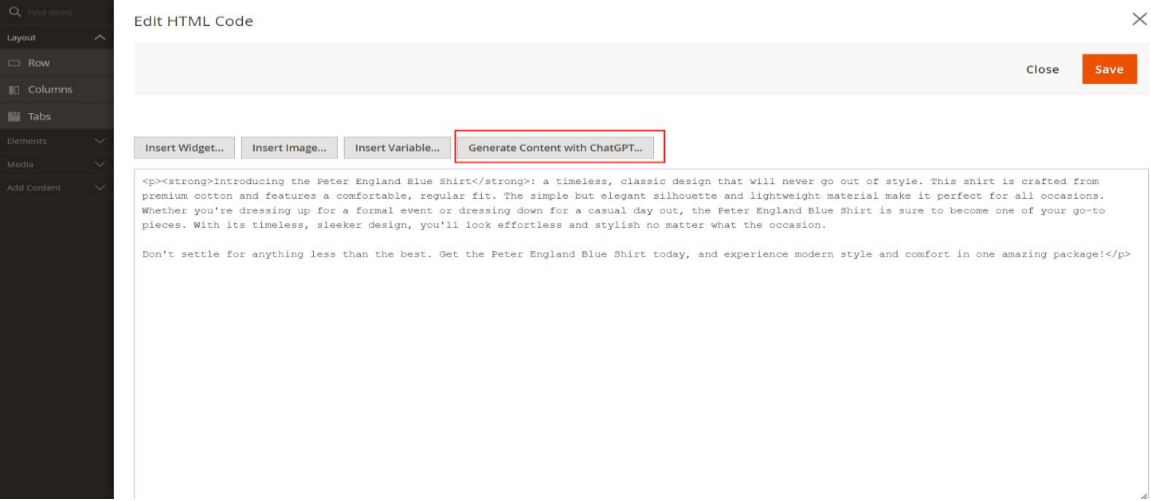
- The content will be generated when click on 'Generate Content withChatGPT' button.
- Easily connect OpenAI GPT 3 or GPT3.5 with Magento 2 using the API key.
- By default, content generation is based on the product's name. But you can change the input from ChatGPT pop-up or using configuration.
- Option to enable/disable the extension from backend on store scope level.
- The admin can add description/short description of the product using the ChatGPT AI.
- Option to automatically set product attribute values in the content generation input.
- Input for the ChatGPT will be automatically generated based on the attribute labels and values in the store scope.
- The admin can add meta description of the product using the ChatGPT AI.
- With the help of mass action admin can add product short description and description for multiple products.
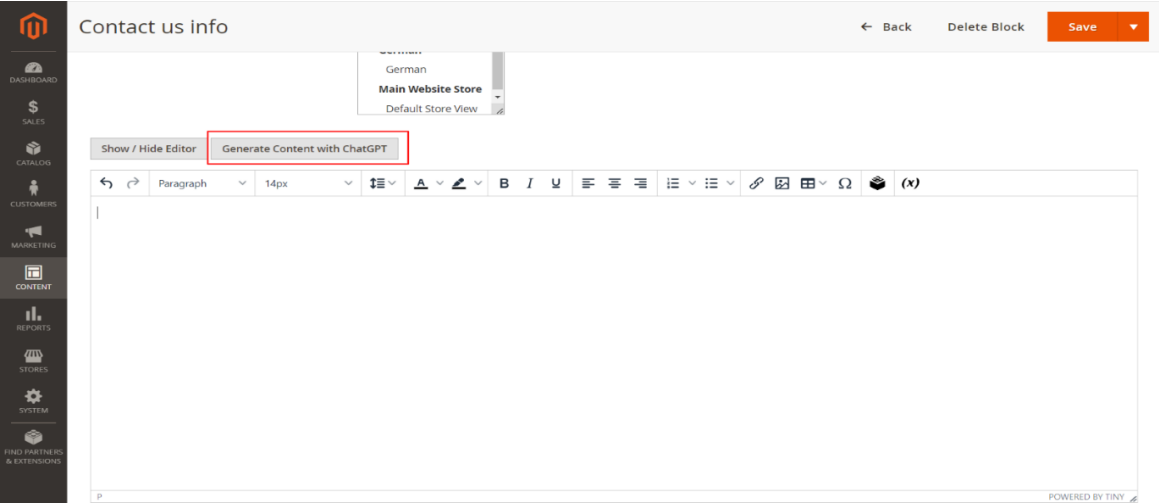
- The admin can add CMS page and Block content using ChatGPT AI.
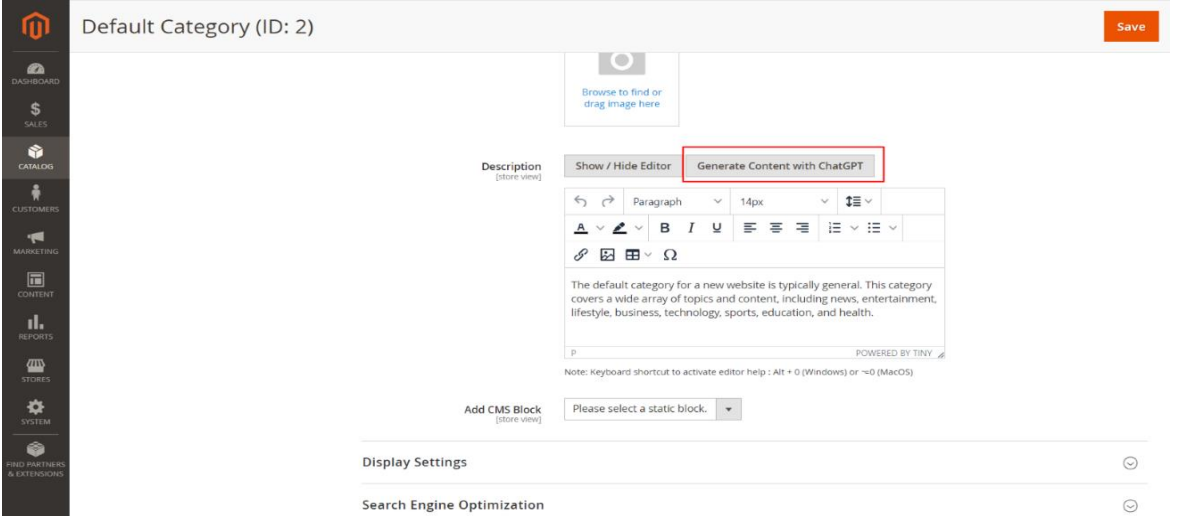
- The admin can generate AI content for categories using ChatGPT AI.
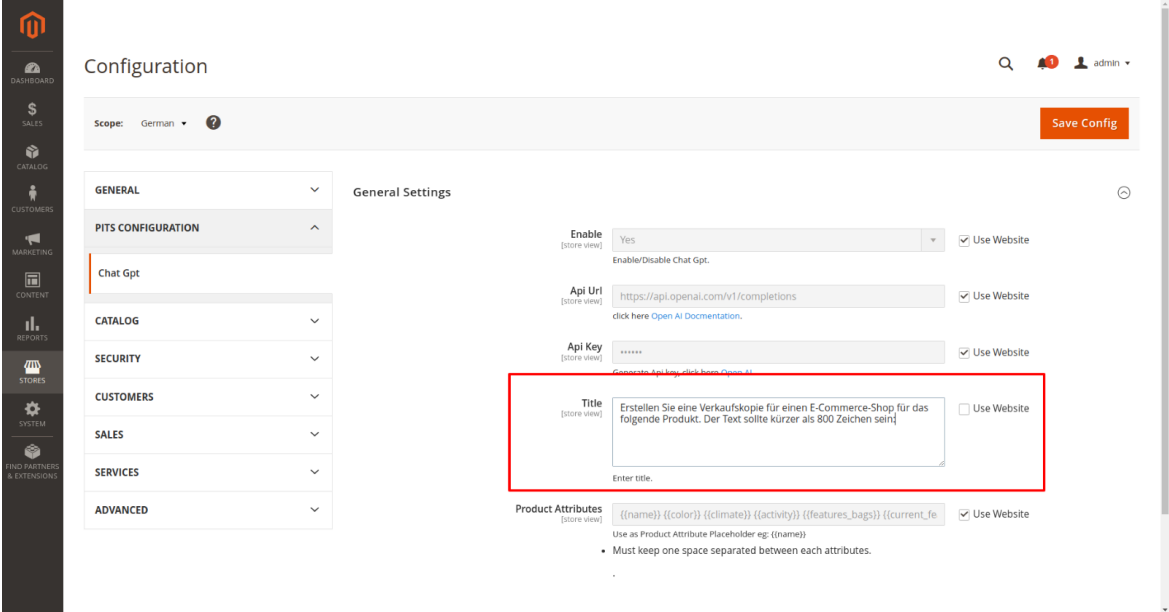
3. Configuration
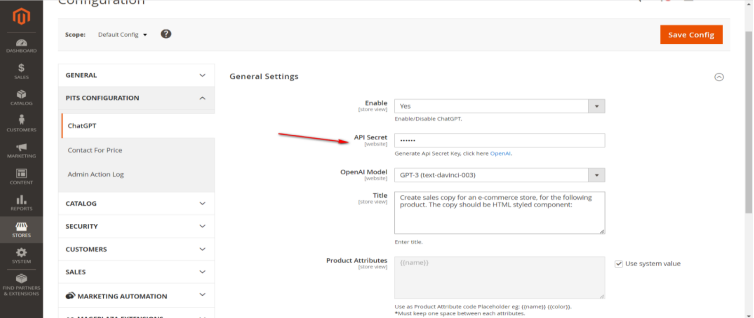
Stores->Configuration->Pits Configuration->ChatGPT
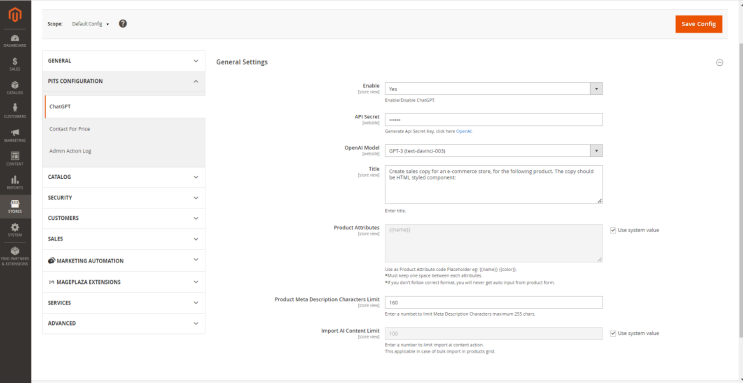
- Enable: Enable/Disable extension.
- API URL: The URL which generates AI content.
- API Secret: Enter the API Secret key from the Open AI account.
- OpenAi Model: The ChatGPT model to generate AI content
- Title: You can instruct ChatGPTusing title, how you want the response type.
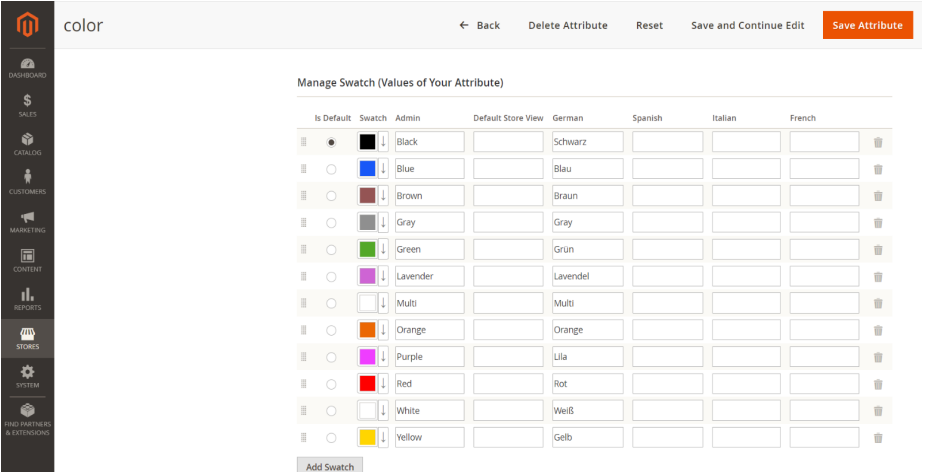
- Product Attributes: By default, content generation is based on this. If you add multiple attributes, you must keep one space between them. e.g.:{{name}} {{color}}. Attribute label and value is displaying based store view language.
If you don’t follow the correct format, you will never get auto input from product form.
- Product Meta Description Character Limit: The character limit to generate AI content for product meta description.
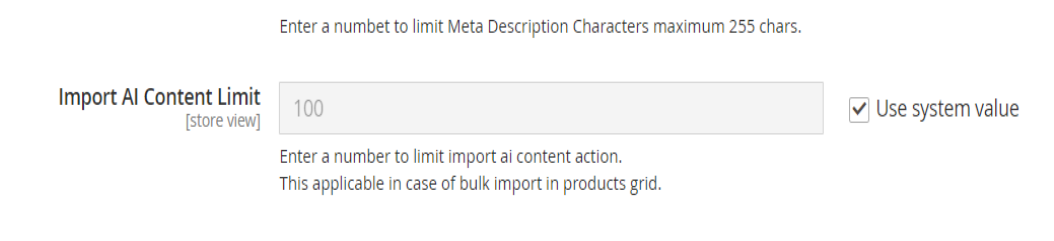
- Import AI Content Limit: Enter the limit for bulk update in the product grid.
Please enter an integer below 100 otherwise it will affect performance and also, you need more time to generate AI content.
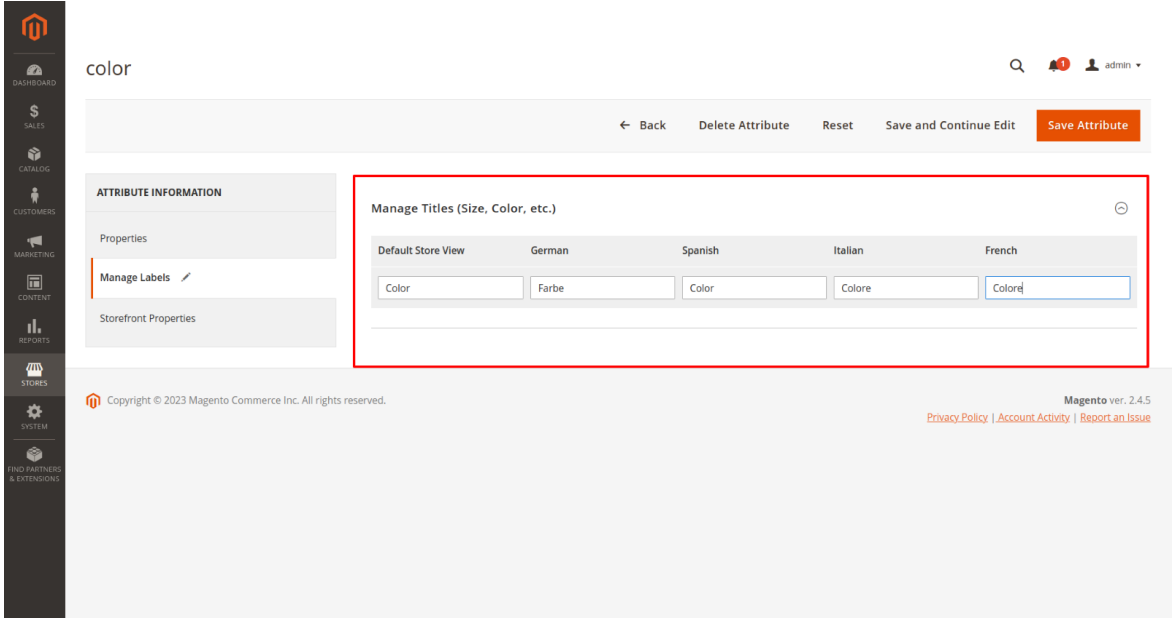
4. How to get Product Attribute code {{attribute_code}}
You can get product attribute code from Backend.
Stores -> Attributes - > Product
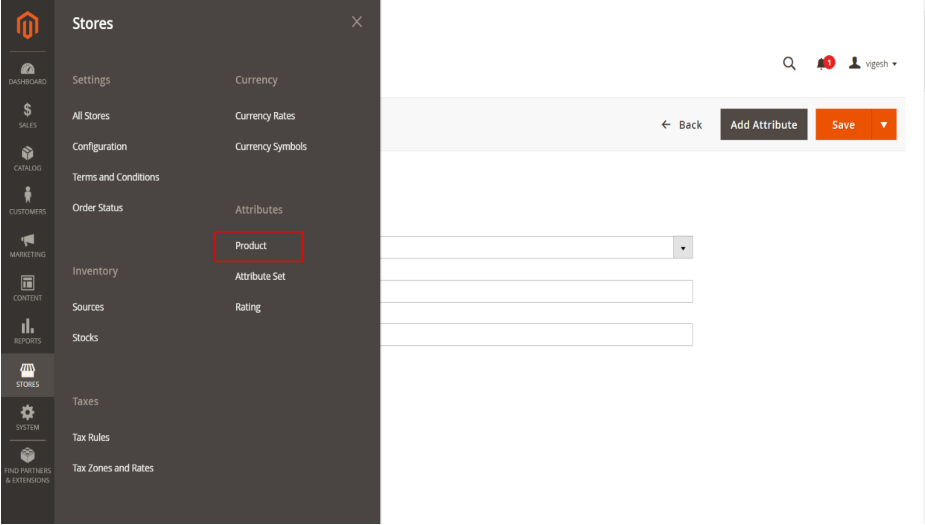
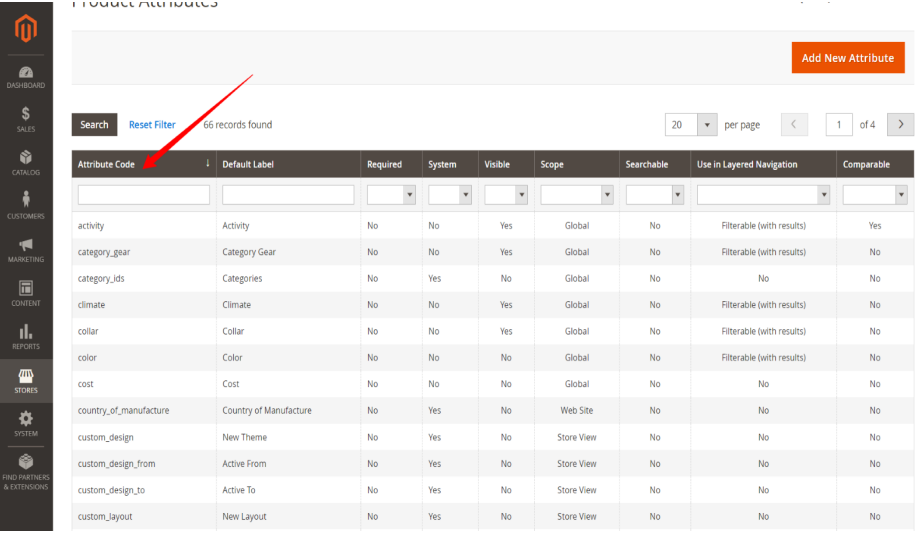
Copy the attribute code you want and paste it to the product attribute field in the chatGpt configuration. Please use placeholder format {{attribute_code}} eg: {{name}} {{color}}
You can add product attribute store wise
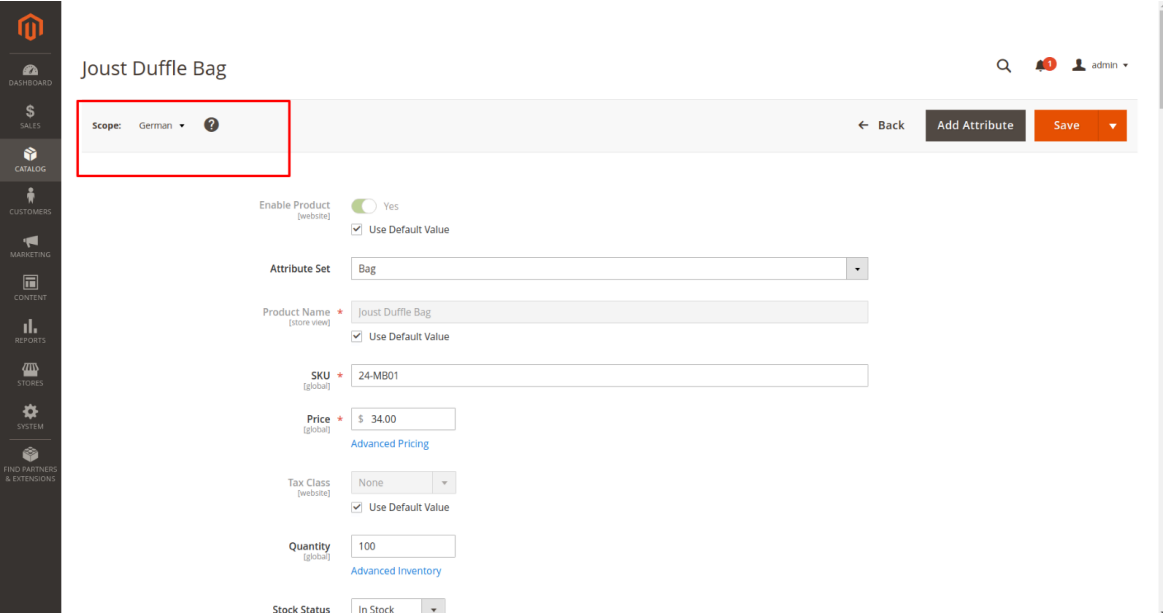
5. Work Flow
Go to Catalog -> Product -> Add Product/Edit Product
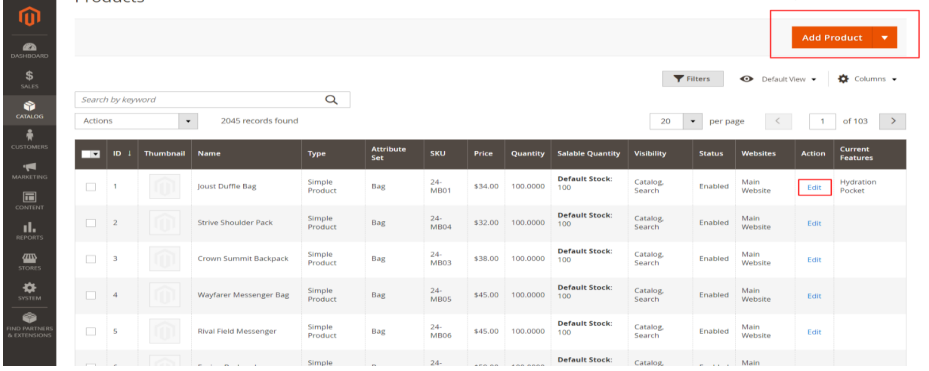
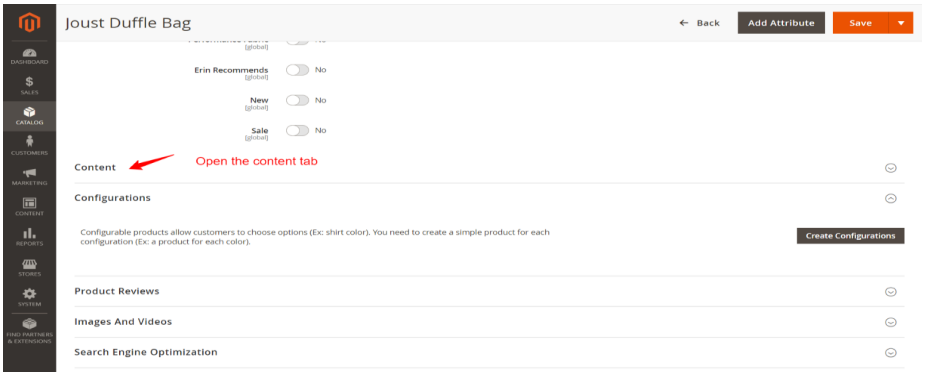
Open content tab in the product form
Click on Generate Content with ChatGPT button to generate content
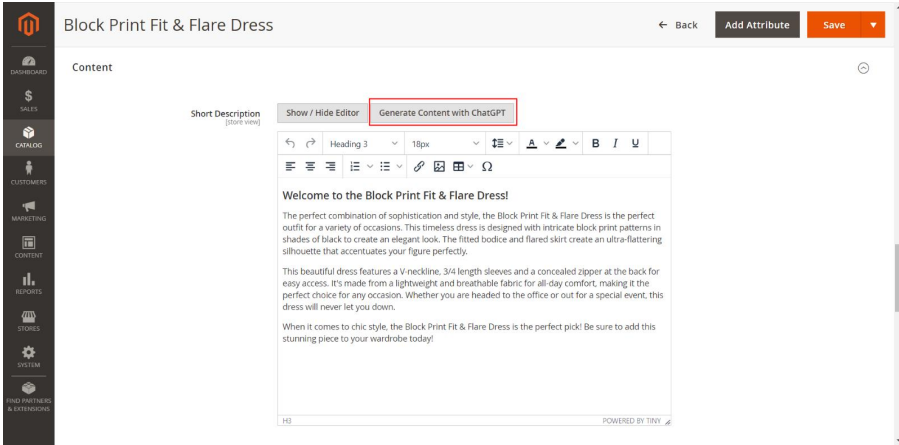
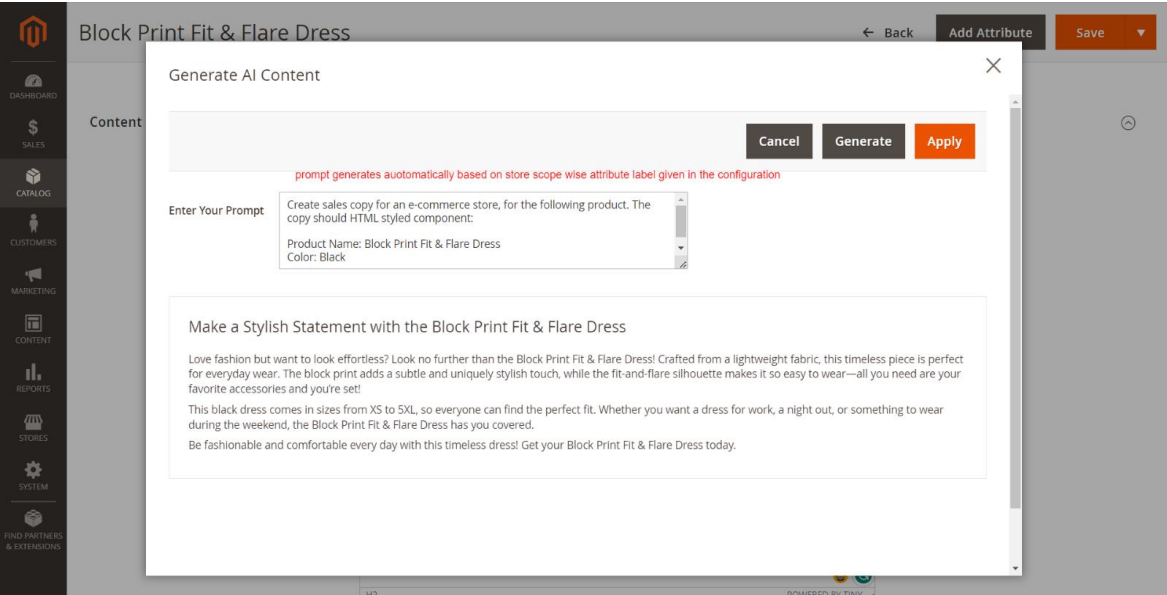
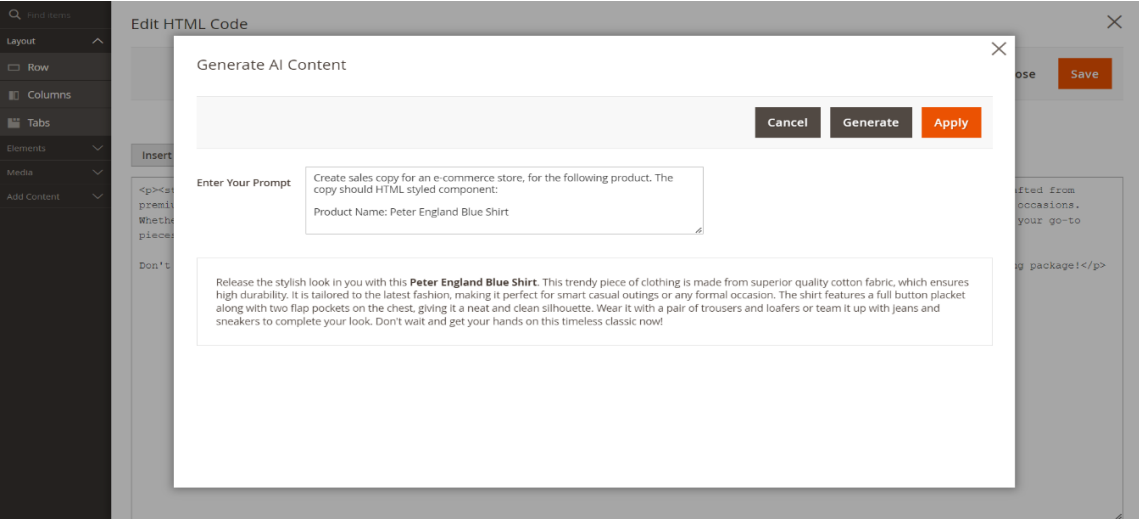
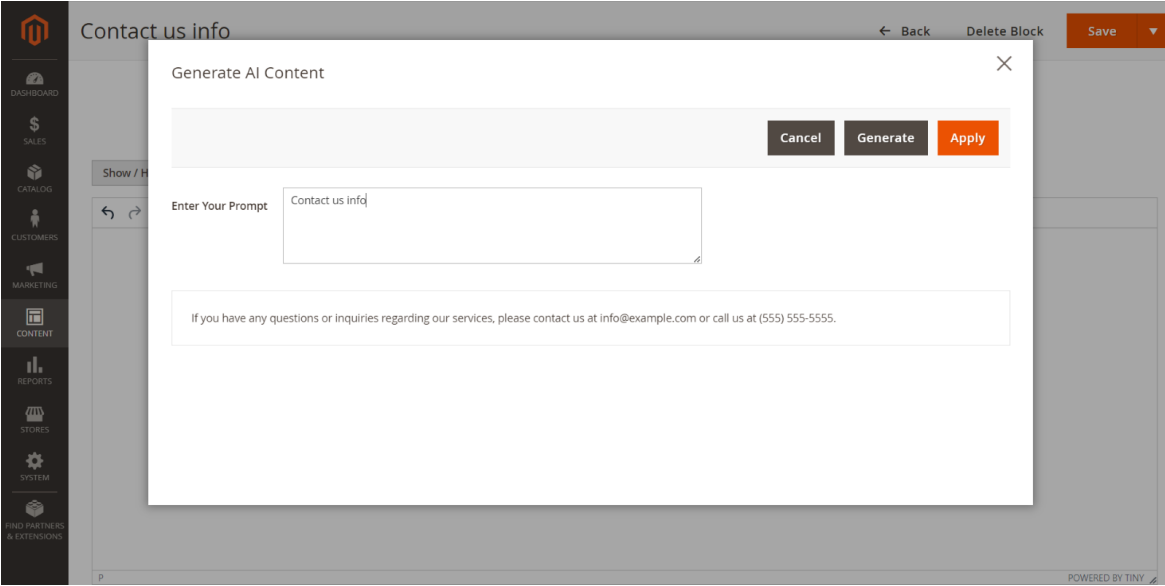
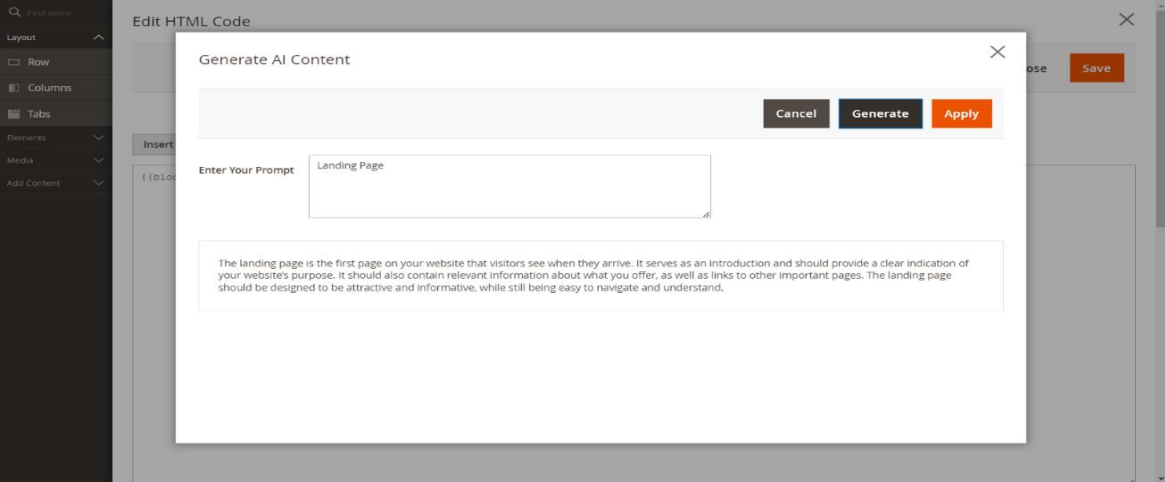
The popup will display when clicking on the Generate Content with ChatGPT button and content will generate automatically based on your product name by default. You can change this from backend configuration to show any attribute value when the popup is loaded.
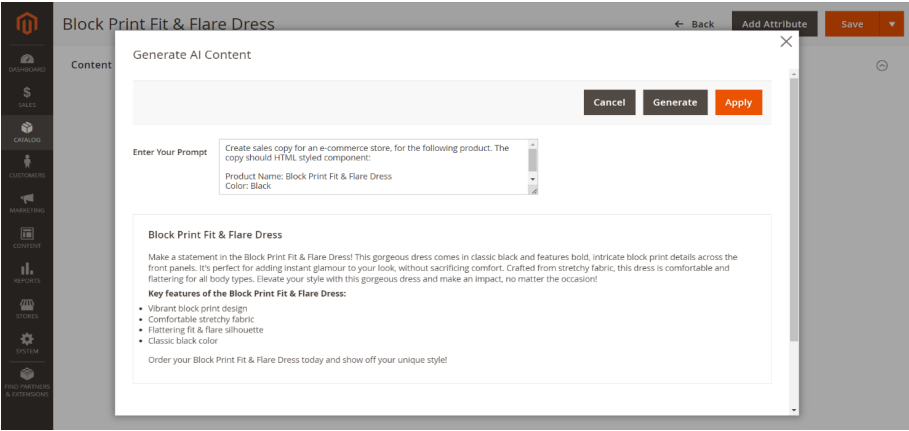
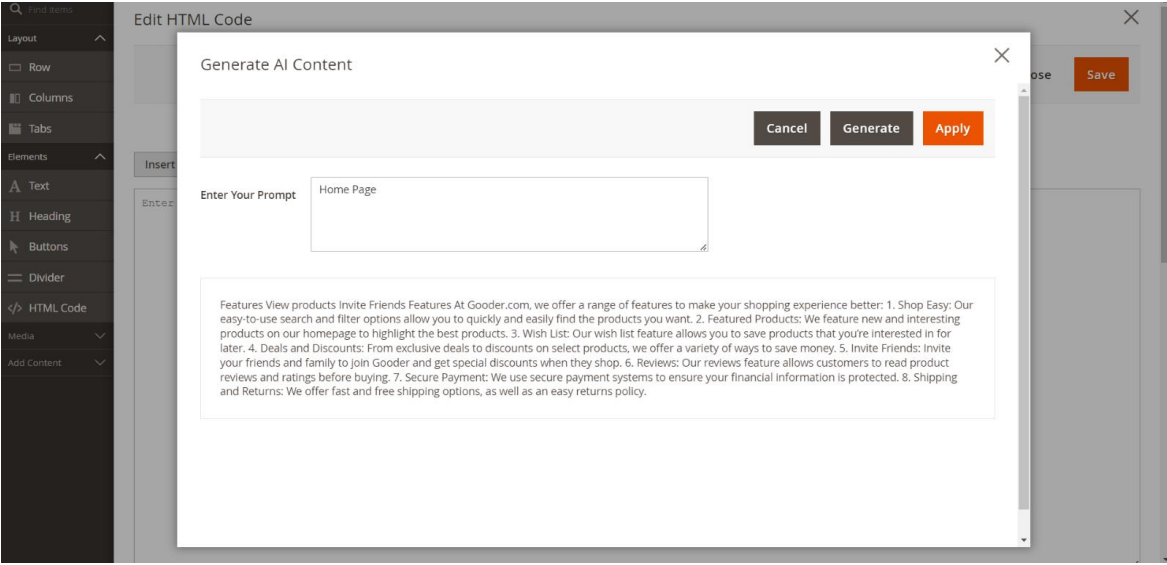
If you wish to change the prompt, you can change the prompt text and generate with “Generate” button in the pop-up
The prompt will be generated automatically based on store language.
The attribute labels and values given based on the store will be taken when store scope is switched in the backend.
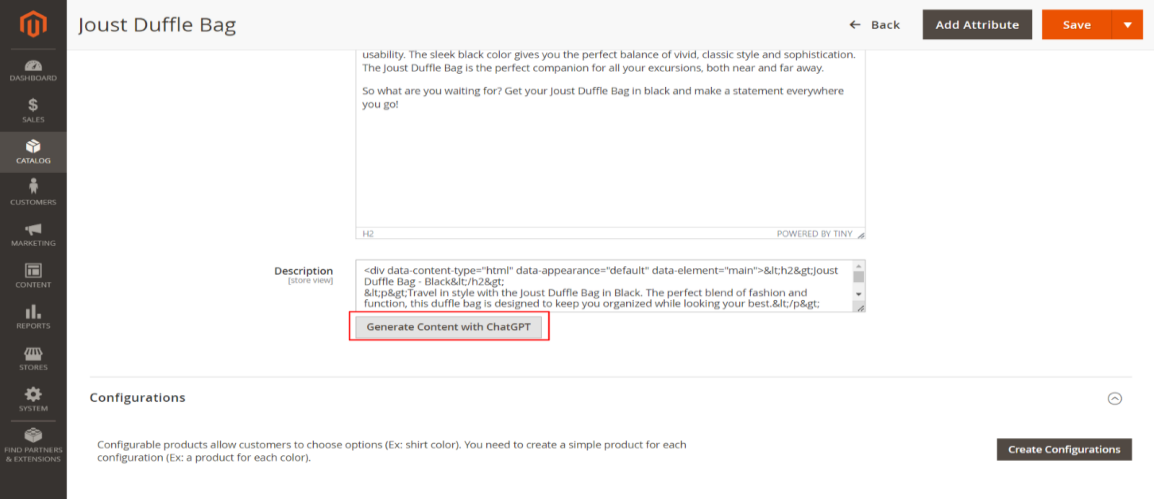
If you are using the description/short-description attribute as “Page Builder” input type, click on “Edit with Page builder button”
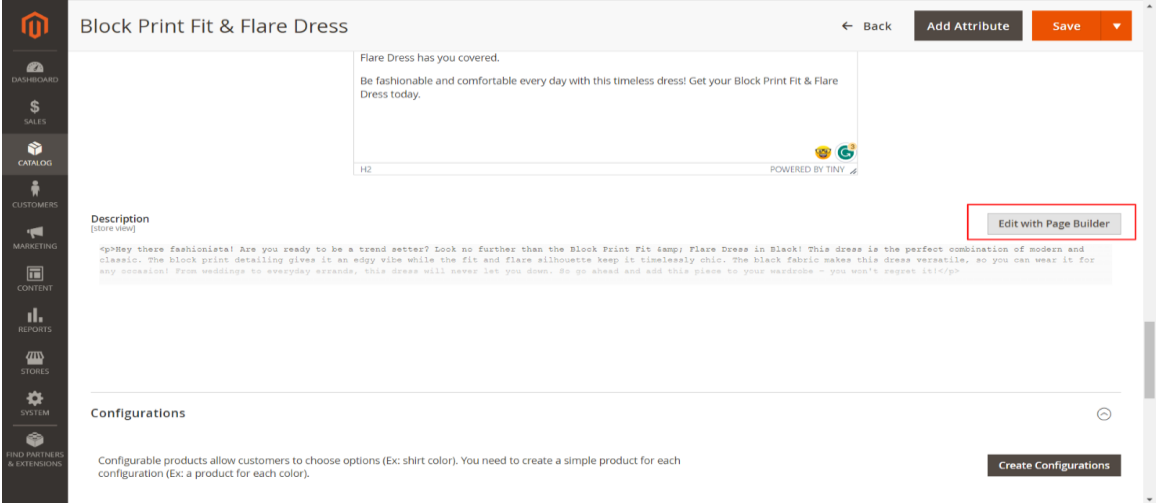
Click on the Generate Content with ChatGPT button shown in the above screenshot
The popup will display when clicking on the Generate Content with ChatGPT button.
Here, auto generated prompt is based on your selected product attributes in the configuration. If you wish to change the prompt you can change it and regenerate AI content by, click on Generate button.
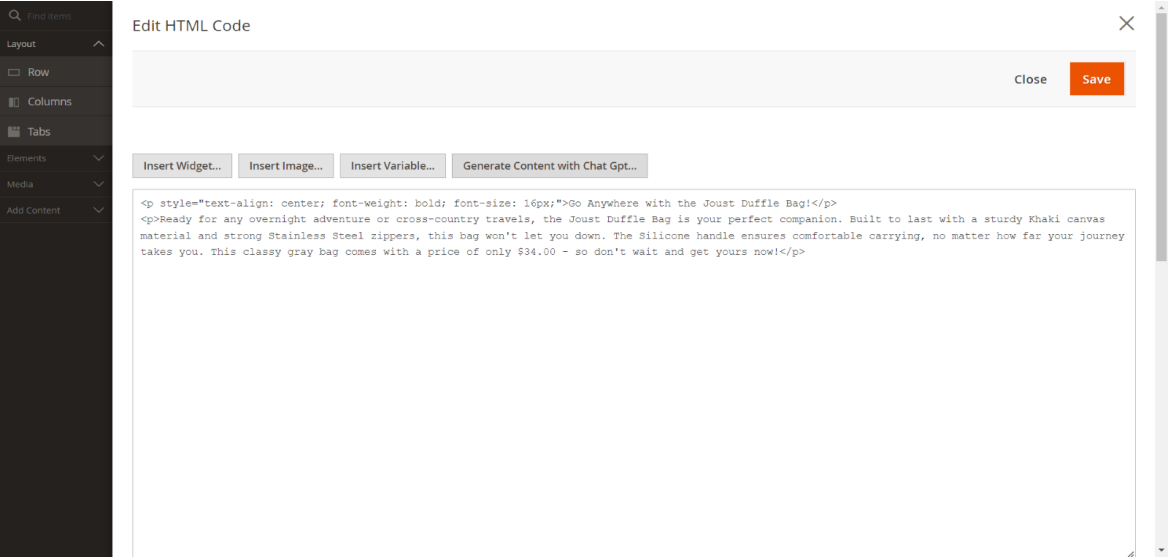
If you are using description/short-description attribute as” Text area" input type, the option to generate AI content button will be as in the below image.
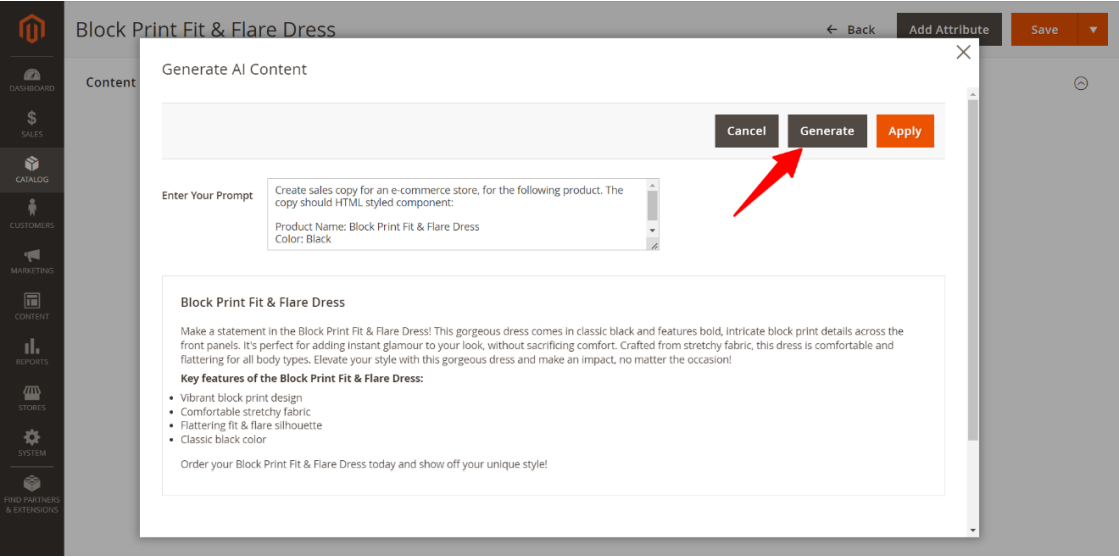
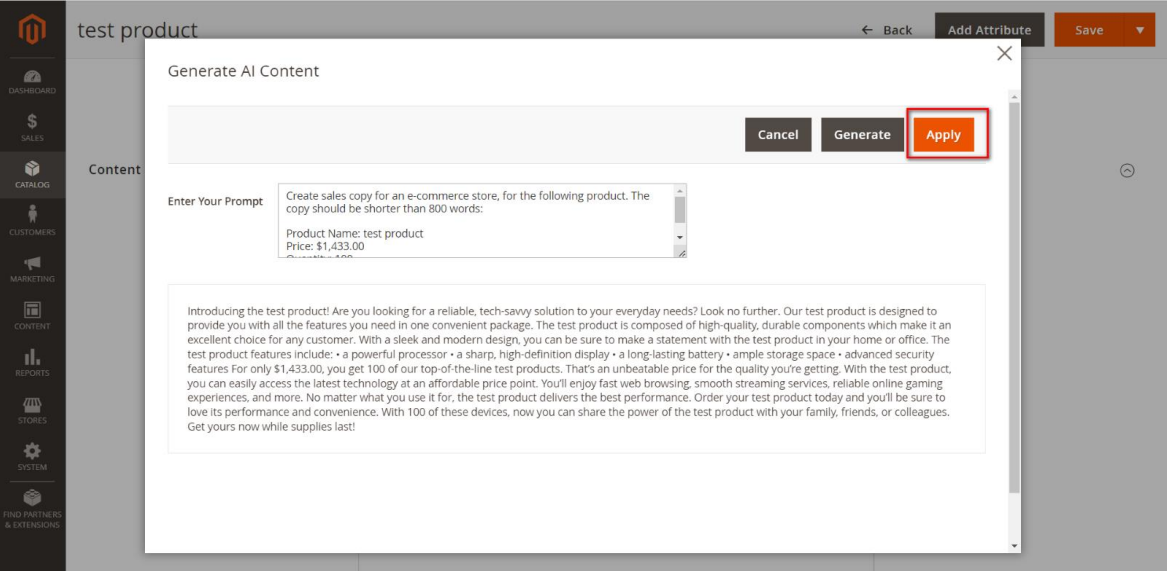
Finally, you can set AI content to product description by clicking on Apply button in the popup.
6. Product Meta Description
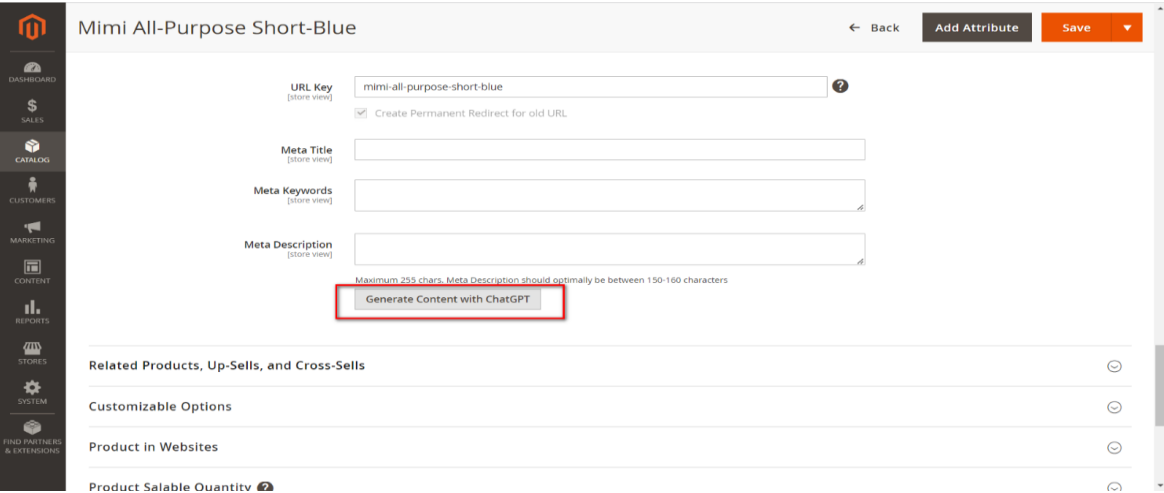
Click the button “Generate Content with ChatGPT” to generate content for product meta description
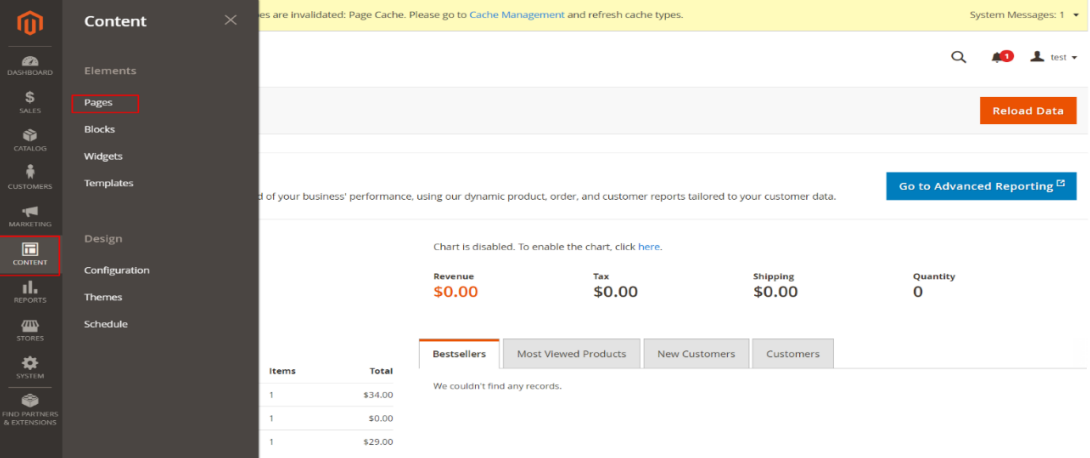
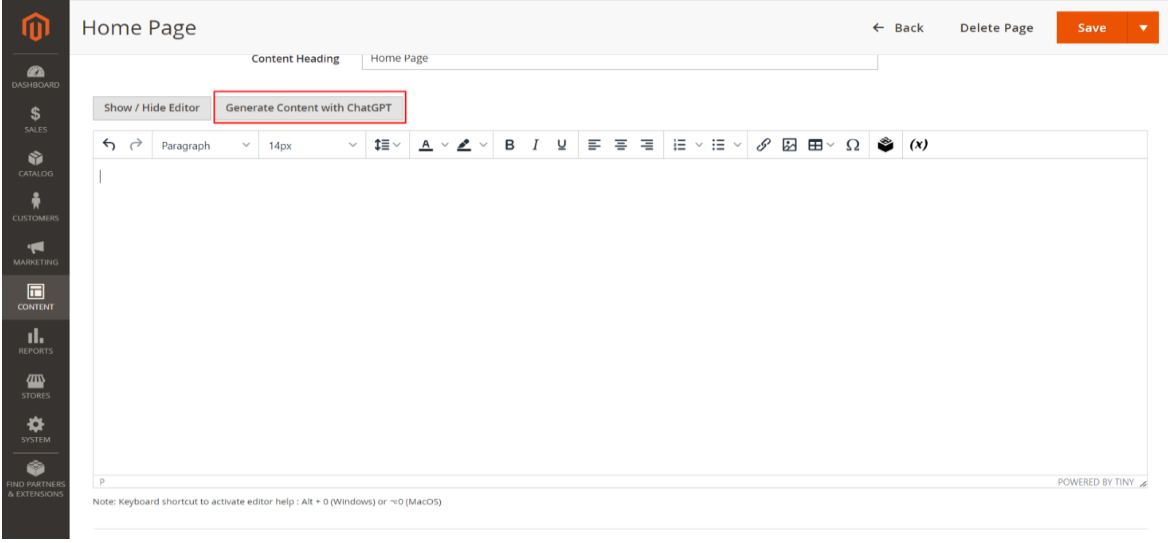
7. Content-> Elements->Pages
Navigate to backend Content-> Elements->Pages section.
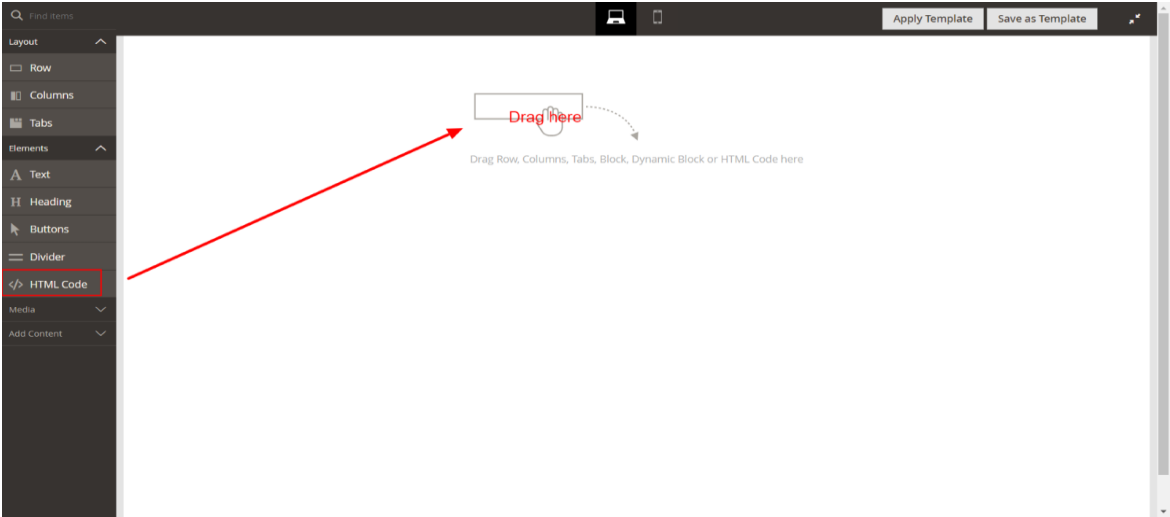
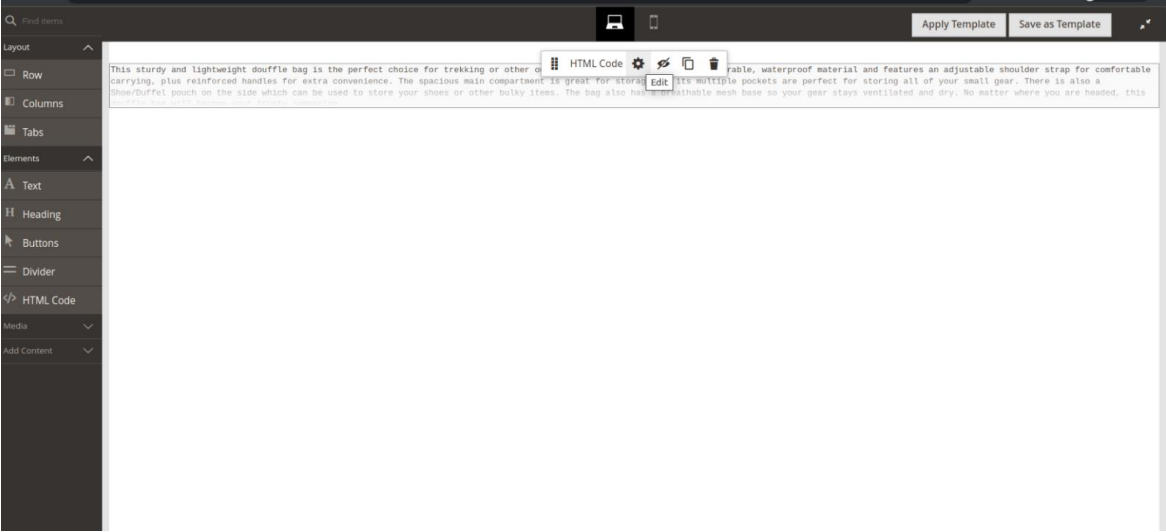
Select a CMS Page and got to Content, select ‘Edit with Page Builder’ and add/edit the HTML code in the editor

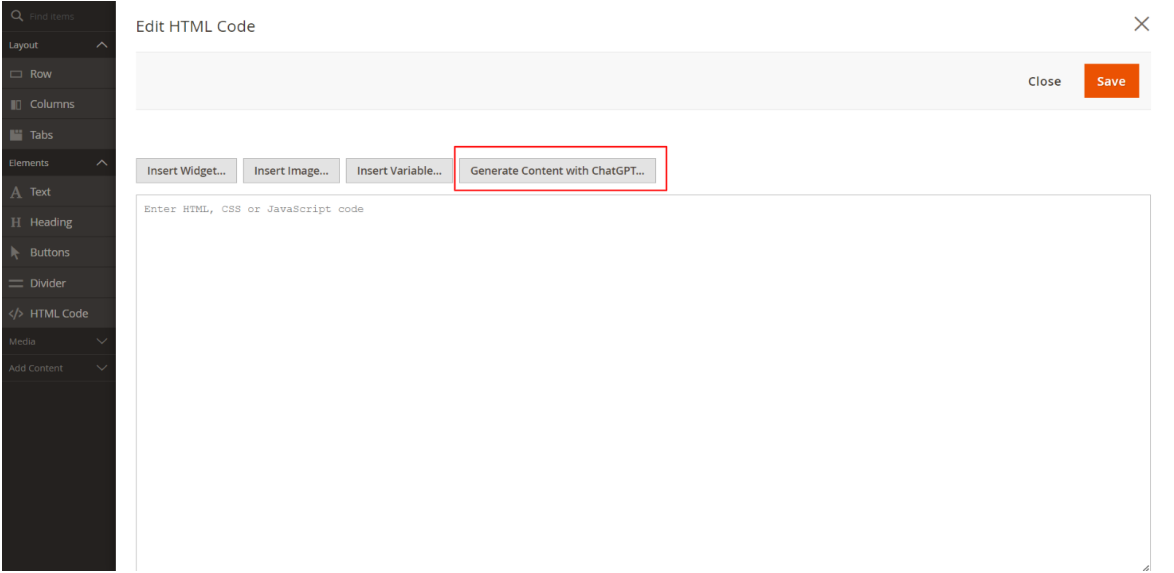
If you are disabling page builder from STORES->Configuration->Content Management->Advanced Content Tools, the button to generate AI content will be as in the below image.

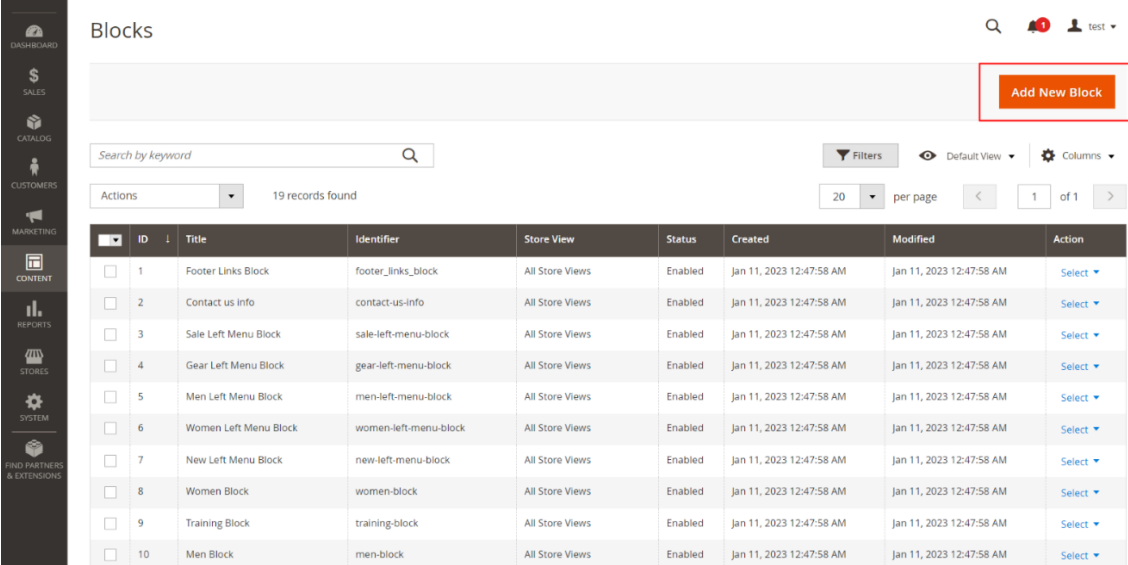
8. Content-> Elements-> Blocks
Navigate to backend Content-> Elements-> Blocks section.
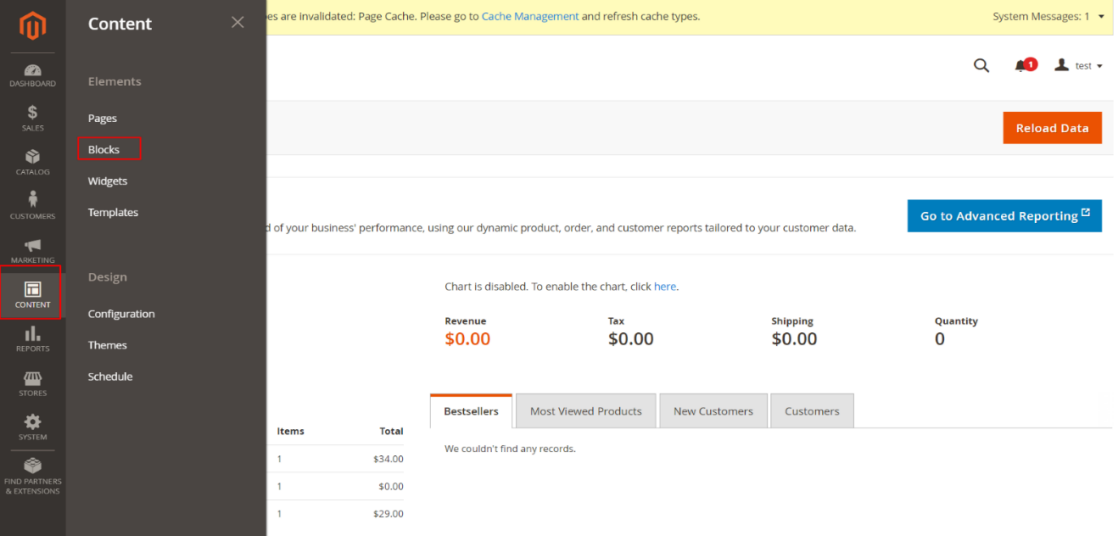
Select a CMS Page and got to Content, select ‘Edit with Page Builder’ and add/edit the HTML code in the editor.

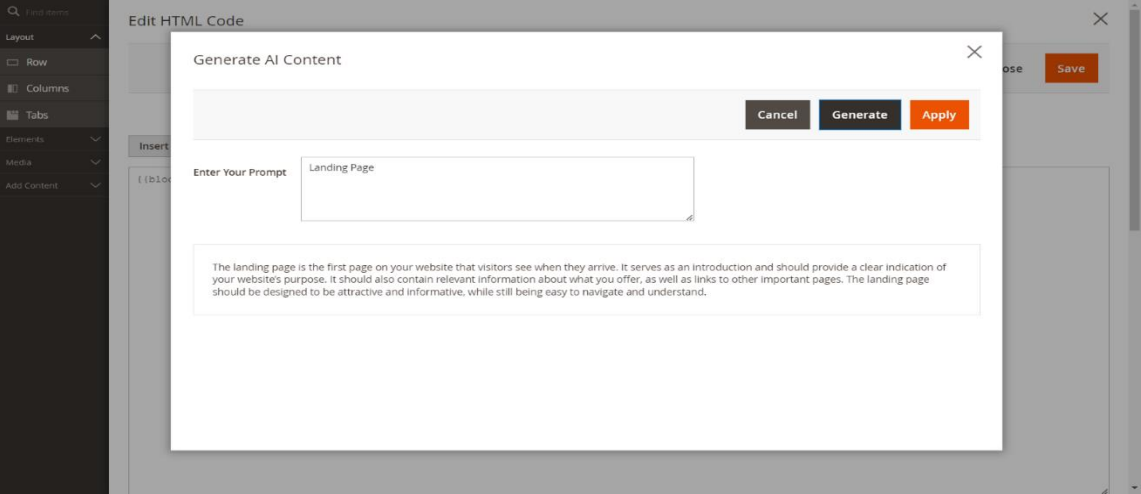
If you are disabling page builder from STORES->Configuration->Content Management->Advanced Content Tools, the button to generate AI content will be as in the below image.
9. Catalog-> Catagories
Navigate to backend Catalog-> Catagories section

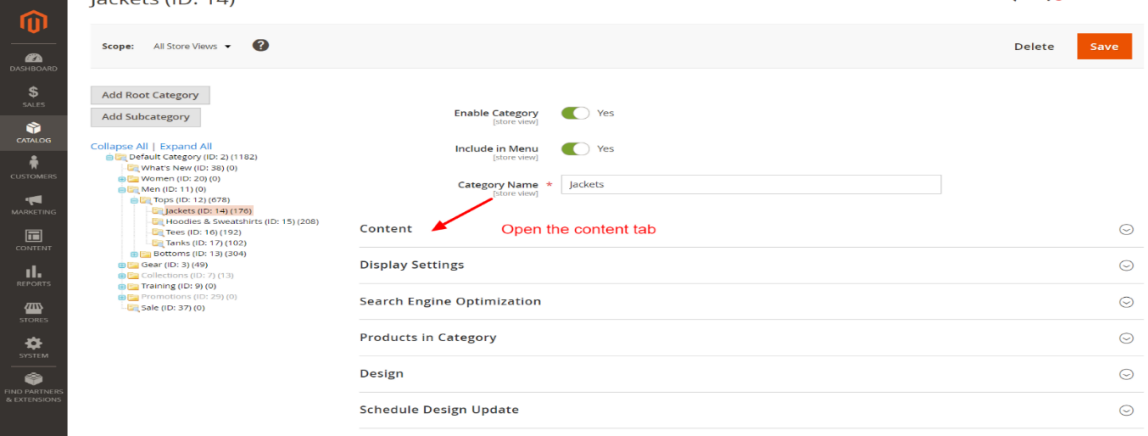
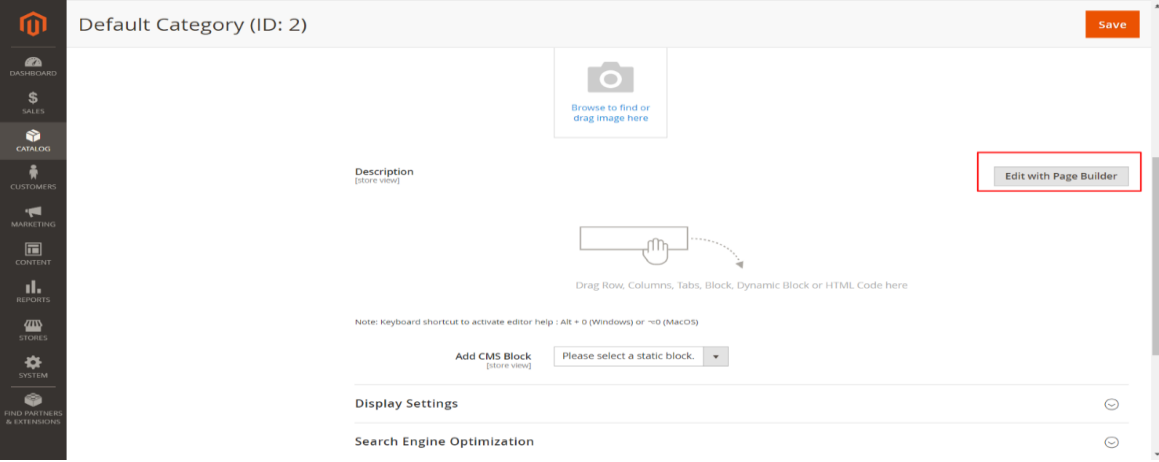
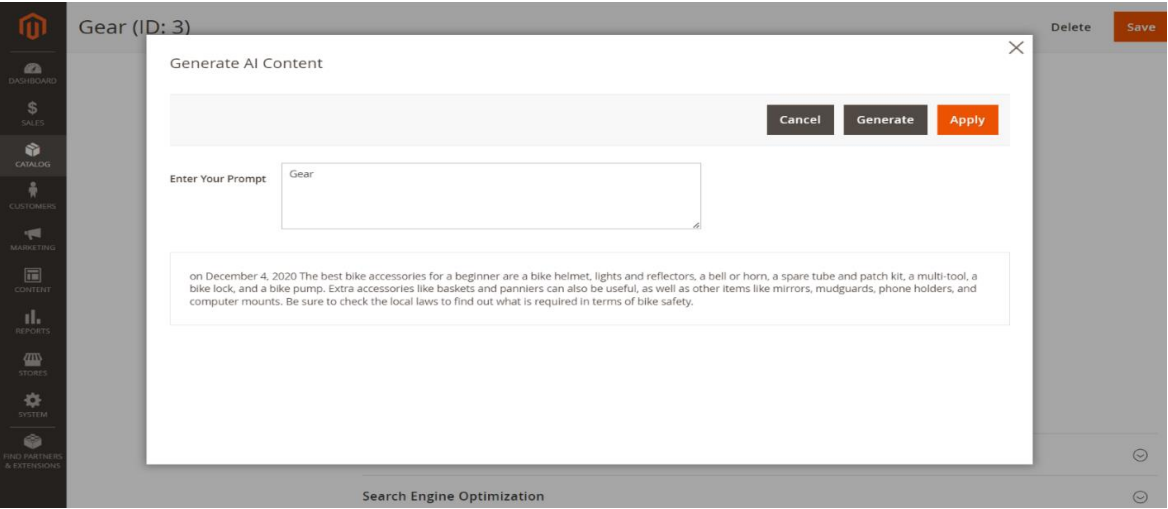
Then click on the Edit with Page Builder in the content tab shows as in the above screen shot.
Click on Apply button in the above screen shot to set AI content.
If you are disabling page builder from STORES->Configuration->Content Management->Advanced Content Tools, the button to generate AI content will be as in the below image.
If we are making Stores->Configuration->General->Content Management->WYSIWYG Options-> Enable WYSIWYG Editor to ‘Disabled Completely’ , the ‘Generate Content with ChatGPT’ button will not be there for CMS Pages, Blocks and Categories.
The frontend style will depend on the layout selected.
10. Import AI Content
You can also mass-upload content at the same time. Go through, Catalog ->Product ->Actions ->Import AI Content
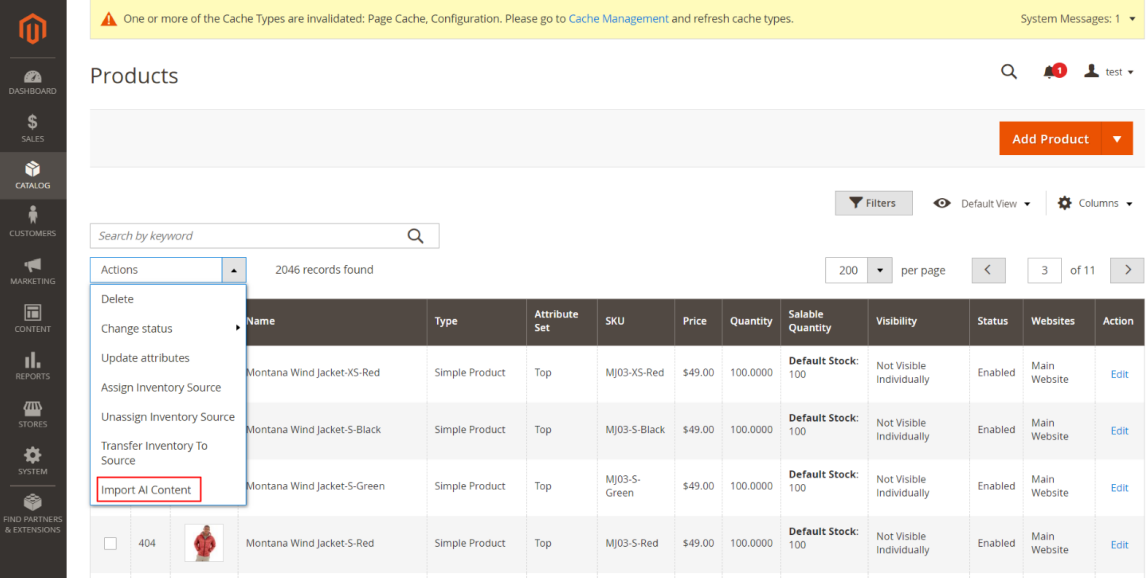
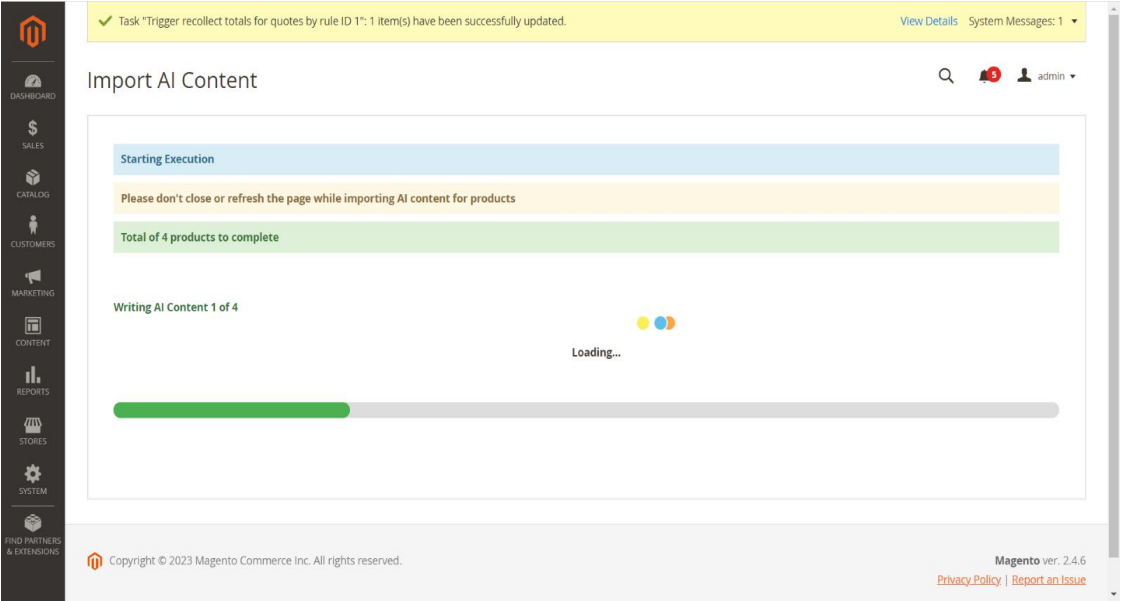
A popup will display with message when click on Import AI Content. When you click on the OK button it starts the execution of the mass upload.
This process will take more time because of the API call. So, we recommend you choose a minimum number of products at a time.
By default, the product limit is 100. You can change it from the ChatGPT configuration.
You can see the progress of Import AI Content in the below image
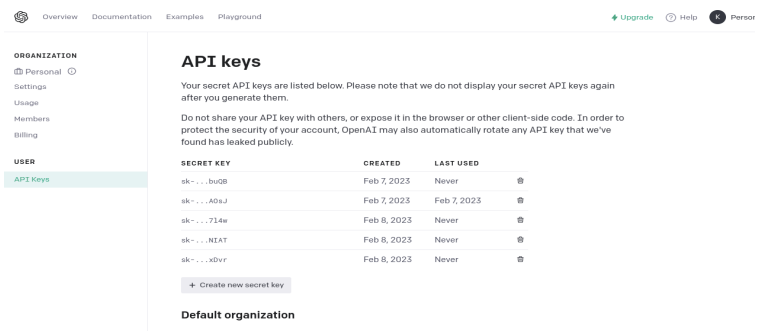
11. API Key Generation
The user must first create an OpenAI account and login OpenAI dashoboard https://platform.openai.com/signup
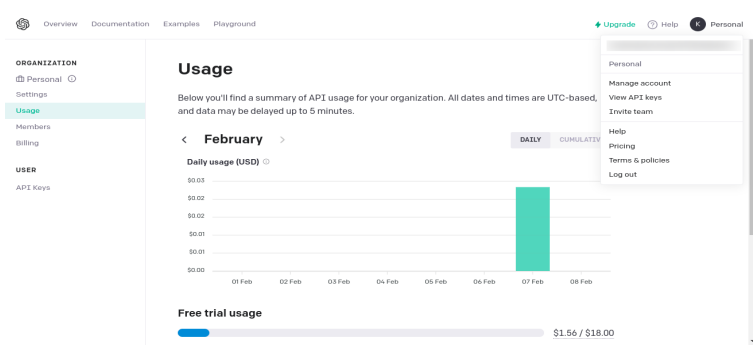
Then user need to click on Personal in the top-right corner and popup will appear and click on View API Keys option
Click on Create New Secret Key will be visible as shown in the below screen shot
You can copy the API key from here with the help of copy button.
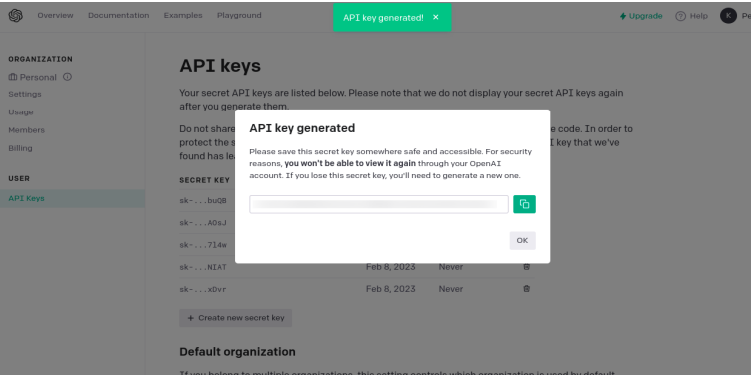
Paste the API key in the corresponding field.
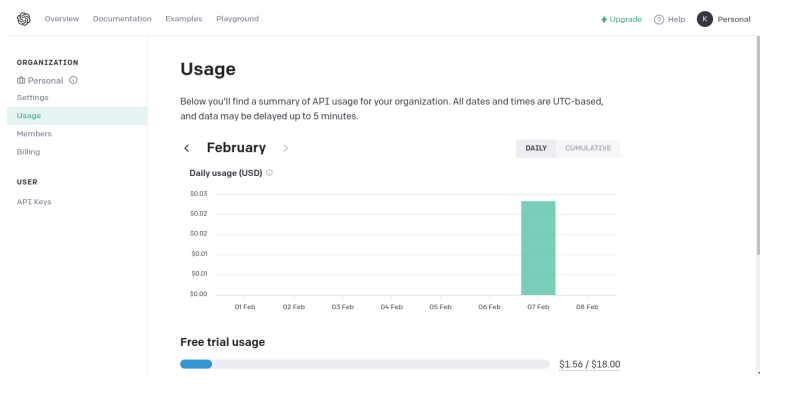
This is an Integration with a Third Party Service. Other charges and fees may be required to use this extension on your Store. You can view the pricing for Open AI GPT models here at https://openai.com/pricing
In OpenAI, tokens serve as the fundamental components of text that language models work with. Tokens can be thought of as pieces of words. These tokens can be either full words or smaller units like sub-words, each assigned a distinct numerical representation. Language models rely on these numerical representations to process and generate text. Essentially, when you feed text into a language model, it dissects it into tokens, examines them, and utilizes this information to generate a response.
12. Technical Requirements / Compatible with
Magento Community 2.4.x
13. Installation
To install the module, follow the steps below.
Step 1: Download the module/extension and unzip it.
Step 2: Access your web server directories and upload the content of the folder into
app/code/Pits/ChatGptPro/ directory.
Step 3: Run the following commands to complete the installation.
- Enable the module - php bin/magento module:enable
- Update of the database - php bin/magento setup:upgrade
- Generate and pre-compile classes - php bin/magento setup:di:compile
- Deploy static files - php bin/magento setup:static-content:deploy
14. Supported Languages
Backend texts have German, French, Spanish and Italian translations. ChatGPT is a multilingual chatbot that supports multiple languages. Currently, it supports more than 50 languages, including English, German, Spanish, French, Italian, Dutch, Portuguese, Russian, Chinese, Japanese, Korean, and many more.
All languages supported by ChatGPT GPT 3 OR 3.5 models will be supported by this extension as well. Make sure the input is in the required language and you will get the output in the specified language.
15. Change Log / Release Notes
Version 1.0.3 April 28, 2025
- Added models GPT-4, GPT-4o Mini, and GPT-4.1.
- Compatible with Magento Open Source (CE): 2.4.8.
Version 1.0.2 March 06, 2024
- ChatGPT model changed to “gpt-3.5-turbo-instruct".
- Compatible with Open Source (CE): 2.4.6-p4.
Version: 1.0.1: March 28, 2023
- Compatible with Open Source (CE): 2.4.6
- Import AI content
- Product meta description
Version: 1.0.0: Feb 23, 2023
- Initial release
Support
If you have questions, use our contact form in webshopextension.com