Kategorien
Magento
WordPress
SAP Commerce
Odoo
Shopify
Typo3
Shopware
nopCommerce


ABOUT SAFERPAY
Saferpay is the easy, flexible, secure and comprehensive e-payment solution from Worldline for easier and more secure payment in your online shop.
Worldline [Euronext: WLN] is the European leader in the payments and transactional services industry and #4 player worldwide. With its global reach and its commitment to innovation, Worldline is the technology partner of choice for merchants, banks and thirdparty acquirers as well as public transport operators, government agencies and industrial companies in all sectors. Powered by over 20,000 employees in more than 50 countries, Worldline provides its clients with sustainable, trusted and secure solutions across the payment value chain, fostering their business growth wherever they are
Worldline since the end of 2018 is Europe's largest technology partner for banks and merchants. The tailor-made solutions from Worldline include a broad portfolio of payment terminals and the acceptance and processing of national and international payments with credit, debit and prepaid cards as well as the smartphone.
ABOUT SHOPWARE EXTENSION
The extension adds 24 Saferpay payment methods to Shopware administration on install. The payment methods included are:
- ALIPAY
- AMERICAN EXPRESS
- APPLE PAY
- BANCONTACT
- CREDIT/DEBIT CARD
- DINERS CLUB/DISCOVER
- DIRECT DEBIT
- EPS
- PRZELEWY24
- GOOGLE PAY
- IDEAL
- JCB
- KLARNA
- MAESTRO
- MASTERCARD
- MYONE
- PAYDIREKT
- PAYPAL
- POST FINANCE CARD
- POST FINANCE E FINANCE
- TWINT
- UNIONPAY
- VISA
- WL CRYPTO PAYMENTS
Shopware admin may choose the required payment methods from these, activate them and add in sales channel to show them in storefront. Online payments through these payment methods would be handled by Saferpay API.
REQUIREMENTS
To install and configure Saferpay extension in Shopware, the following is required:
- Shopware 6.5.7.3
- License for Saferpay
- A valid Saferpay account with at least one active Saferpay terminal through which payments can be carried out.
- API credentials like Terminal ID, Customer ID, JSON Username and JSON Password for the Saferpay Live/Test environment.
- Valid acceptance agreement for payment methods.
INSTALLATION
To install the extension, follow the steps below:
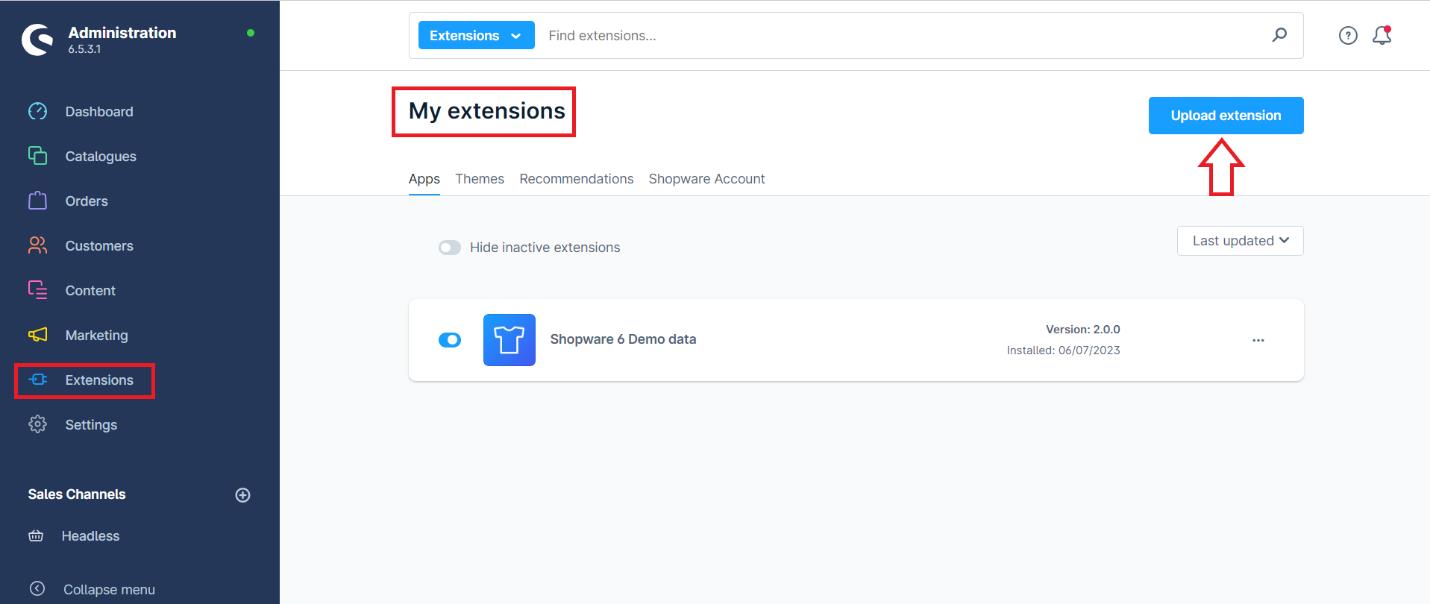
- Go to Shopware administration, in the left panel, click on ‘Extensions’ and then click ‘My extensions’. In the ‘My extensions’ page, click on ‘Upload extension’ button.
- Select the extension’s zip file from computer location where it was downloaded. The extension will then get uploaded into Shopware instance with a success notification as shown below and will be listed in the ‘Apps’ tab of ‘My extensions’.
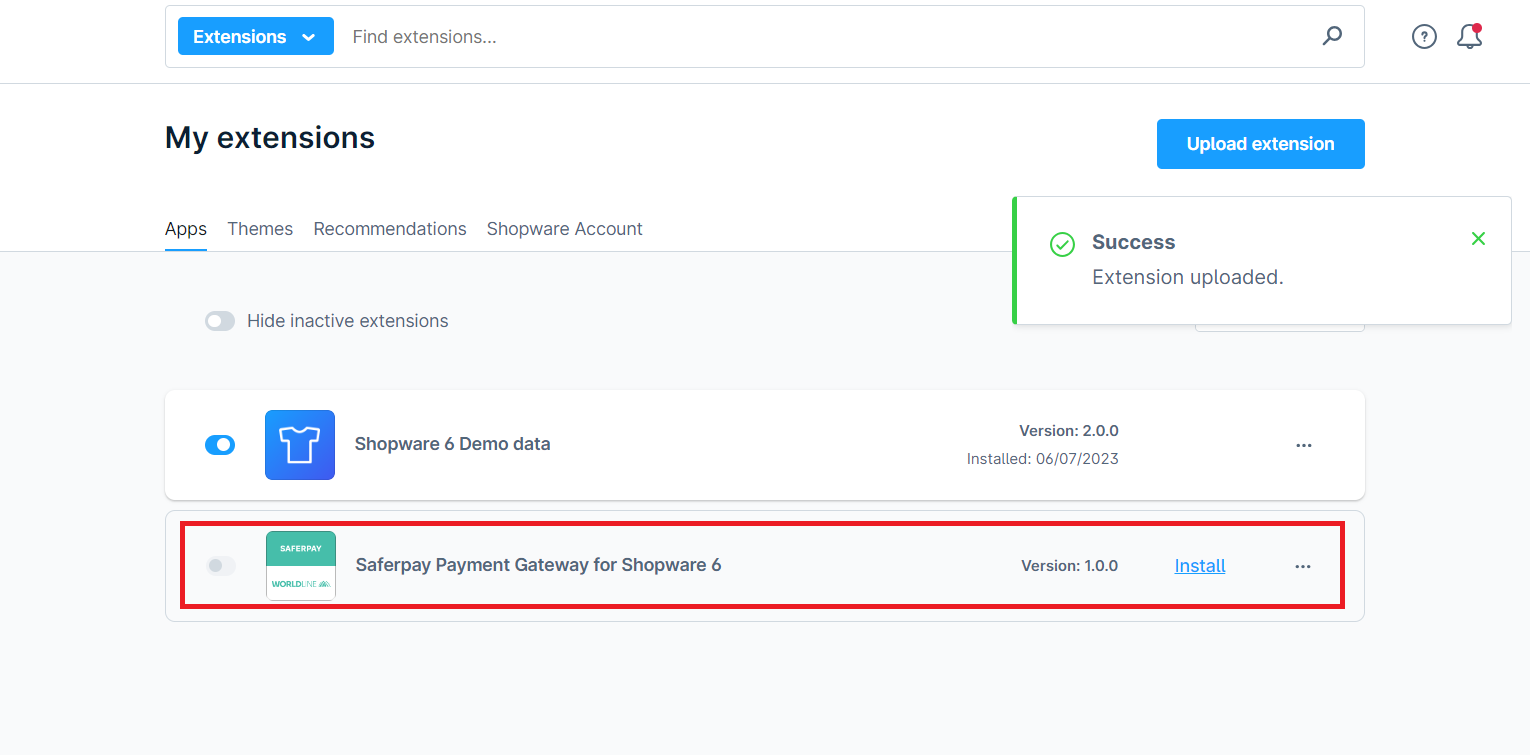
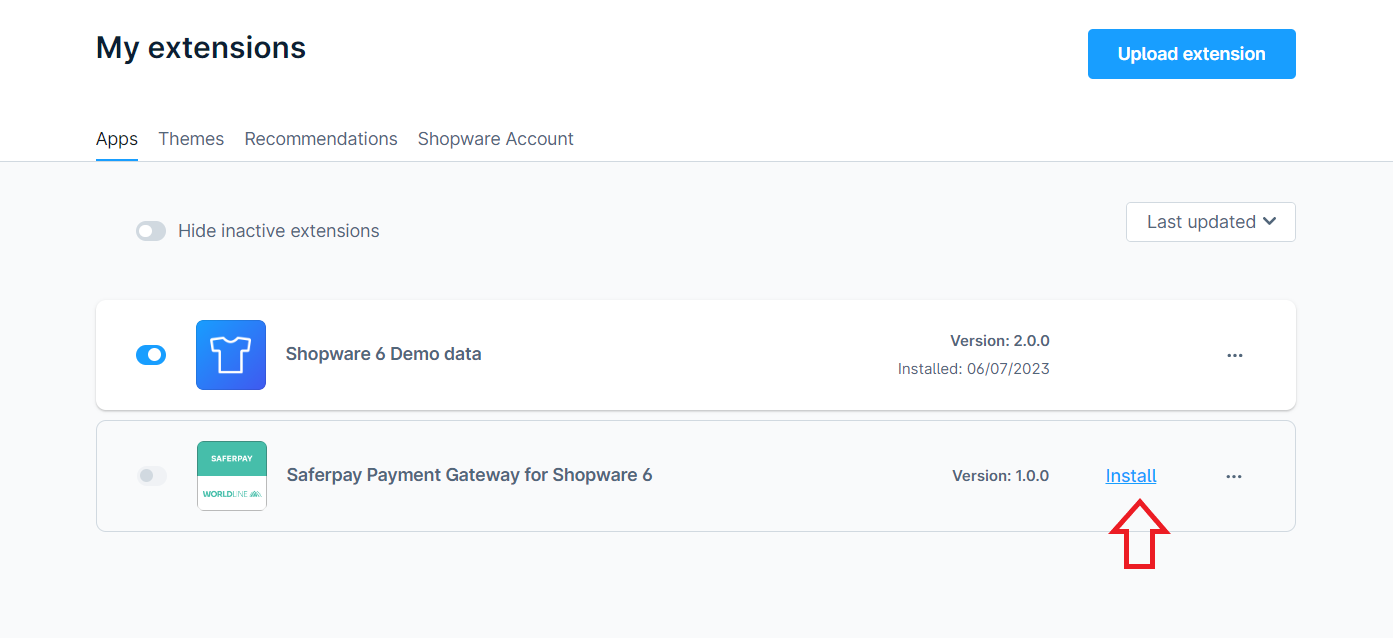
- Click on ‘Install’ link against the extension, Saferpay Payment Gateway for Shopware 6
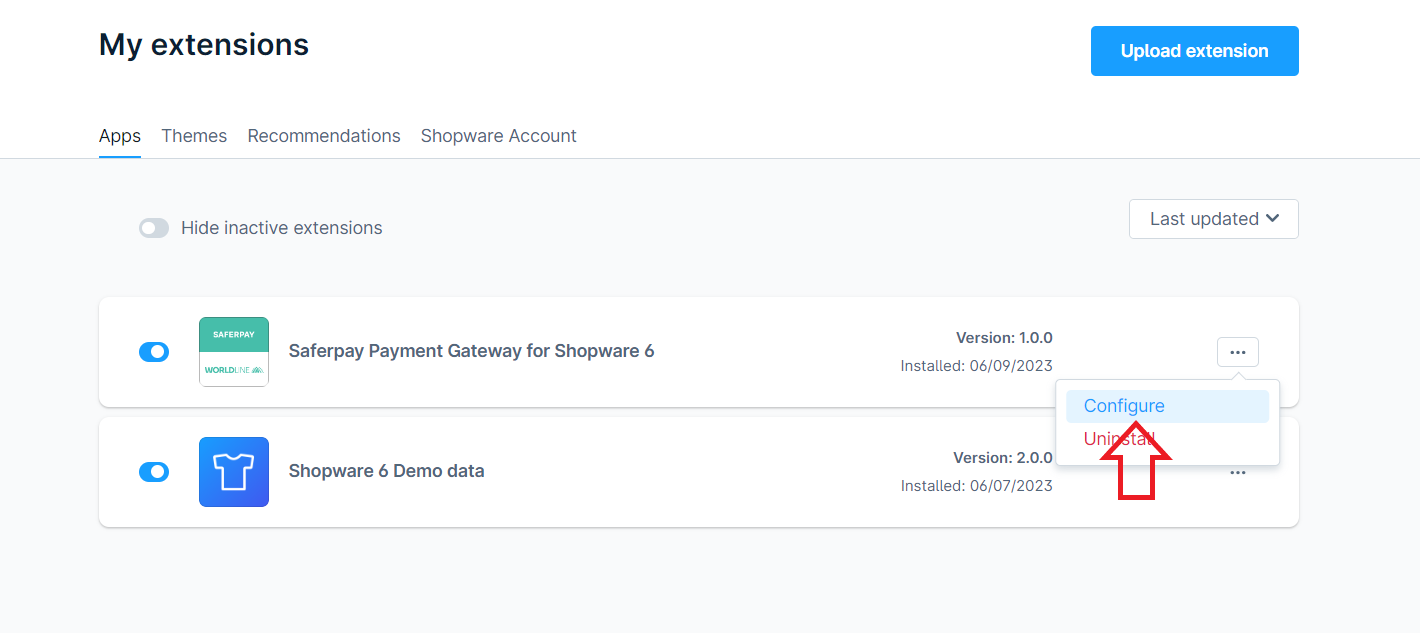
- After the extension is installed, it is in inactive state at first. Activate by clicking the toggle button given near the extension.

CONFIGURATION
Before using the payment methods in storefront, configure the mode, Saferpay account api details in the extension. For that, click on ‘Configure’ in the options of the extension.
The general settings which are applicable for all payment methods are managed in configure page of the extension. Payment method specific configurations can be made in Settings > Shop > Payment Methods.
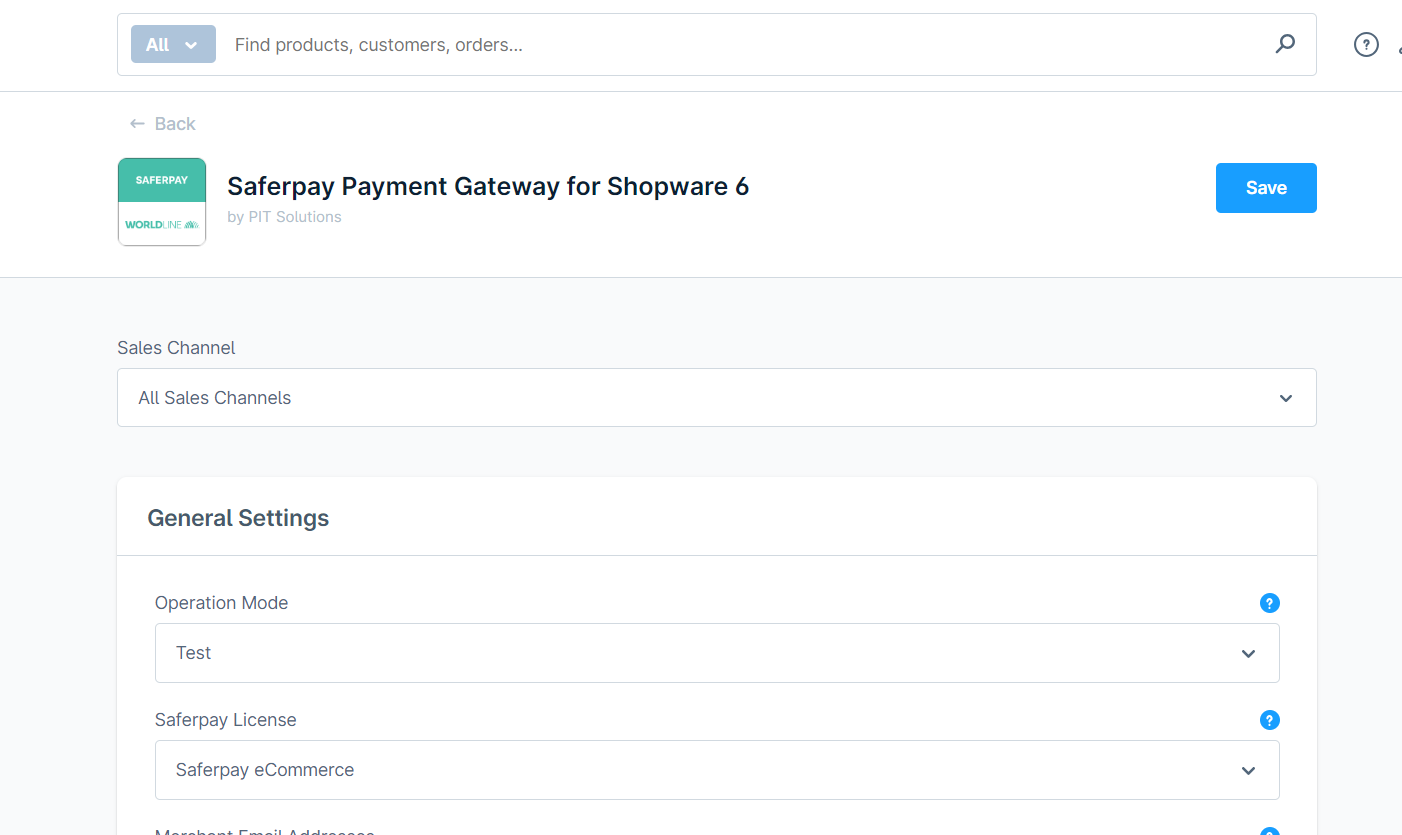
EXTENSION CONFIGURATION
- Sales Channel: In the configuration page of the extension, select the sales channel for which the configuration should be applied. If ‘All Sales Channels’ is selected the configuration will be saved for all sales channels. If a particular sales channel needs to be configured differently the sales channel can be selected and then the configurations done will be saved for only that sales channel.
- Operation Mode: Under general settings, select the operation mode as either ‘Test’ or ‘Live’.
- Saferpay License: Here you can save the license as Saferpay eCommerce or Saferpay Business.
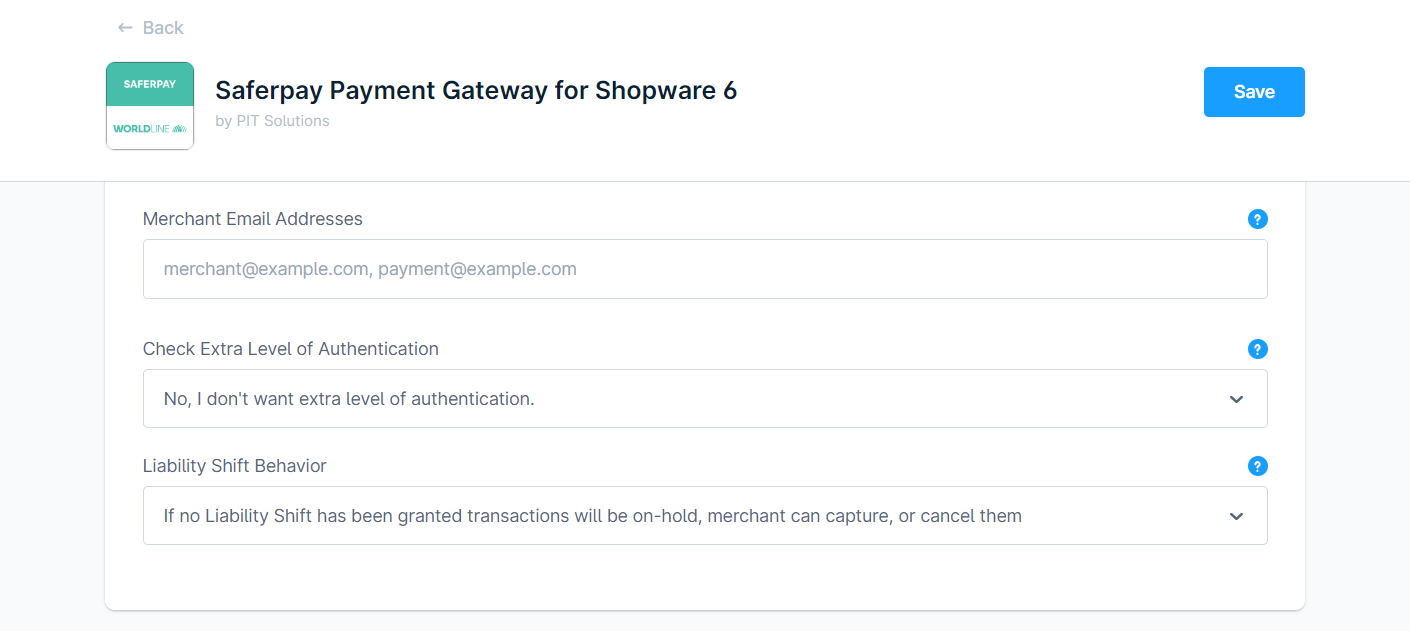
- Merchant Email Addresses: In this configuration, you can add email addresses comma separated. After a successful transaction the email addresses will receive an email with Saferpay transaction details.
- Check Extra Level of Authentication: Here you can select Yes or No if you want extra authentication feature enabled or not. If your shop handles high risk businesses like Jewellery, Electronics etc. it is recommended to set this configuration as ‘Yes’.
- Liability Shift Behavior: This configuration determines how to handle the transactions if a fraudulent card is used on the website. When we use this functionality, the liability shifts to the authorizing bank and the shop owner receives no claim for any chargeback. It has two options:
- Option A: “If no liability shift has been granted transaction will be on-hold, merchant can capture or cancel transaction”. Here order placed via fraudulent card will be unconfirmed and merchant can capture or cancel transaction accordingly.
- Option B: “If no liability shift has been granted transactions will be auto cancelled”. Here order placed via fraudulent card will be cancelled.

- Theme: Under Appearance, the configurations that determine the appearance of the payment page can be configured. Theme can be chosen to be ‘Default (lightweight responsive)’, ‘Six’ or ‘None’.
- Payment page config name: In Saferpay backoffice, under Settings > Payment Page Configuration, user can create custom styles to manage the look and feel of payment page. Once such a configuration is created in Saferpay backoffice, the same can be applied in the shop’s payment page by adding the name of the configuration in this configuration of the extension.
- Payment Page CSS URL (Widget authorization) : Enter a valid CSS URL which is included in the payment page. This file must be hosted on an SSL/TLS secured web server (the URL must start with https://) Example: https://merchanthost/merchant.css.
Refer https://saferpay.github.io/sndbx/CssiFrame.html for more details.
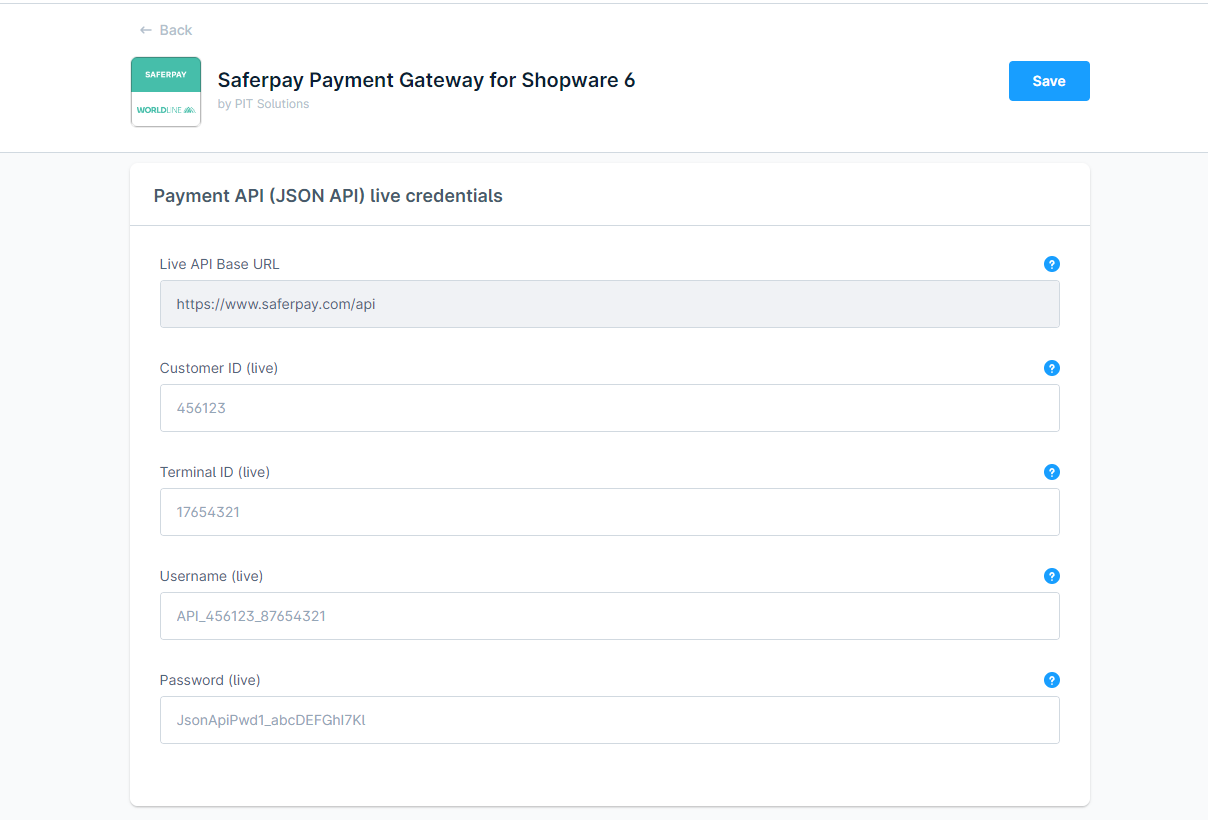
- Live API Base URL: The base url for sending api requests to Saferpay in live operation mode.
- Customer ID (live), Terminal ID (live), Username (live), Password (live) : In these fields enter the live credentials provided by Saferpay. If the operation mode is ‘Live’, these credentials will be sent in the api request to Saferpay.
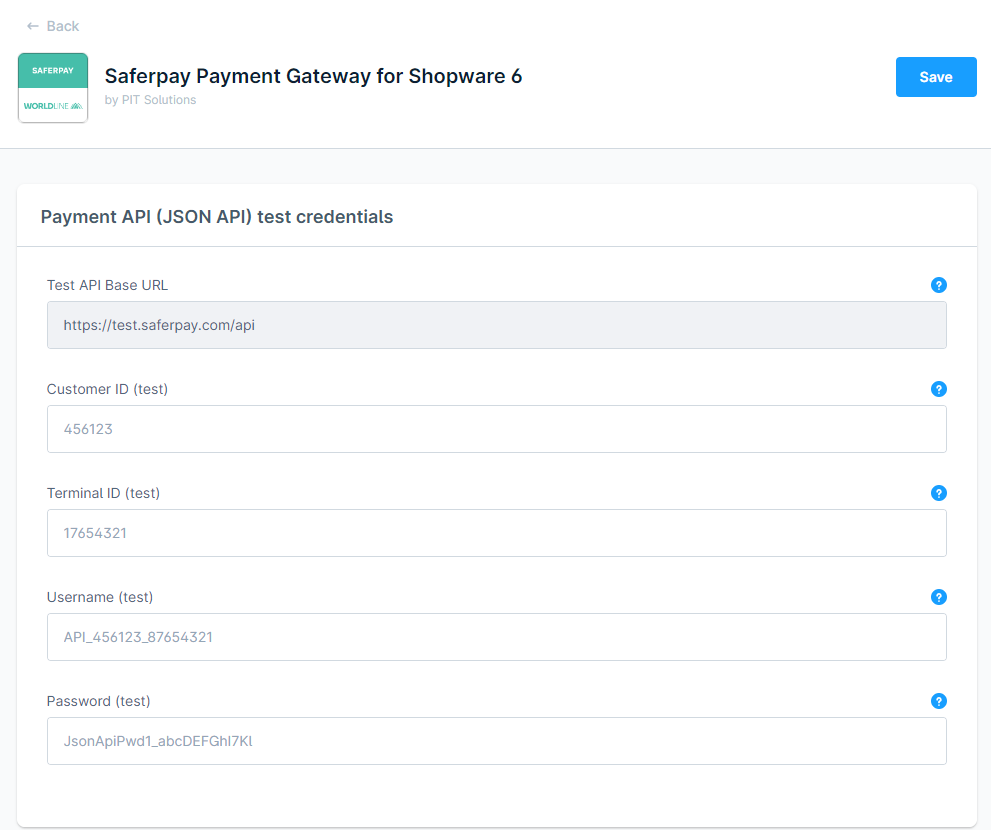
- Test API Base URL: This is the base url used in test mode of the extension.
- Customer ID (test), Terminal ID (test), Username (test), Password (test) : When the extension is configured in ‘Test’ operation mode, the values in these fields will be sent in api request to Saferpay. For more information on test account check the link.
After completing the configurations, click on ‘Save’ button on the top right corner.
PAYMENT METHOD ACTIVATION
By default, when the payment methods are installed with the extension, they are in inactive status. User can choose the payment methods to be activated from the list of the payment methods.
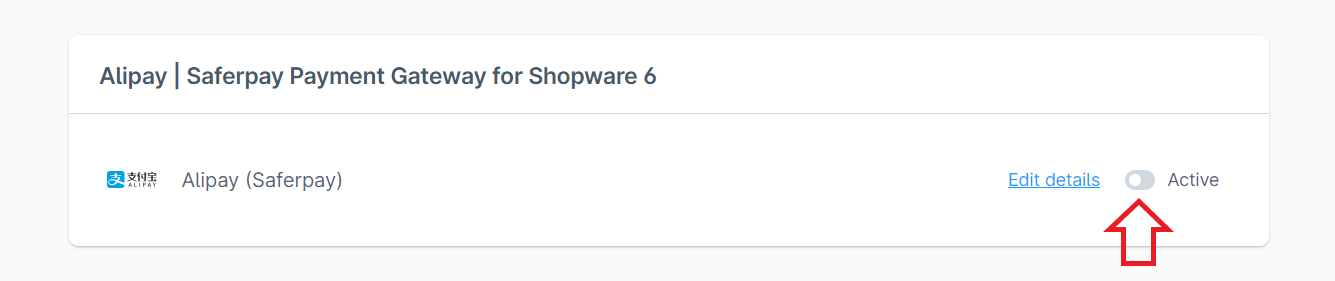
To activate required payment methods, go to Settings > Shop > Payment Methods. This page lists all the payment methods in the shop including the default payment methods of Shopware. To identify the payment methods added using the Saferpay extension, there is the name of the extension appended to the payment method, like below.

The payment method can be activated by clicking on the toggle button against the payment method.
After activating the payment methods, they need to be added to the sales channel too for the payment method to be displayed in storefront. To add payment method to sales channel, select the sales channel from left administration panel, scroll down to ‘Payment and Shipping’ section.
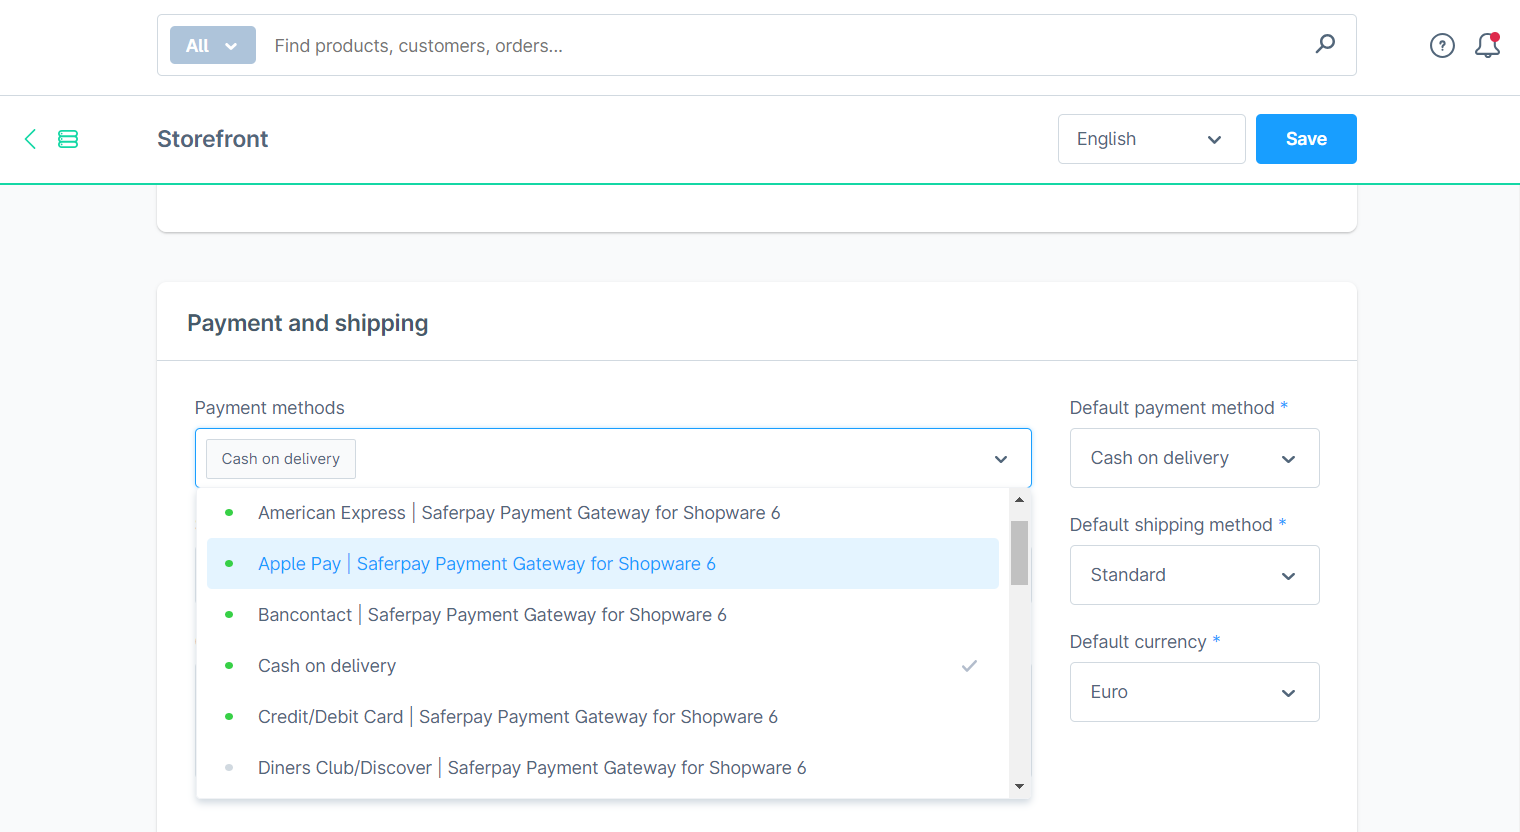
Select the payment methods to show in the storefront in ‘Payment methods’. Active and inactive payment methods will be listed here, active ones will have a green dot near them to identify among others. If you would like to set a payment method as default payment method, it can be selected in ‘Default payment method’. The payment method selected here would be on top in the checkout page and selected by default the first time a user tries to checkout. Afterwards his/her recent payment method would be selected by default.
Even if you select an inactive payment method by mistake, a notice in blue colour will be shown above Payment methods saying that the payment method is not available. They won’t show in the storefront too if inactive.
JSON API USERNAME AND PASSWORD GENERATION
To create JSON API username and password, you have to login to Saferpay management interface(Saferpay Backoffice) and go to Settings > JSON API basic authentication. Please refer https://worldline.com/en-ch/home/topnavigation/developers/e-commerce-developer/integration.html for more information
PAYMENT METHOD CONFIGURATION
Payment method specific configurations can be done in Settings > Shop > Payment Methods. Select the payment method to configure, click on ‘Edit details’.
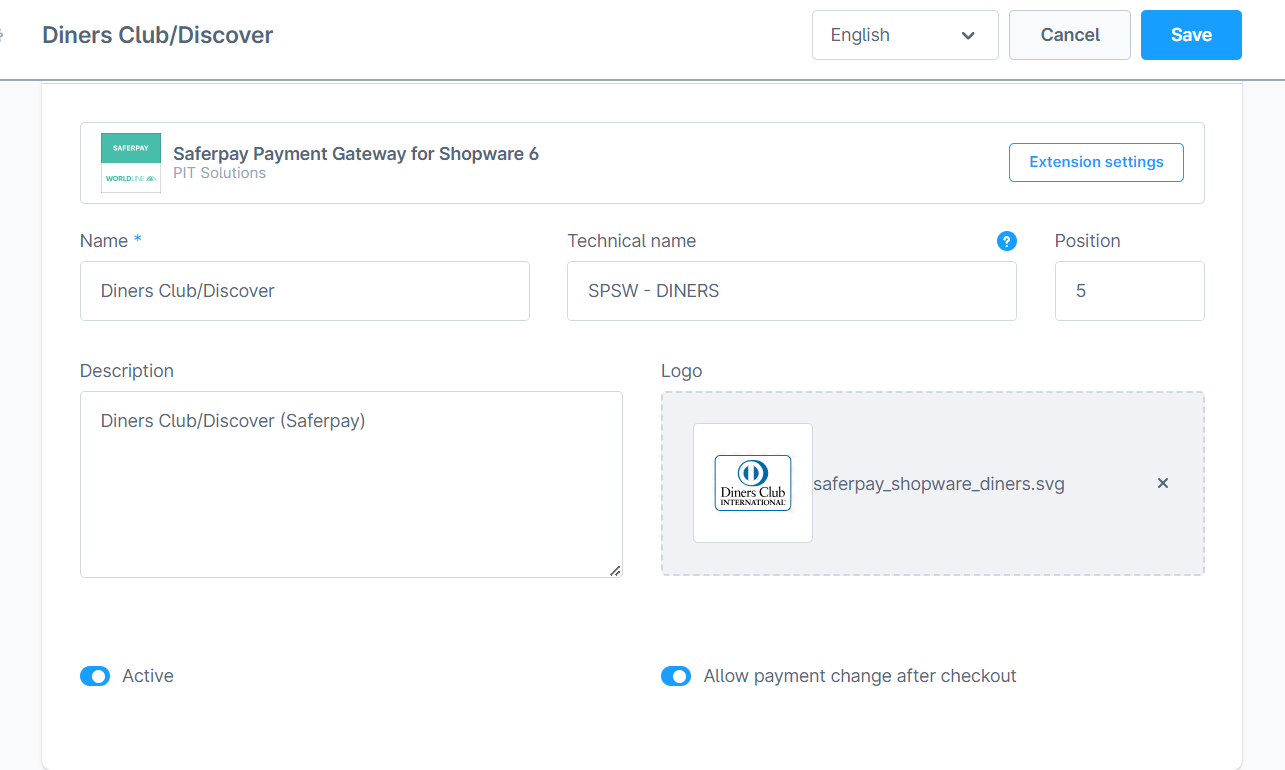
- Name: The name in which the payment method should be displayed in storefront.
- Technical name: The technical name field is to give the payment method a unique reference.
- Position: In Position field, you can specify a number to show the payment methods in particular order. If three payment methods are there, first with -1, second with 0, third with 1 values, then the payment methods will be displayed in checkout page based on the numeric value of the position entered for them. In this case it will be first, second and third respectively.
- Description: Text description for the payment method.
- Logo: Logo to be displayed in the storefront along with the payment method.
- Active: The status of the payment method can be modified in details page too.
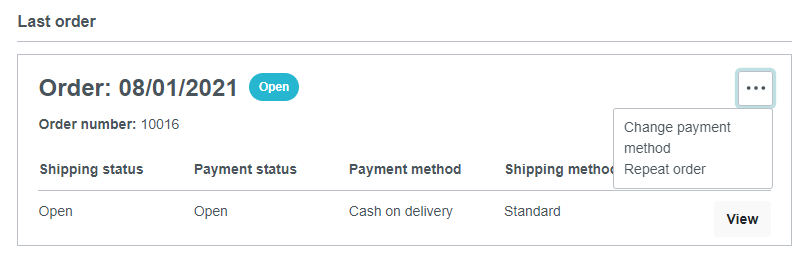
- Allow payment change after checkout: If this configuration is enabled, customers can change the payment method after order completion within the customer account under Orders. If it is deactivated for a payment type, your customer can no longer select this payment type when changing the payment type after completing an order.
- Availability Rule: Availability Rule is a Shopware feature added for a payment method by default. Here you can mention an additional rule for the payment method to be displayed in storefront.
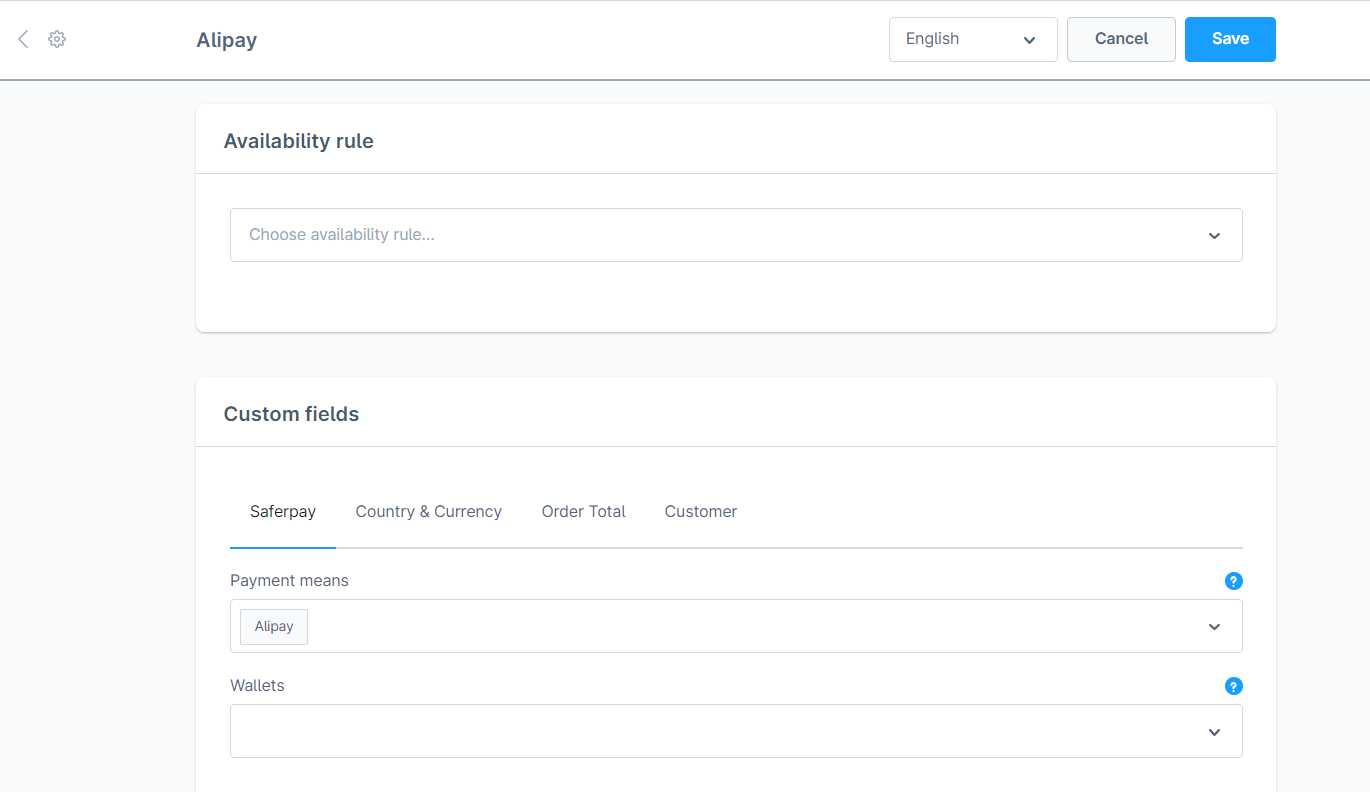
- Custom Fields: These are payment method specific settings that can be added for further customization. The Saferpay extension adds some custom fields for payment methods upon installation.
- Saferpay: This custom field set has two custom fields ‘Payment Means’ and ‘Wallets’. For general payment methods, one value will be selected in either of the two custom fields. In case of credit/debit payment method, multiple custom field values may be present. It is advised not to change the custom field values for the smooth functioning of the extension and hence the fields are made non editable.
- Country & Currency: This custom field set consists of Country and Currency custom fields. If the payment method has to be availed in all countries, leave the country field blank. If the payment method has to be enables only in a selected country, it can be selected in the Country field.
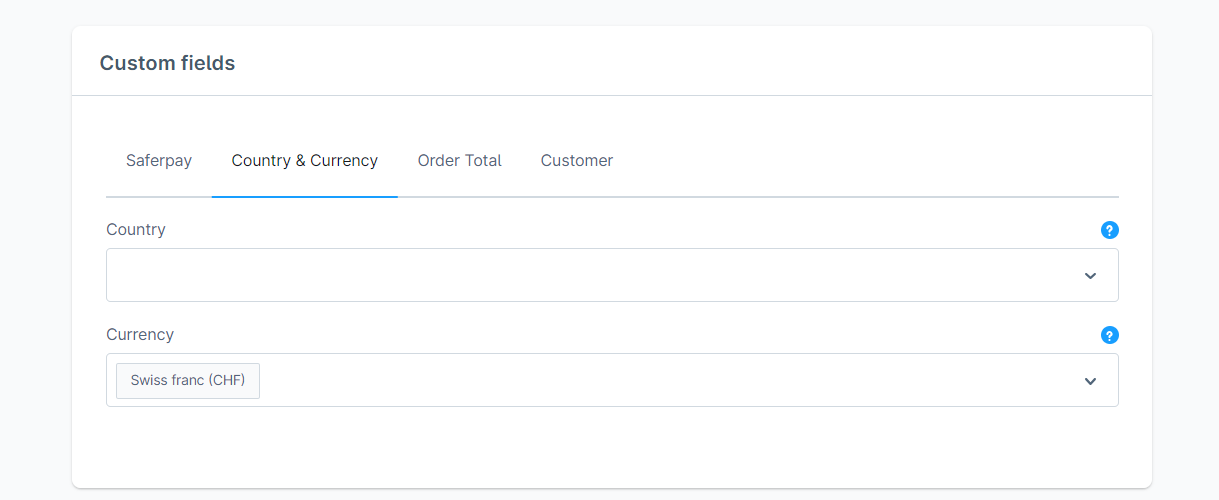
All payment methods are not available for all currencies. In Saferpay backoffice this availability can be seen in Settings > Payment Means/Terminals. By default, in the extension, the currency availability of the payment method is checked with Saferpay backoffice while adding currency field configuration value above. So the values are preselected in the select field of currency based on their actual availability for those payment methods.
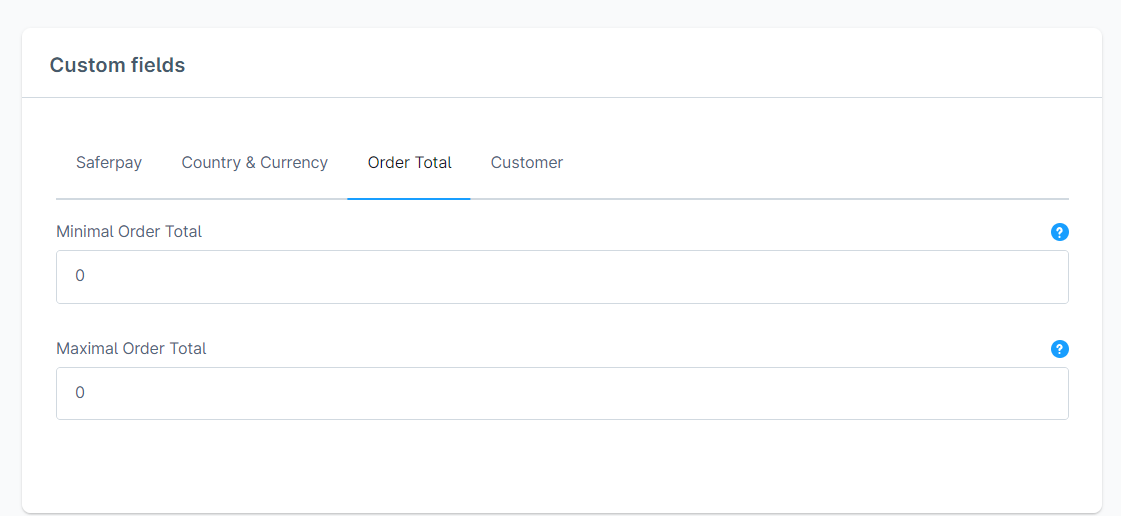
- Order Total: This custom field set consists of Minimal Order Total and Maximum Order Total. When the minimal order total is set to $20 and the order total in cart is $10, the payment method will not be displayed. Similarly, when maximum order total is $20 and the order total in cart is $30, the payment method will not be displayed in checkout page of storefront.
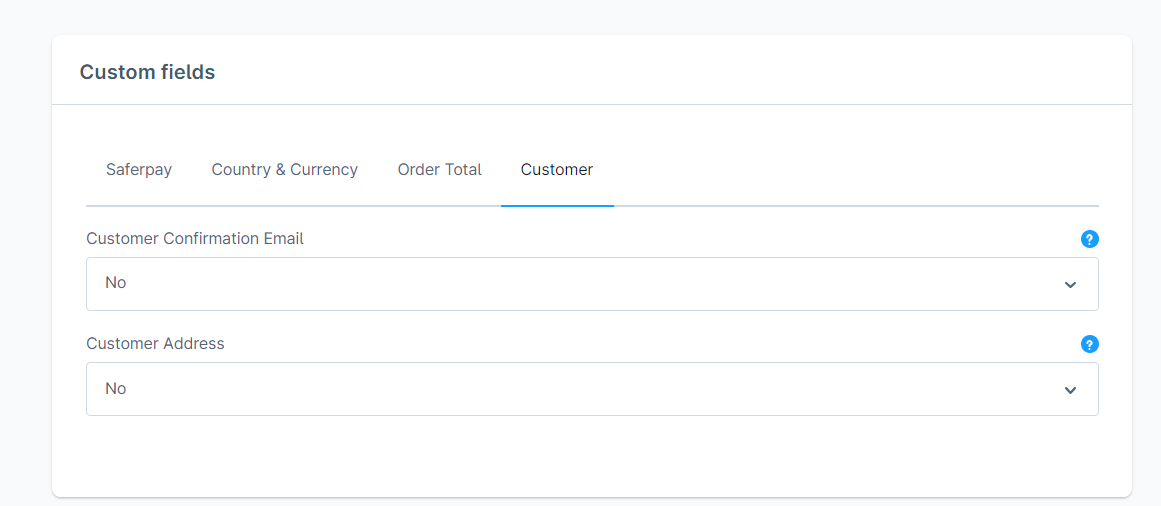
- Customer: This custom field set consists of customer confirmation email and customer address fields. When customer confirmation email is set to ‘Yes’, after a successful transaction, an email will be sent to the customer’s email address with the transaction details. If a customer’s address is sent to Saferpay in a transaction, in Saferpay backoffice journal, the address will be visible in the transaction details. Customer address has four options –
- None – customer’s billing and shipping address will not be sent to Saferpay,
- Send delivery address – customer’s delivery address will be sent to Saferpay,
- Send billing address – customer’s billing address will be sent to Saferpay,
- Send both billing and shipping – customer’s billing and shipping addresses will be sent to Saferpay.
The above four custom fields are available for all payment methods. There are some additional custom fields which are only available for few payment methods. They are listed below:
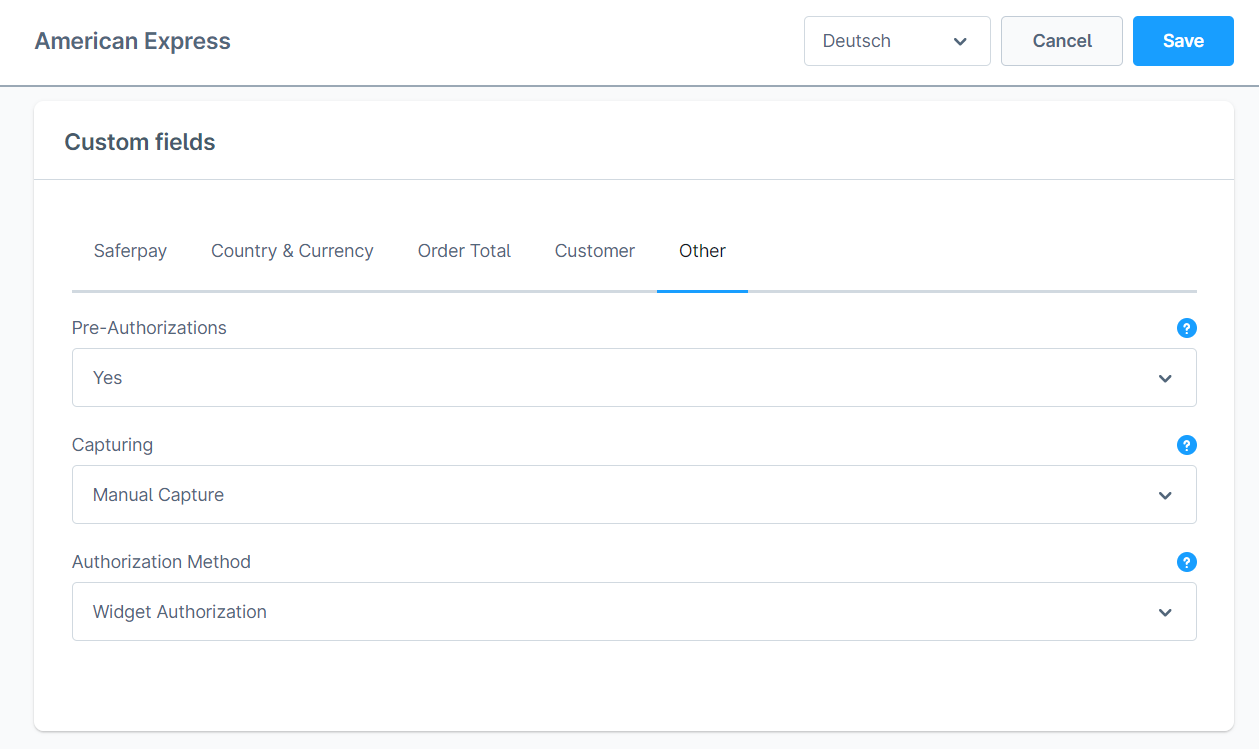
- Other: This custom field set consists of custom fields that are specific to some payment methods.
- Pre-Authorizations: It extends the validity of an authorization up to 30 days. If it is set to YES only, Manual Capture option will be possible under Capturing settings.
- Capturing: Here you can set capturing mode. If it is set as Manual Capture amount is only reserved and you should capture it manually through Shopware administration - Orders. If it is set as Auto Capture amount is captured automatically. Note: Auto Capture is not possible if Pre-Authorizations is set to YES.
- Authorization Method: Here you can set authorization method used for payment processing. Two options are available under these settings.
-
-
- Payment Page – During the order processing user will be redirected from the Shopware store to the Saferpay payment gateway interface to process the payment. On successful completion of the payment the user will be redirected back to the Shopware store. The Saferpay Payment Page Interface is intended for a simplified and universal integration of the payment process by using the Payment Page form. The Saferpay Payment Page can be used both with a Saferpay eCommerce license and with a Saferpay Business licence.
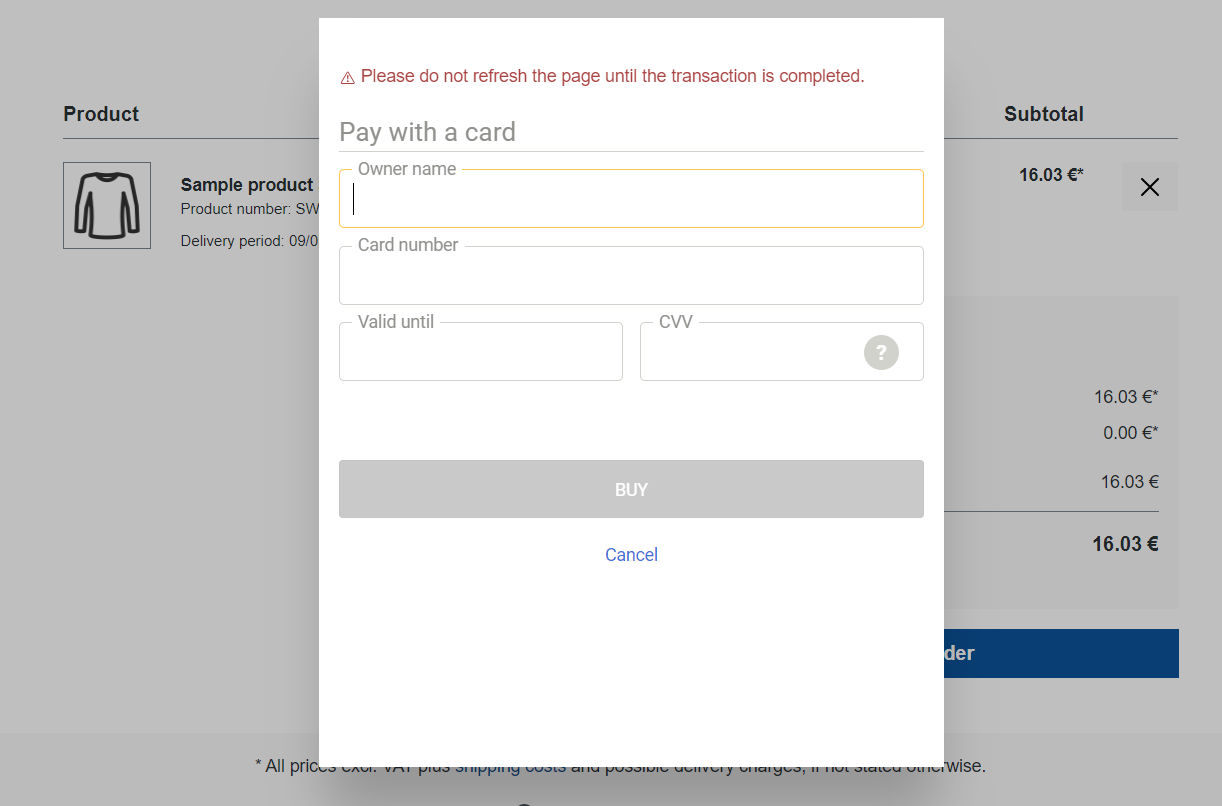
- Widget Authorization – During the order processing the user is served with Saferpay payment forms in a popup within the Shopware store. The Widget Authorization(Transaction Interface) is an extension to Payment Page Interface. It offers the Hosted Entry Form (HEF) to process card payments seamlessly. The Widget Authorization is only for holders of a business license on the live system.
-
ORDER MANAGEMENT
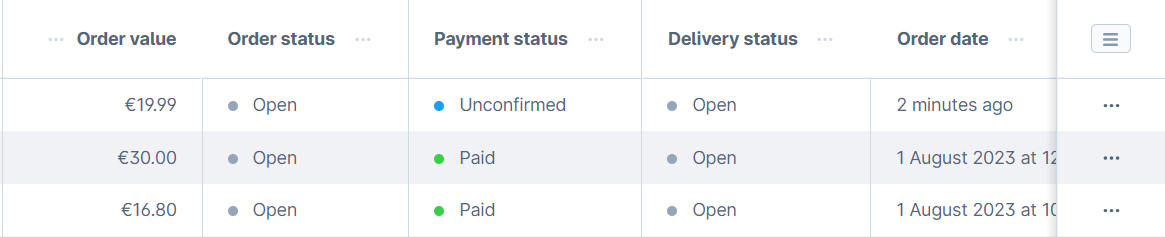
Orders list can be accessed in Shopware from left administration panel.
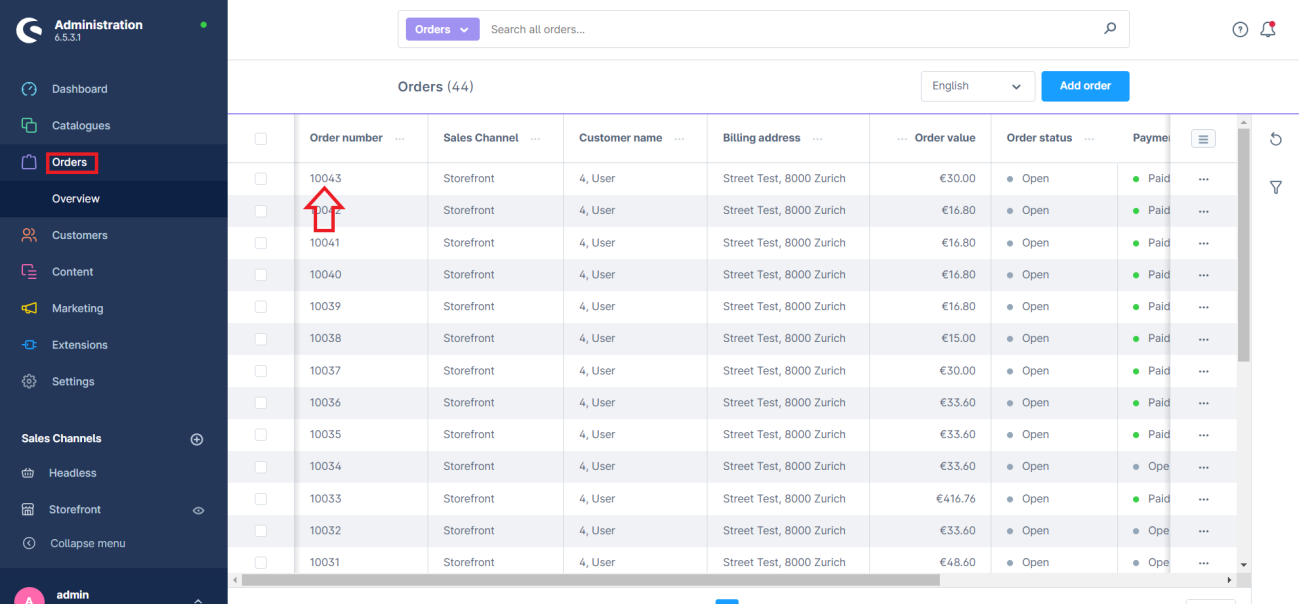
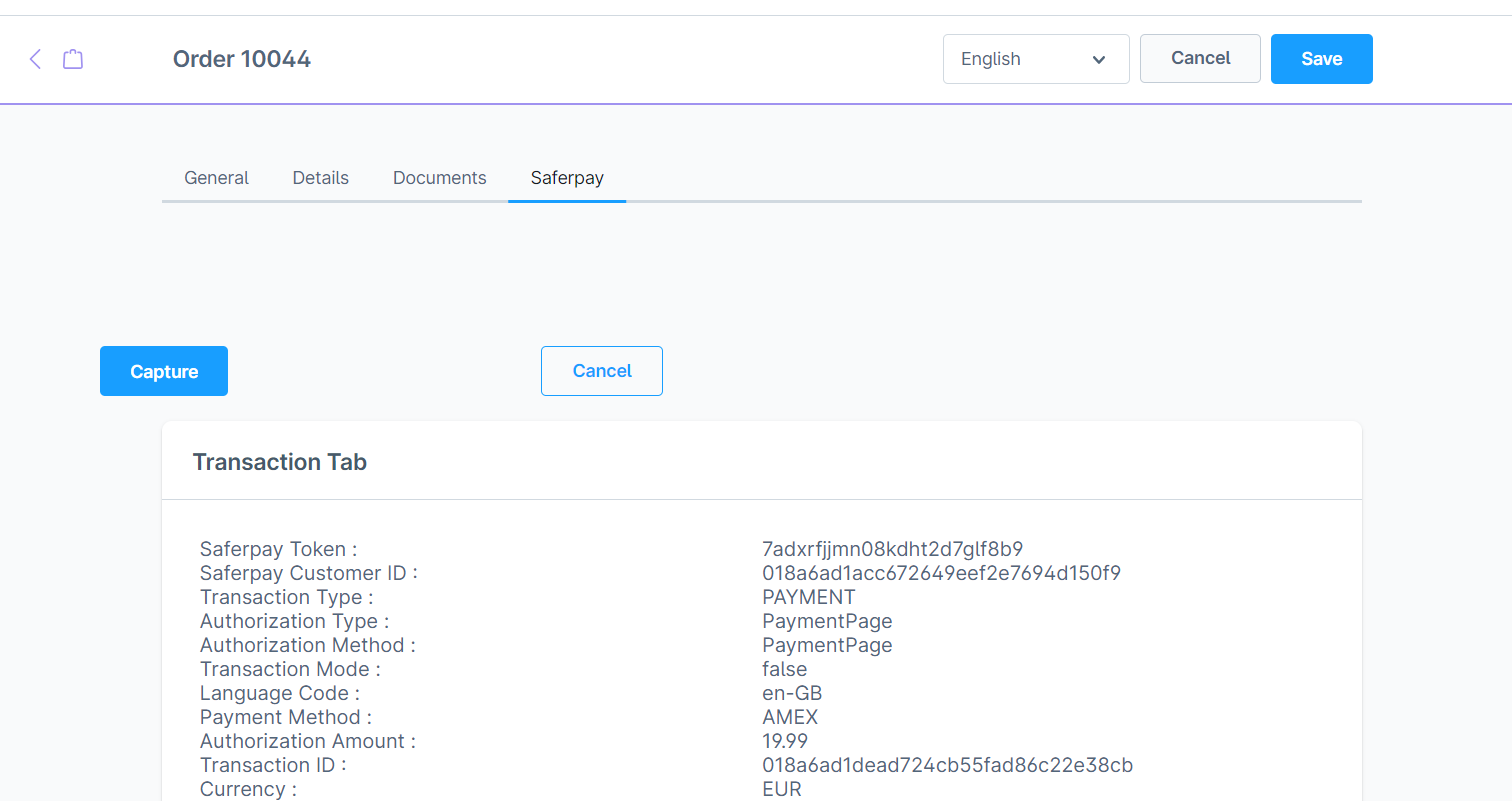
Click on the order number to view the order details of any order. Order details displays three tabs by default – General, Details and Documents. These are managed by Shopware. An additional tab called ‘Saferpay’ will be displayed after Saferpay extension is installed.

This tab displays the transaction details card and transaction history card. Transaction details displays the values returned from Saferpay as response in api calls during a transaction. Transaction history displays all the api call transaction statuses during the payment process.
CAPTURE PAYMENT
In the payment method configuration, if “Capturing” is set to “Auto Capture”, the merchant doesn’t need to do anything from the Shopware administration. Payments will be captured automatically by the system. When the “Capturing” is set to “Manual Capture”, the merchant will have the option to Capture or Cancel transactions. If we click Capture, the transaction will be captured after confirmation.
CANCEL PAYMENT
Only authorized, but not captured orders can be cancelled. Cancellation of order prevents any future change from being made to it. If we click CANCEL, the transaction will be cancelled after confirmation.
For a payment to be captured/cancelled manually, it has to be in ‘Unconfirmed’ payment status.
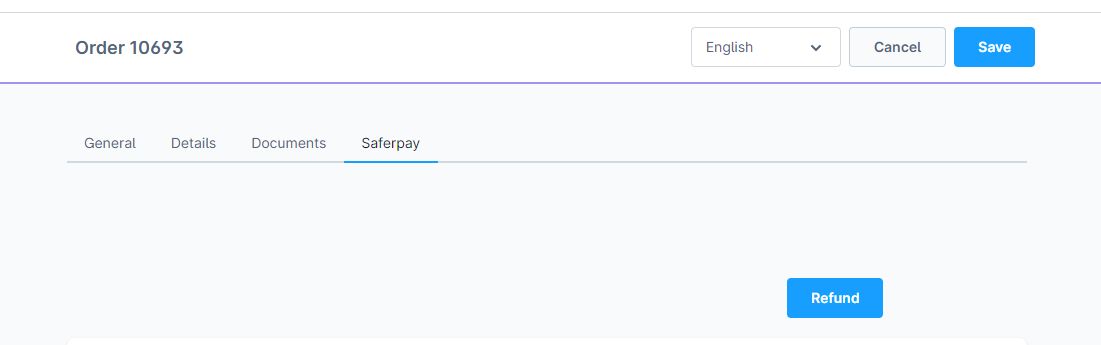
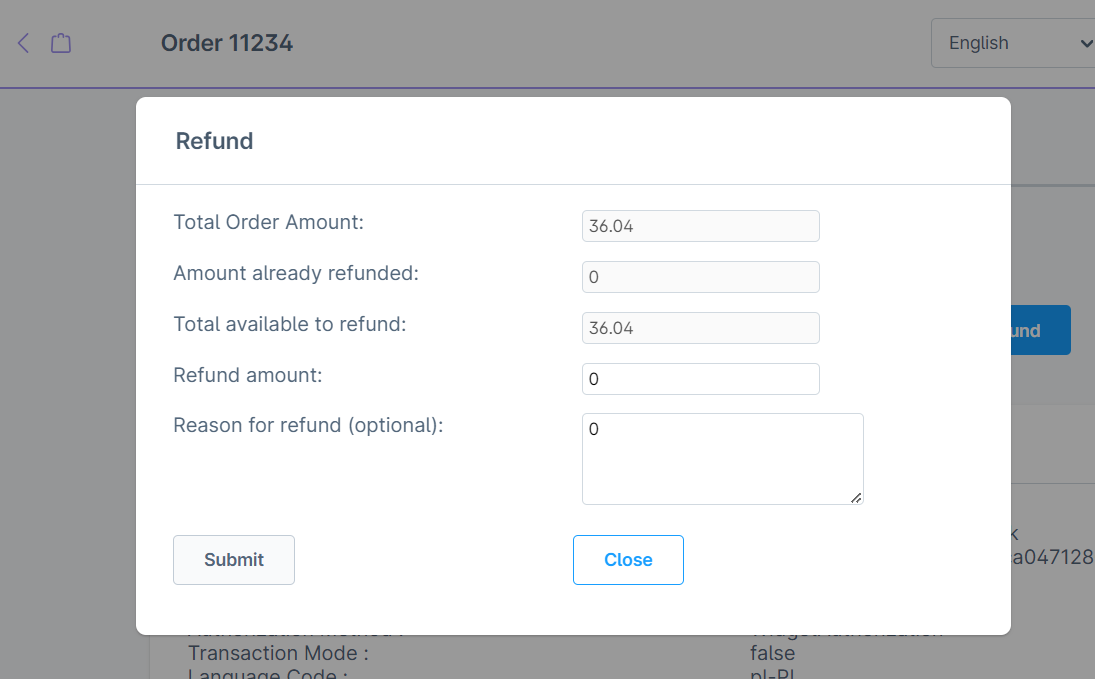
REFUND PAYMENT
Just like Saferpay transactions, you can also manage the Saferpay refund transactions. Saferpay refund will only be available if transactions are captured properly. If transactions are not captured click ‘Capture’ button available in transaction tab, then only Saferpay refund button will be enabled. Admin should have to do manual refund, restock of Refunded items should be done manually.
ERROR LOGS
Error Log provides information about transactions performed by Saferpay that could not be completed successfully. Error details provided by payment gateway will be logged and displayed in ‘Saferpay’ tab of order details under ‘Error Response Tab’.

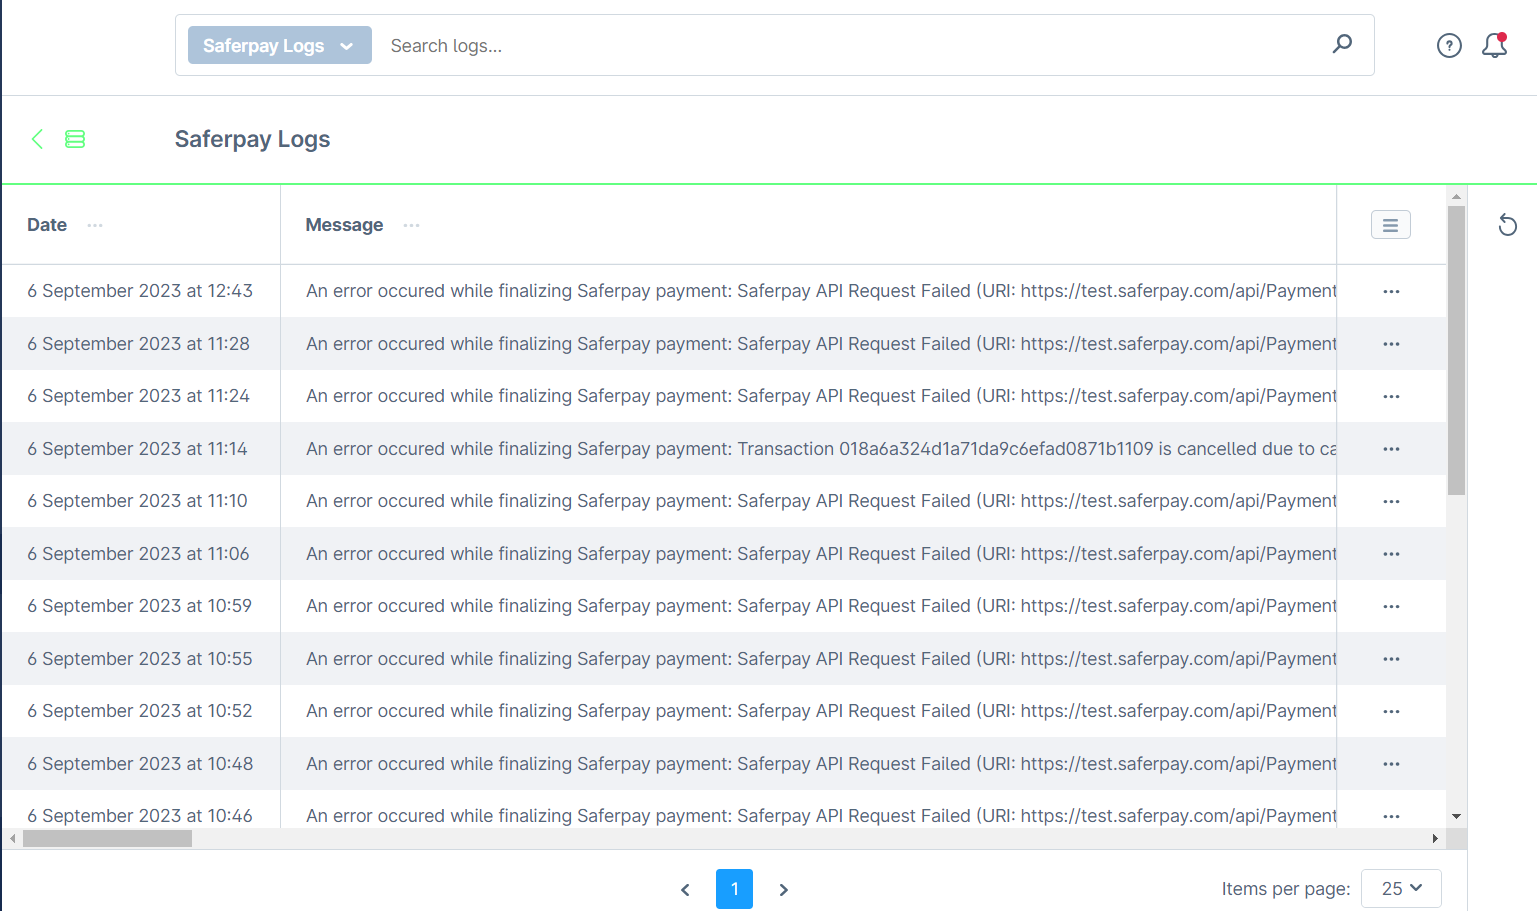
When customer fails to complete a transaction in frontend or does not get a payment page displayed after checkout page, the error would be logged in ‘Saferpay Logs’. This is added in Settings > System.
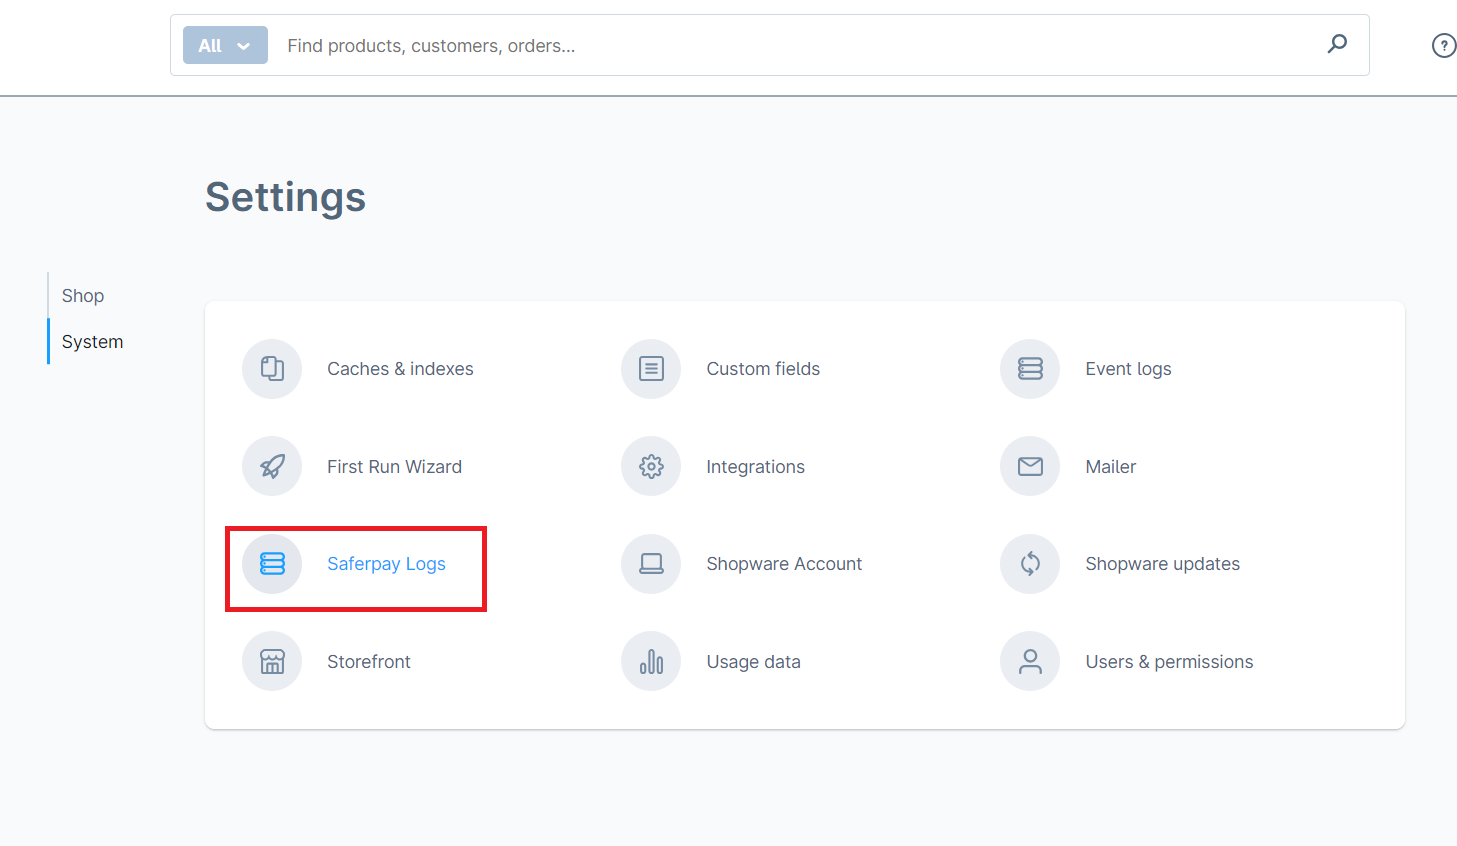
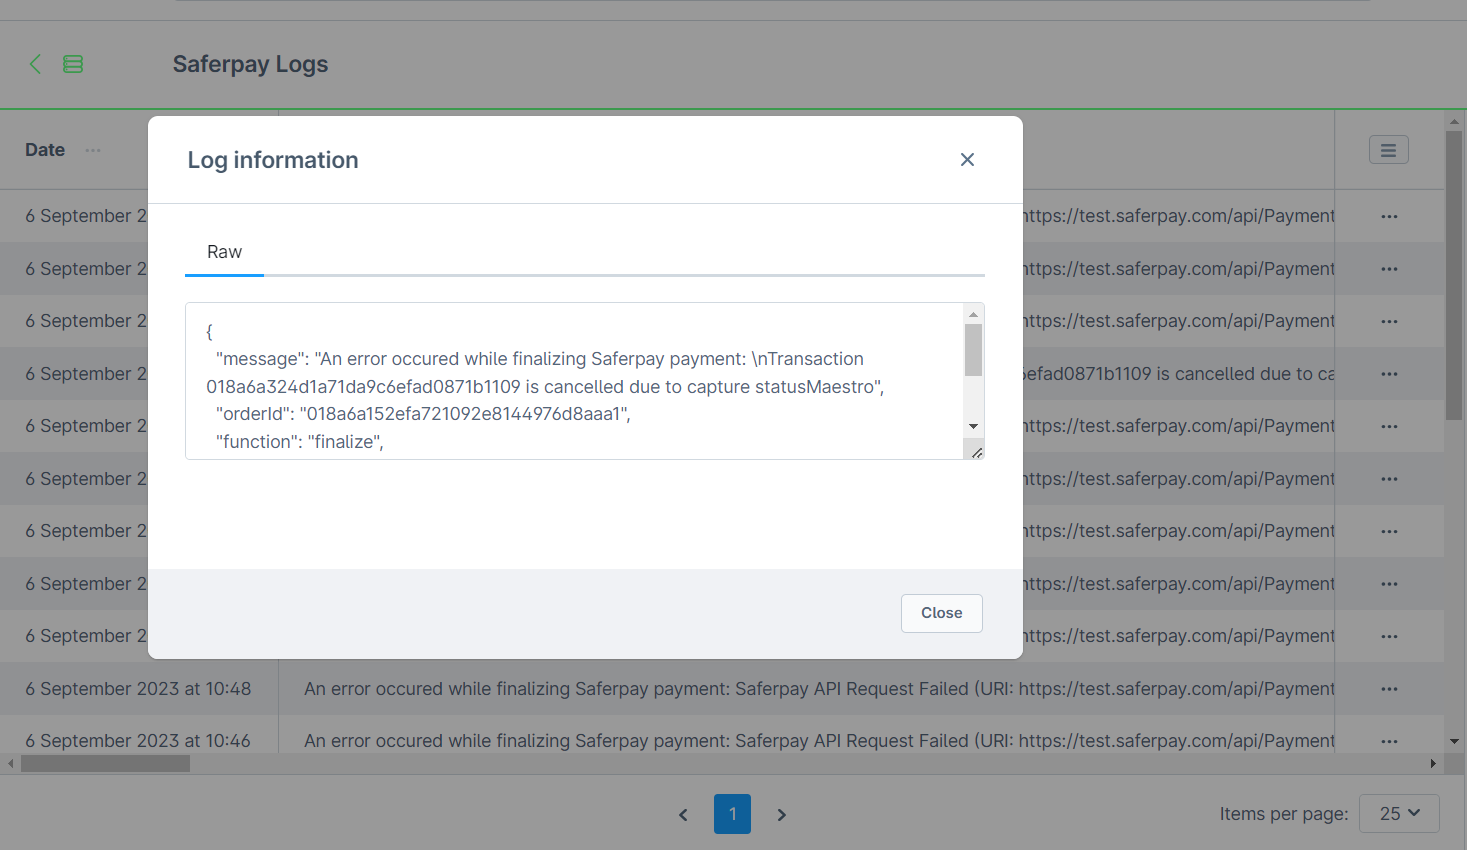
It lists the errors during payment process. To view the details of the error, click on the three dots corresponding to the error. A popup will show the further error details on click of ‘View Details’.
SAFERPAY IDEAL
Other than general settings, additional settings such as account details are available for Saferpay iDEAL payment method. In Shopware administration, admin can add/remove bank account. Customer will be able to select a bank from the bank choices during checkout

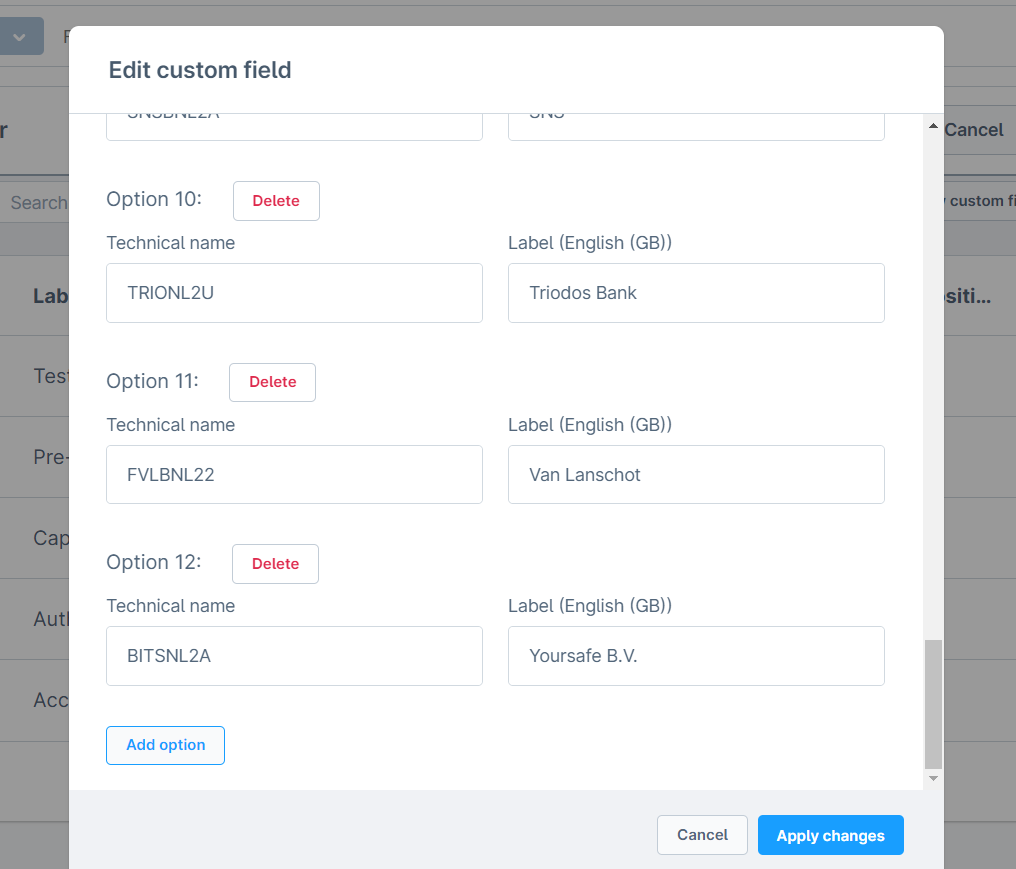
Shopware admin can add more bank options if there are more banks supported by iDEAL. To add additional bank options, go to Settings > System > Custom Fields > Other. Scroll below to custom fields, edit Test Account Details/Account Details and add a new option.
SAFERPAY KLARNA
Other than general settings, some additional settings are to be configured to use Klarna payment method.
In Saferpay Backoffice, under Settings > Terminals. Please select the terminal you want Klarna activated on and scroll down to Self Service. Please refer the link.
This service is to be handled differently depending on the Saferpay environment (test/live) you are on, so please pay attention.
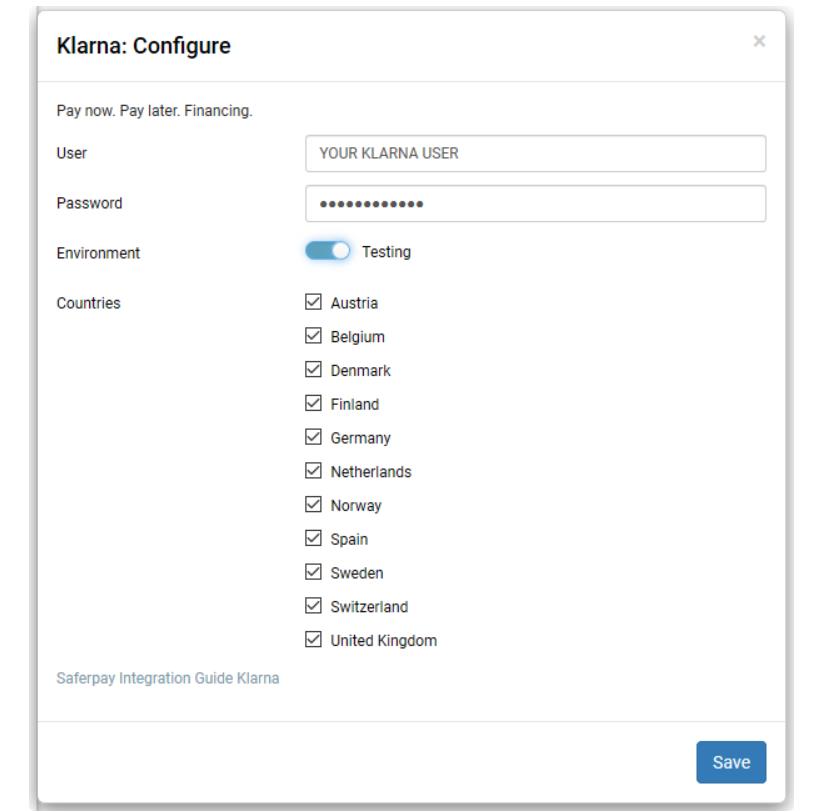
You will have two options Klarna and additionally on the Saferpay test environment, Klarna Simulator. For Live mode, configure Klarna. For Test mode, configure Klarna Simulator.
We need to activate the countries in Saferpay Backoffice settings in order for Klarna to work in checkout.
Additionally, Klarna will be displayed only for certain country-currency combinations. The combinations can be referred in the link. In Shopware store, only when the country currency are properly matched Klarna payment will be displayed.
The following links will be helpful while configuring payment methods:
- Credit and Debit Cards:
https://docs.saferpay.com/home/integration-guide/payment-methods/mastercard
https://docs.saferpay.com/home/integration-guide/payment-methods/maestro
https://docs.saferpay.com/home/integration-guide/payment-methods/visa-and-vpay
https://docs.saferpay.com/home/integration-guide/payment-methods/american-express
https://docs.saferpay.com/home/integration-guide/payment-methods/diners-and-discover
https://docs.saferpay.com/home/integration-guide/payment-methods/jcb
https://docs.saferpay.com/home/integration-guide/payment-methods/china-unionpay
https://docs.saferpay.com/home/integration-guide/payment-methods/swiss-postcard-and-postfinance - TWINT: https://docs.saferpay.com/home/integration-guide/payment-methods/twint
- PayPal: https://docs.saferpay.com/home/integration-guide/payment-methods/paypal
- Klarna: https://docs.saferpay.com/home/integration-guide/payment-methods/klarna-payments
- eps: https://docs.saferpay.com/home/integration-guide/payment-methods/eps
- paydirekt: https://docs.saferpay.com/home/integration-guide/payment-methods/paydirekt
- iDEAL: https://docs.saferpay.com/home/integration-guide/payment-methods/ideal
- SEPA Direct Debit: https://docs.saferpay.com/home/integration-guide/payment-methods/sepa-direct-debit
- Przelewy24: https://docs.saferpay.com/home/integration-guide/payment-methods/eprzelewy
- Bancontact: https://docs.saferpay.com/home/integration-guide/payment-methods/bancontact
- Apple Pay: https://docs.saferpay.com/home/integration-guide/payment-methods/applepay
- Alipay: https://docs.saferpay.com/home/integration-guide/payment-methods/alipay+
- WL Crypto Payments: https://docs.saferpay.com/home/integration-guide/payment-methods/crypto-payments
- Google Pay: https://docs.saferpay.com/home/integration-guide/payment-methods/google-pay