Odoo OneDrive Integration
Kategorien
Magento
WordPress
SAP Commerce
Odoo
Shopify
Typo3
Shopware
nopCommerce
Pimcore
Hyvä
OXID eShop


1.0 Introduction
The Odoo OneDrive Integration plugin seamlessly bridges the gap between your Odoo platform and Microsoft OneDrive, revolutionizing the way you manage and share documents and data. By automatically storing all Odoo attachments in your OneDrive account, it eliminates the hassle of manual uploads, ensuring that your files are always securely backed up and easily accessible. Moreover, the integration empowers you to securely share your Odoo data with external stakeholders through OneDrive, facilitating streamlined collaboration while maintaining control over who has access to what. With real-time synchronization, any updates or modifications made to documents within Odoo are instantly reflected in OneDrive, guaranteeing that all parties have access to the latest information. The integration also offers robust security features, including encryption and access controls, to safeguard your sensitive data throughout the transfer process. Additionally, the ability to delete documents and revoke sharing permissions directly from Odoo provides added flexibility and control over your data management workflows. Easy configuration and comprehensive monitoring tools further enhance the user experience, enabling seamless integration and efficient management of your documents and data across both platforms. In essence, the Odoo OneDrive Integration plugin empowers your organization with enhanced collaboration capabilities, improved data security, and streamlined document management workflows, ultimately driving productivity and efficiency across your operations.
1.1 Features
The few of the features which are available in Odoo OneDrive Integration module are as below:
- Easy to install
- Flexible
- User-friendly and configurable as per user requirements
- Ability to choose model and mime types for document upload
- It offers you complete security along with accessibility
- Microsoft OneDrive offers a secure environment
- Share the large files without hassle
- Easily manage and share files in OneDrive
- Ability to stop the sharing feature
- Delete Action
- Update files
1.2 Odoo backend configuration
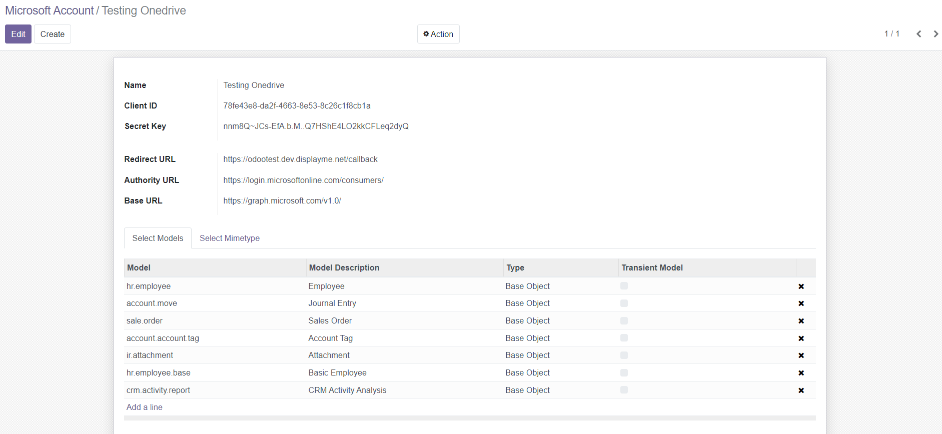
OneDrive can be configured by using detailed information like:
- Client ID: Application client ID from Azure App
- Secret Key: Secret ID generated from the Azure App
- Redirect URL: Add the redirect URL same in the Azure App like BASE_URL/callback
- Model: Add models from which the attachment should be uploaded to OneDrive
- Mime type: Add the required mime type of files should be added to OneDrive
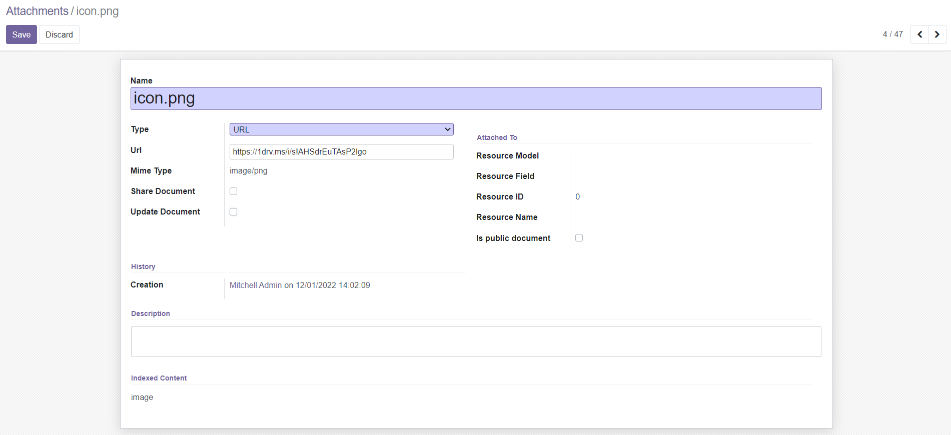
1.3 Attachment view in backend
1.4 Sharing document view
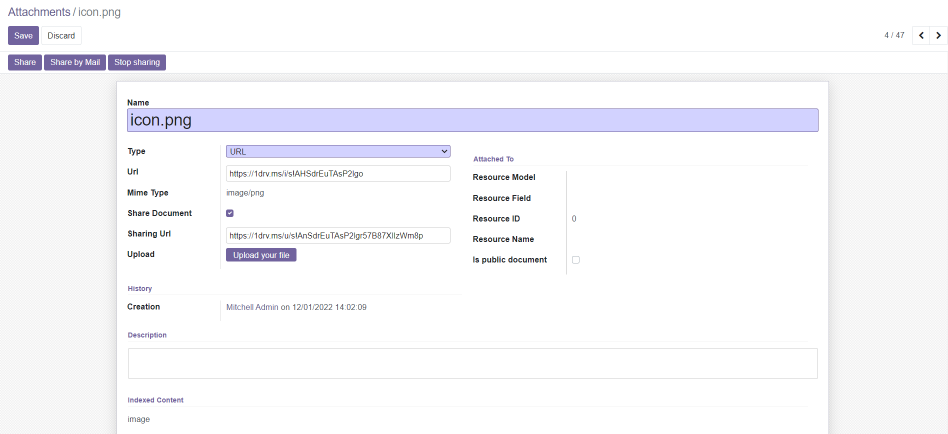
If you need to share the same document with someone, then check on share document Boolean and click on the share button, it will generate a sharing url which can be used for sharing purpose. Also use the stop sharing button to deactivate the sharing features.
1.5 Document in OneDrive
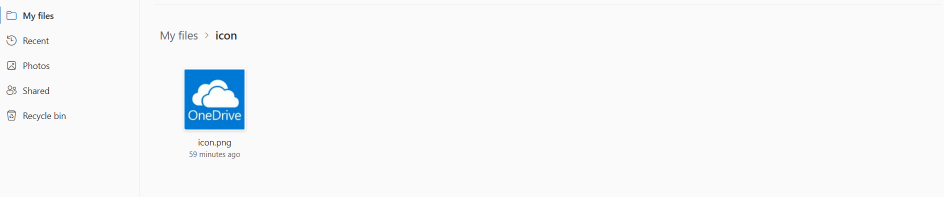
- A folder is created in OneDrive with the corresponding record name and a document isstored in it. Updates made to the same document from the backend will affect the same document.
- Finally, if the user removes the attachment from Odoo, it will automatically delete the same attachment from OneDrive also.
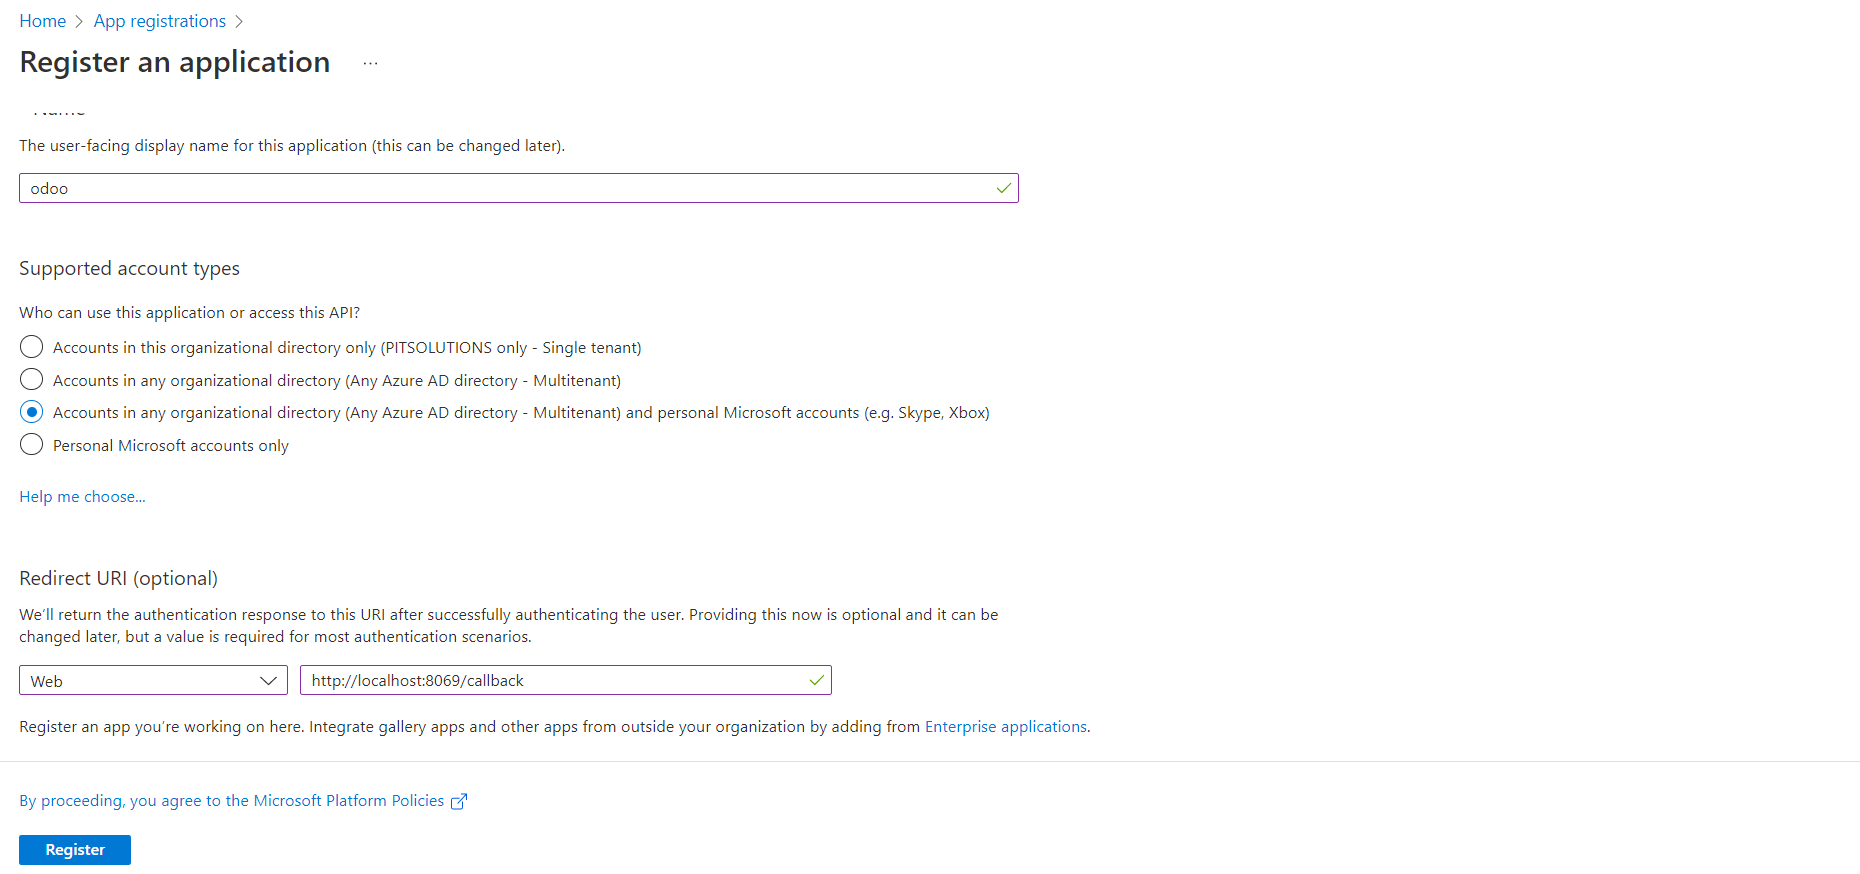
1.6 Register an application in Microsoft Azure
Registering your application establishes a trust relationship between your app and the Microsoft identity platform
Follow these steps to create an application in Microsoft Azure:
- Login to Microsoft account on https://apps.dev.microsoft.com
- Under Manage, select App registrations > New registration.
- Need to add a name and select platforms as WEB, and enter Redirect URIs:
BASE_URL/callback
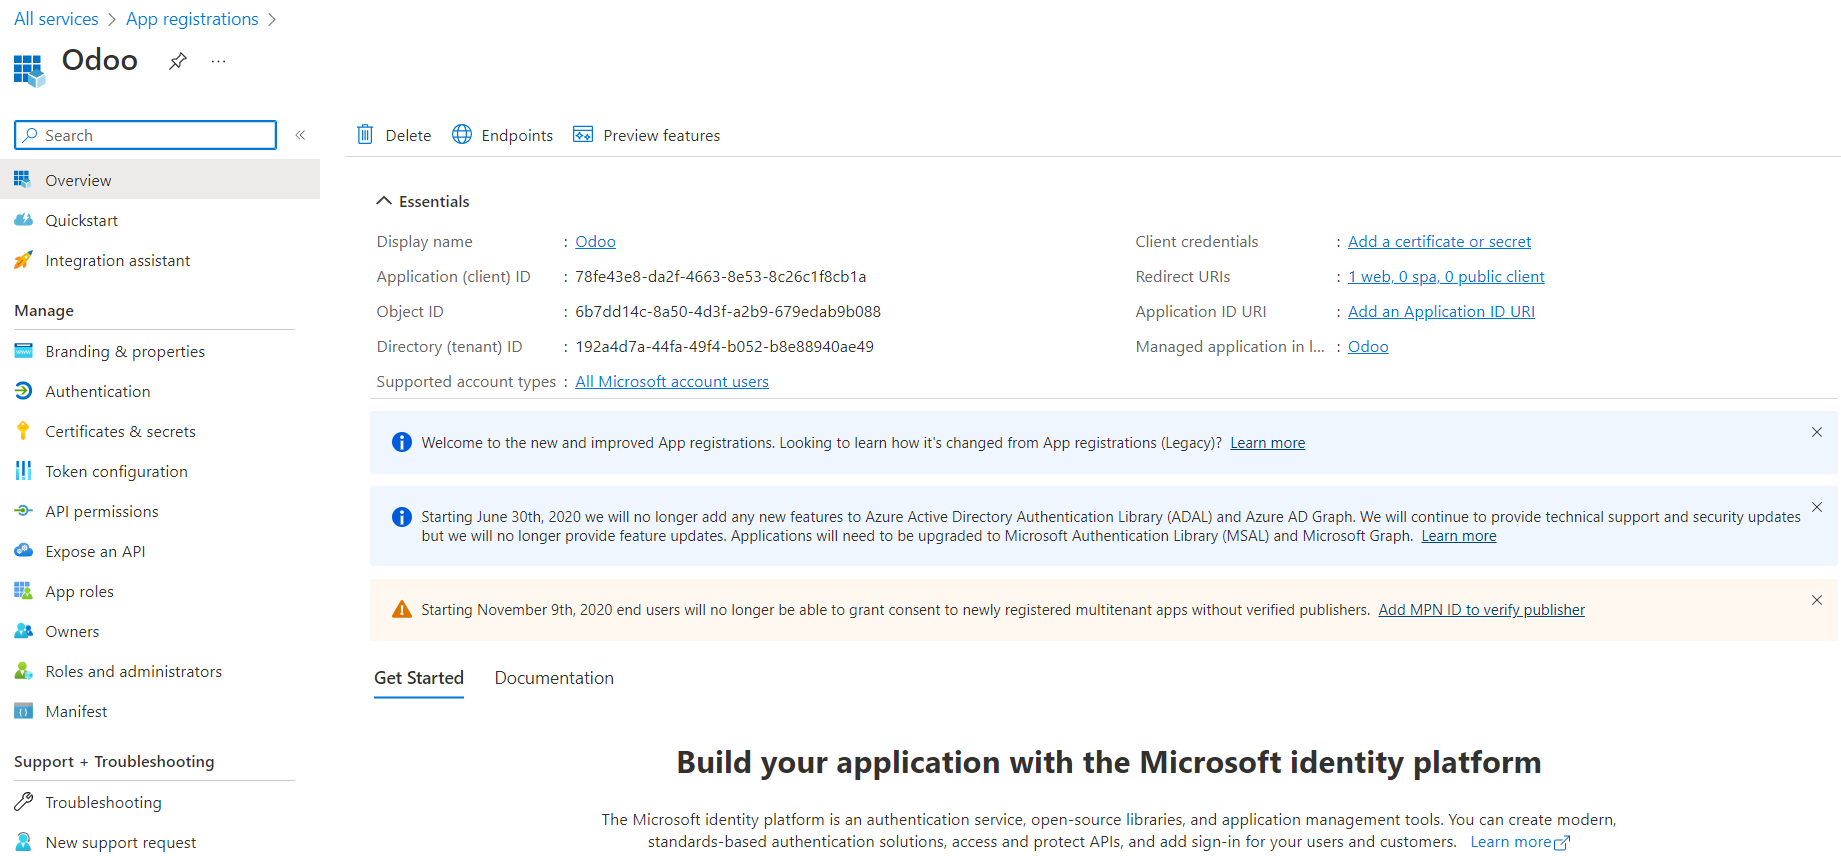
- When registration finishes, the Azure portal displays the app registration's Overview pane. It will generate the client id and the secret key, this value uniquely identifies your application in the Microsoft identity platform.
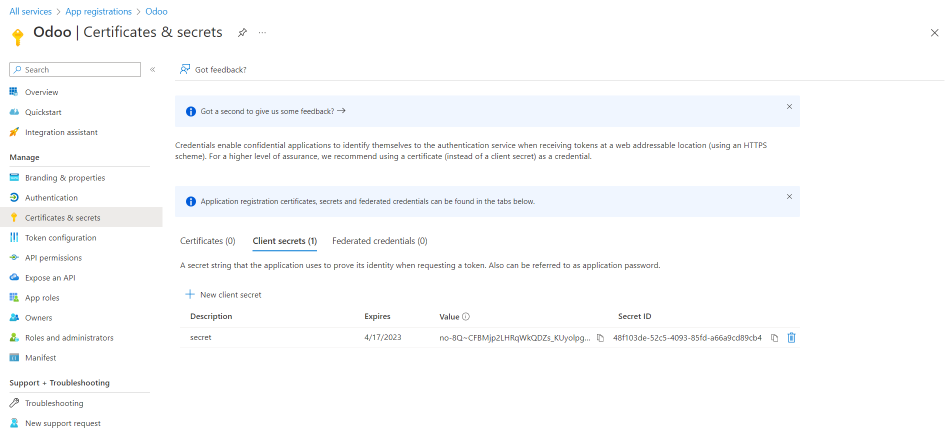
- Under Certificate and Secret section create secret key copy the value field data and save it.
- Configure delegated permission to Microsoft Graph to enable your client application to perform operations
- Select API permissions > Add a permission > Microsoft Graph.
- Select Delegated permissions. Microsoft Graph exposes many permissions.
- Under Select permissions, select the following permissions:
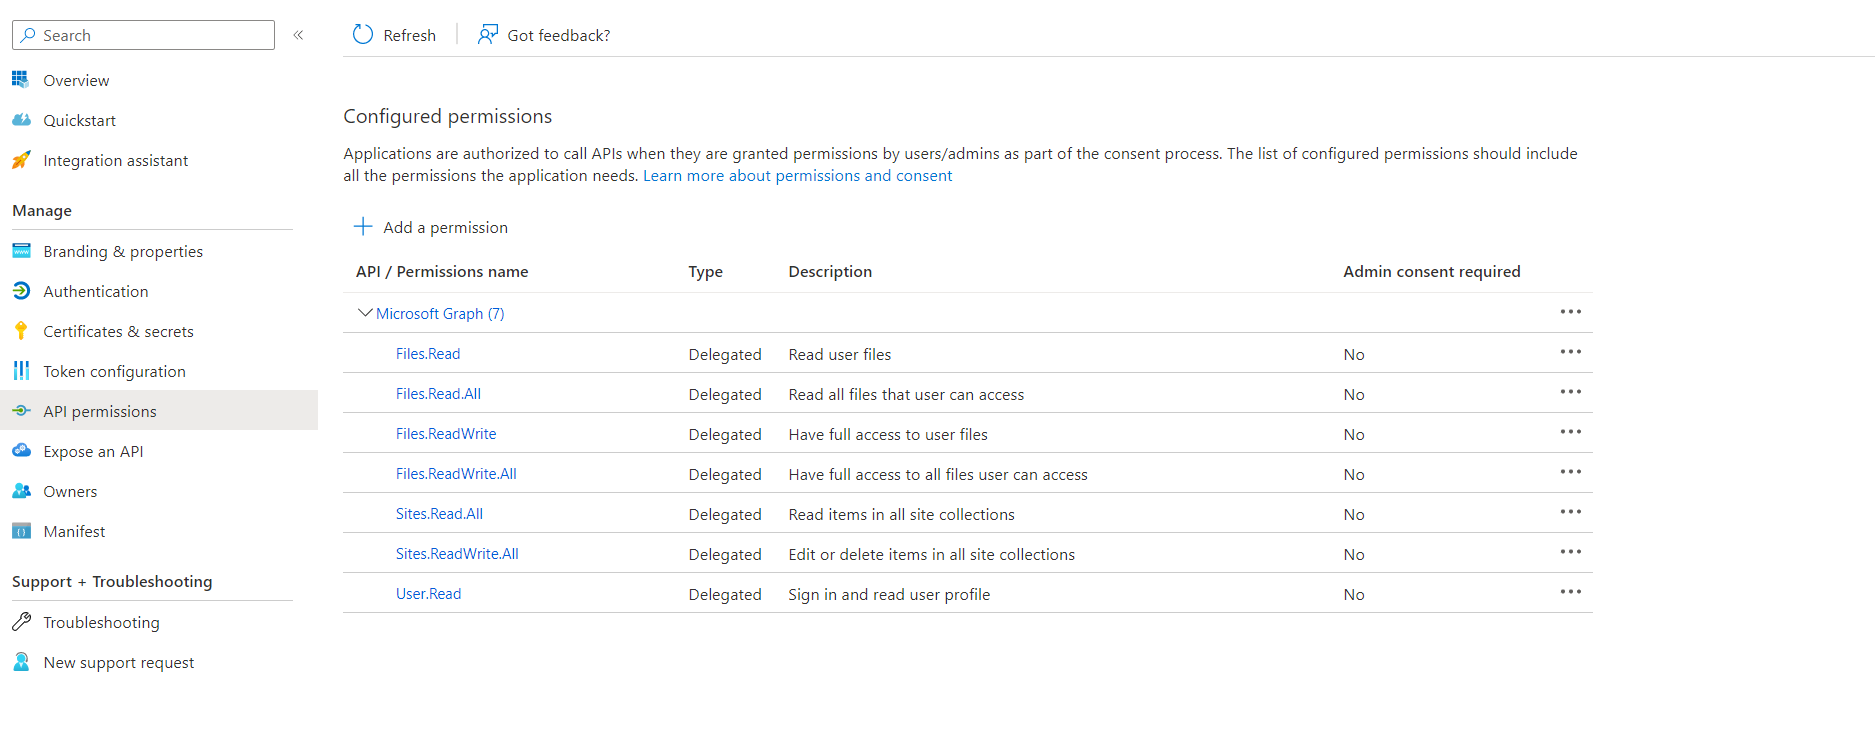
- Select Add permissions to complete the process
1.7 Technical Requirements / Compatible With:
Technical Requirements: external library- msal
Compatible with ODOO version 13 - 16