Kategorien
Magento
WordPress
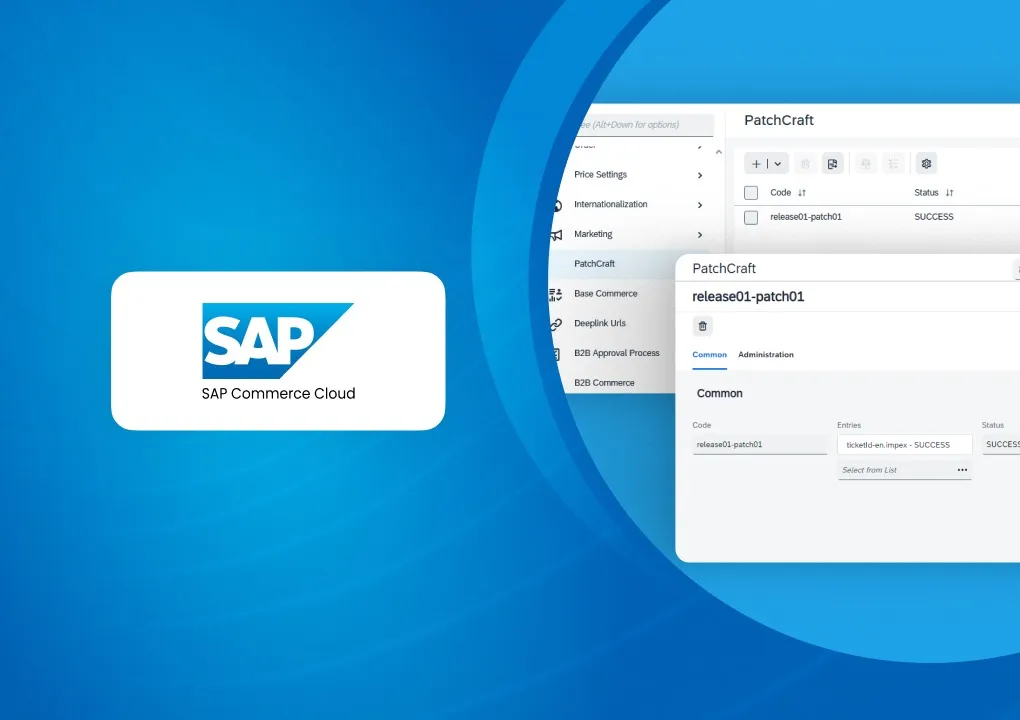
SAP Commerce
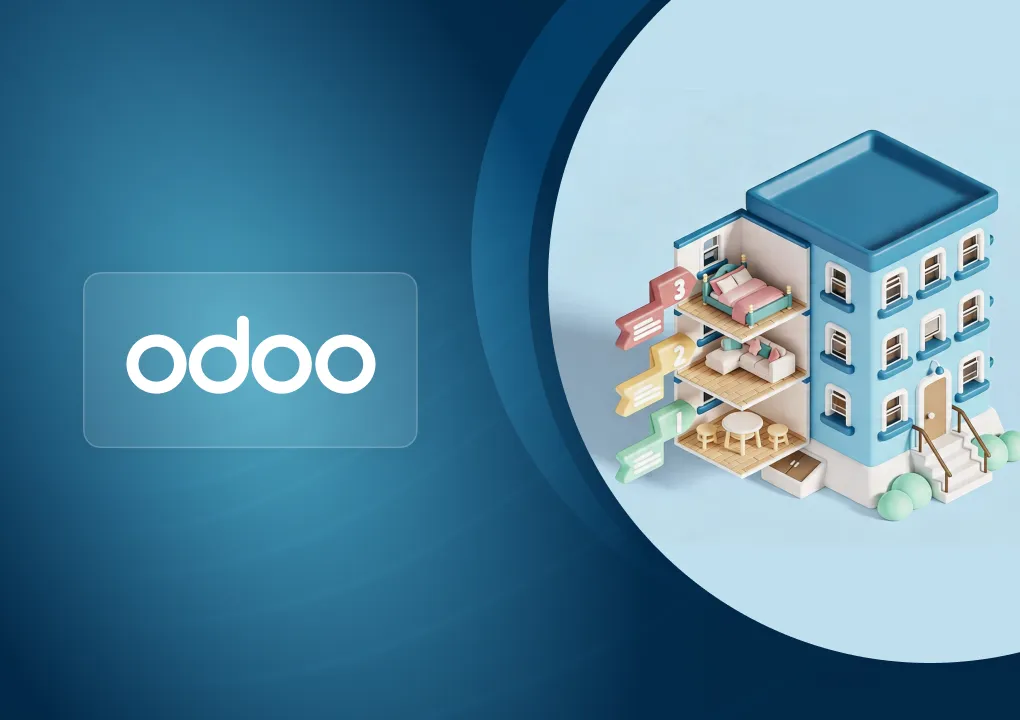
Odoo
Shopify
Typo3
Shopware
nopCommerce
Pimcore
Hyvä
OXID eShop


The Amazon SES Connector Plugin enables seamless integration between Odoo and Amazon Simple Email Service (SES), allowing all outgoing emails from Odoo to be sent through Amazon SES using the AWS SDK. This integration improves email deliverability, scalability, and overall performance of the email communication system.
The plugin also supports the configuration of Amazon Simple Notification Service (SNS) to receive real-time notifications for email delivery, bounce, and complaint events. These events are automatically captured and stored within Odoo, enabling effective monitoring, tracking, and analysis of email activities.
In addition, the plugin includes a custom unsubscribe mechanism that allows recipients to securely opt out of future communications. A re-subscription option is also provided, enabling partners or recipients to opt back in and resume receiving emails when required.
Key Features
- Send all Odoo emails via Amazon SES using AWS SDK.
Instead of using Odoo’s traditional SMTP servers, the system routes every outgoing email through Amazon SES using the AWS SDK (SESv2).
- Configure SNS to receive real-time Delivery, Bounce, and Complain events - Amazon SNS (Simple Notification Service) is configured to receive all events from SES, such as
o Delivery → Email reached the recipient’s mail server
o Bounce → Recipient’s email address is invalid, mailbox full, or blocked
o Complaint → Recipient marked the email as spam
- Store SNS notifications in a custom model for email analytics.
A custom Odoo model is created to store all SNS event payloads. And this payload also stores in Odoo mail record.
- Add Unsubscribe link in every outgoing email using a secure token.
Each outgoing email automatically includes an unsubscribe link containing a secure token. When a recipient clicks the link: -
o They are taken to a custom Odoo controller
o The system verifies the token
o The partner is marked as unsubscribed or added to a blacklist
o Future emails to the recipient are blocked
- Resubscribe partners to allow future communication.
A Re-subscribe button is added to the Partner form in Odoo.
When clicked:
- The partner is removed from the blacklist.
- They can receive emails again.
Amazon Web Services (AWS) Prerequisites
Before configuring the Amazon SES Plugin in Odoo, the required setup must be completed in the Amazon Web Services (AWS) console. These steps are mandatory to allow Odoo to authenticate with Amazon SES, send emails, and receive delivery, bounce, and complaint notifications.
Amazon Web Services (AWS) Prerequisites
1. Log in to the AWS Management Console.
2. Navigate to IAM → Users.
3. Create a new IAM user (for example: odoo_ses_user).
This IAM user will be used by Odoo to authenticate with Amazon SES using the AWS SDK
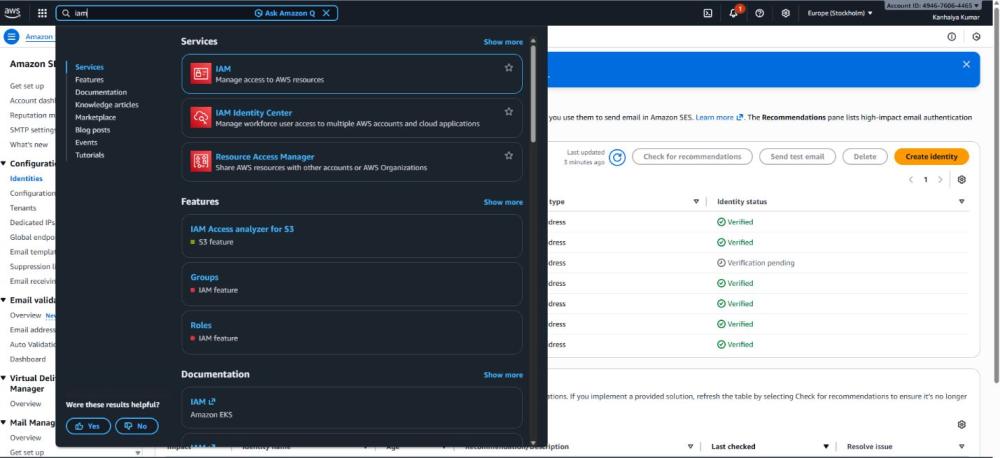
Figure 1: IAM user summary page
Attach Required IAM Permissions
Attach the following AWS managed policies to the IAM user:
- AmazonSESFullAccess
- AmazonSNSFullAccess
These permissions are required to:
- Send emails using Amazon SES
- Publish and receive SNS notifications for Delivery, Bounce, and Complaint events
Without these permissions, email sending and event tracking will not function correctly
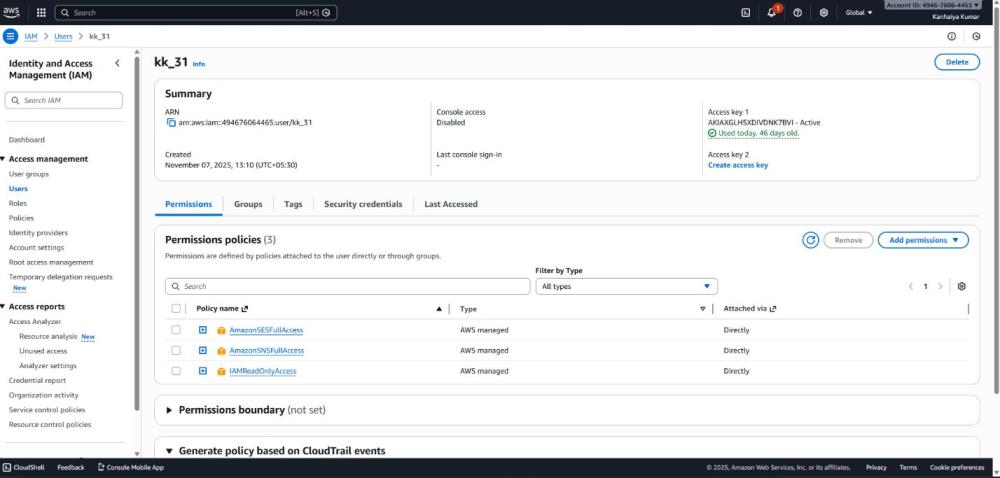
Figure 2: IAM Permissions
Generate AWS Access Keys
1. Open the IAM user created for Amazon SES.
2. Navigate to Security credentials.
3. Create a new Access Key.
4. Select Application running outside AWS when prompted.
5. Copy and securely store the following credentials:
a. Access Key ID
b. Secret Access Key
Important:
The AWS Secret Access Key is displayed only once during creation. If the secret key is lost, a new access key must be generated, and the old one must be deactivated.
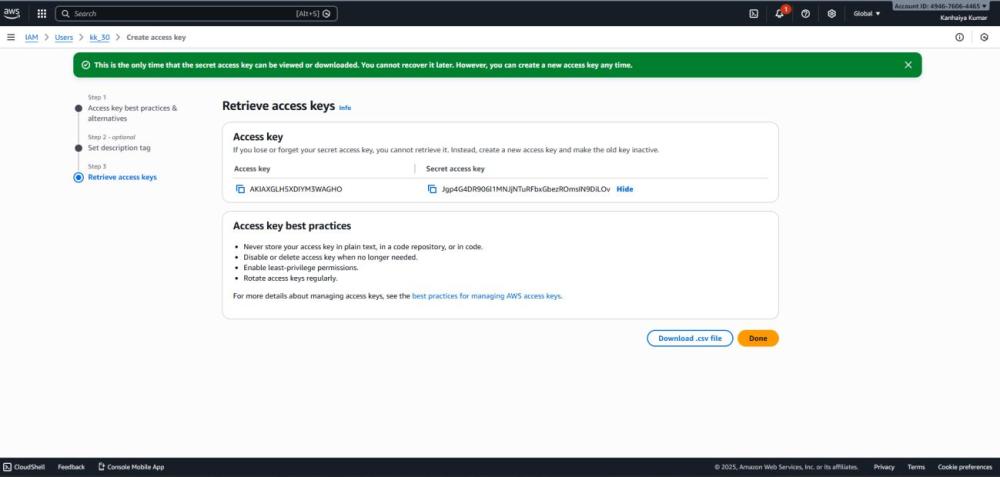
Figure 3: AWS Access Keys
Verify Amazon SES Region
Amazon SES is a region-specific service.
1.Identify the AWS region where Amazon SES is configured (for example: Europe (Stockholm)).
2. Ensure the same region is selected later in the Odoo Amazon SES configuration.
A region mismatch between AWS and Odoo will cause connection and email delivery failures.
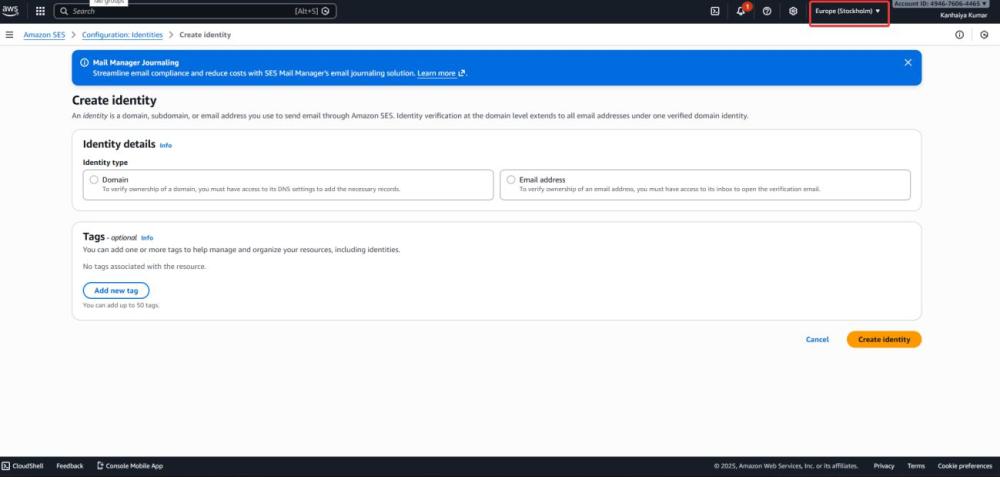
Figure 4: AWS Region Selection
Verify Sender Email or Domain Identity
1. Navigate to Amazon SES → Configuration → Identities.
2. Verify at least one Email Address or Domain.
3. Use a verified identity as the Default From Email in Odoo.
Emails sent from unverified identities will be rejected by Amazon SES.
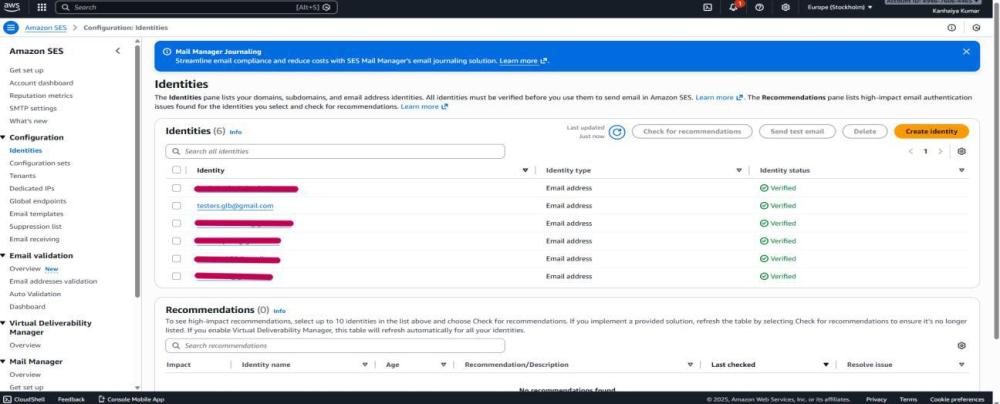
Figure 5: AWS Verified Users
Odoo Configuration & Usages
Install the Module
- In the Apps search bar, type: Amazon SES Email Service.
- The module will appear in the search results.
- Click the Install button.
- Wait for Odoo to finish installing and updating menus.
- The module is now active.
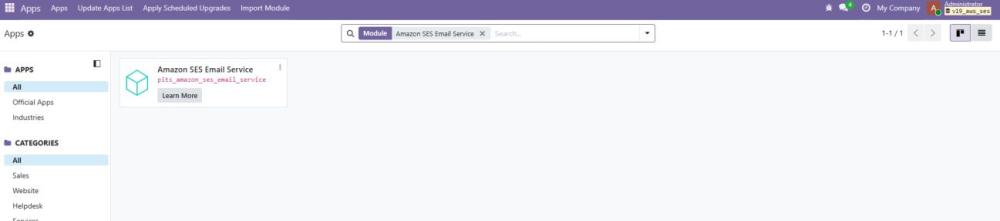
Figure 6: Plugin Install Page
Amazon SES Configuration User Access
- Give User Access to access the AWS SES Configuration Menu
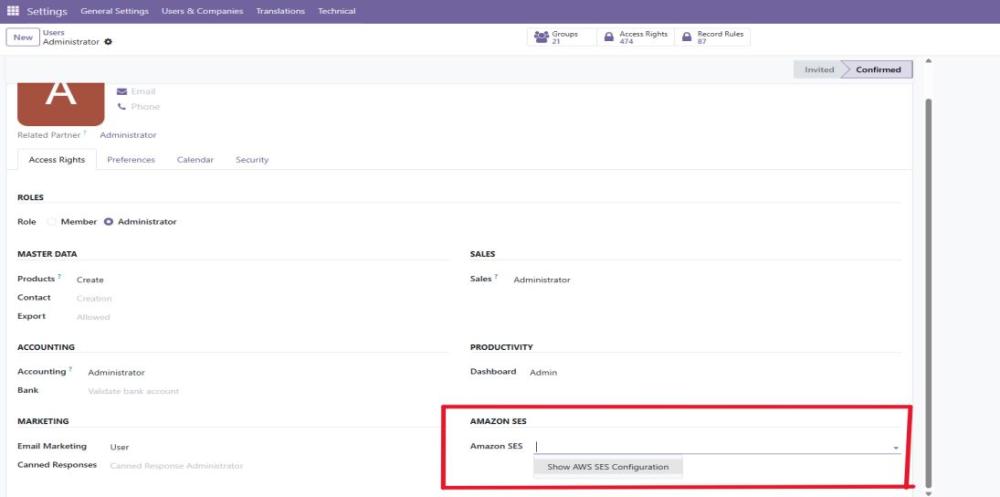
Figure 7: Amazon SES Group Access
- Navigate to AWS SES Configuration → AWS SES Configuration → Click → New
- AWS Access Key ID - Enter AWS Access Key ID for authentication.
- AWS Secret Access Key - Enter AWS Secret Access Key for authentication.
- AWS Region - Select the AWS region where your SES is configured.
- Default From Email - Set a default sender email (must be verified in AWS SES).
- Click on the Test SES Connection Button to establish the connection with Amazon SES.
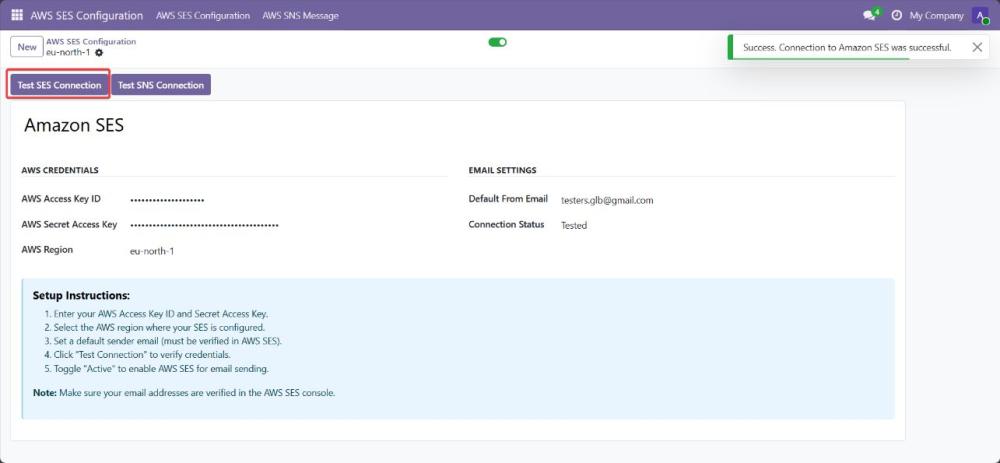
Figure 8: Amazon SES Configuration
Send all Odoo emails via Amazon SES using AWS SDK.
- Instead of using Odoo’s traditional SMTP servers, the system routes every outgoing email through Amazon SES using the AWS SDK (SESv2).
- The plugin automatically intercepts Odoo’s email flow and sends emails through SES programmatically using SES API calls.
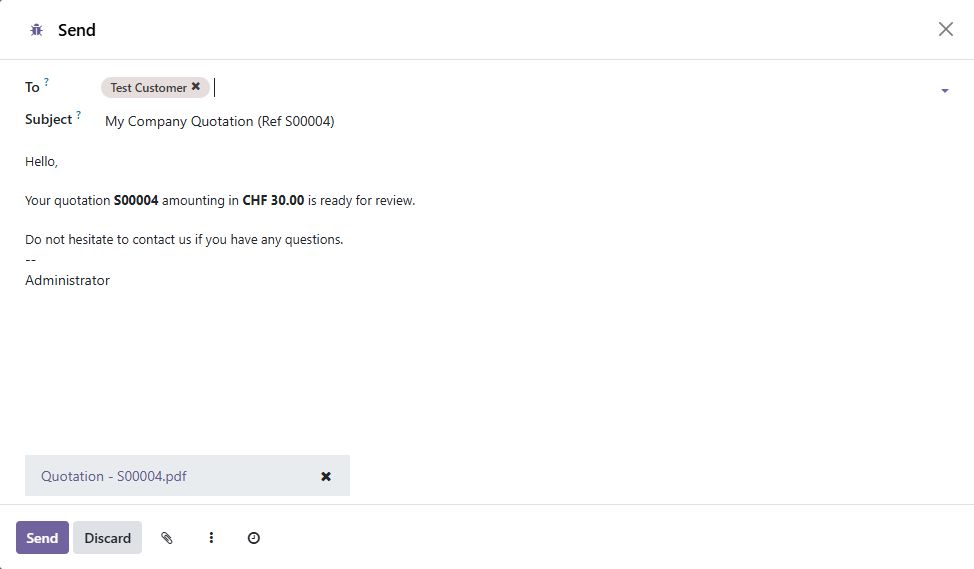
Figure 9: Odoo Send Email Interface
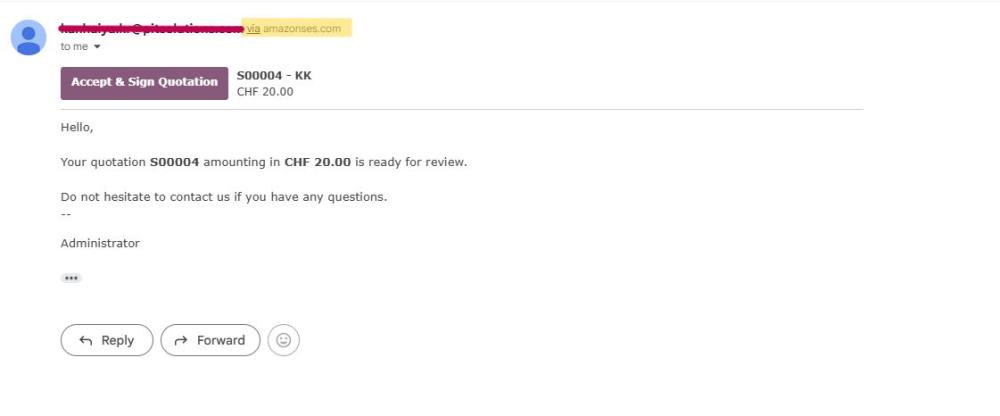
Figure 10: Outgoing email via Amazon SES
Configure SNS to receive real-time Delivery, Bounce, and Complaint events
- Navigate to AWS SES Configuration → AWS SES Configuration → Click → Test SNS Connection.
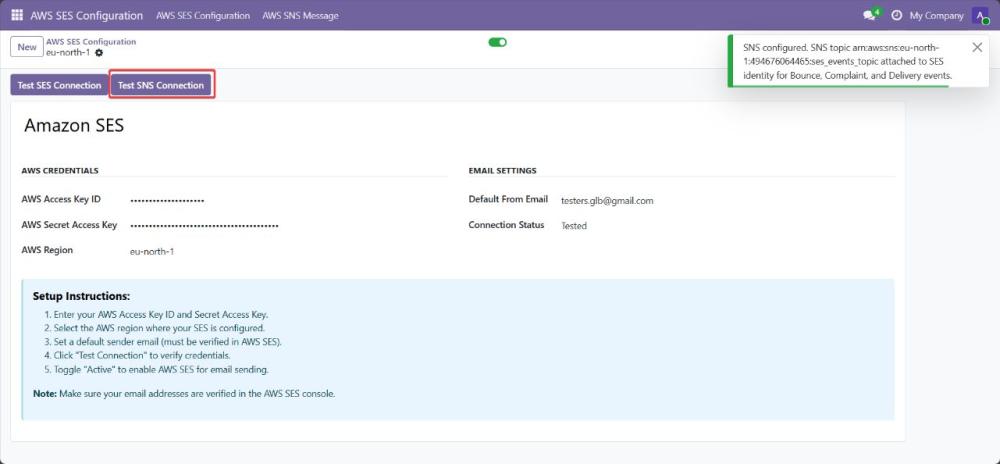
Figure 11: Amazon SNS Configuration
- Amazon SNS (Simple Notification Service) is configured to receive all events from SES, such as:
o Delivery → Email reached the recipient’s mail server
o Bounce → Recipient’s email address is invalid, mailbox full, or blocked
o Complaint → Recipient marked the email as spam
- These events are published by SES to an SNS topic, which sends them to an HTTPS endpoint in Odoo.
- This enables real-time monitoring of email status inside Odoo.
- Make Sure your subscription URL must be confirmed in the amazon SNS as shown on the below Image

Figure 12: Amazon SNS Configured URL In AWS.
Store SNS notifications
- Store SNS notifications in a custom model for email analytics.
- Navigate to AWS SES Configuration → AWS SNS Message.
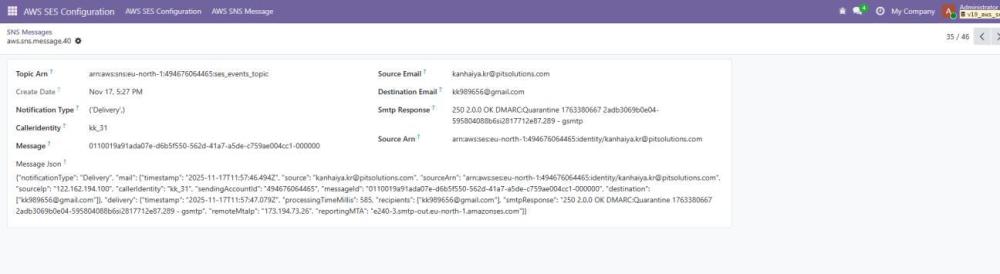
Figure 13: SNS Notification Messages
- And storing these SNS notification on Odoo mail model.
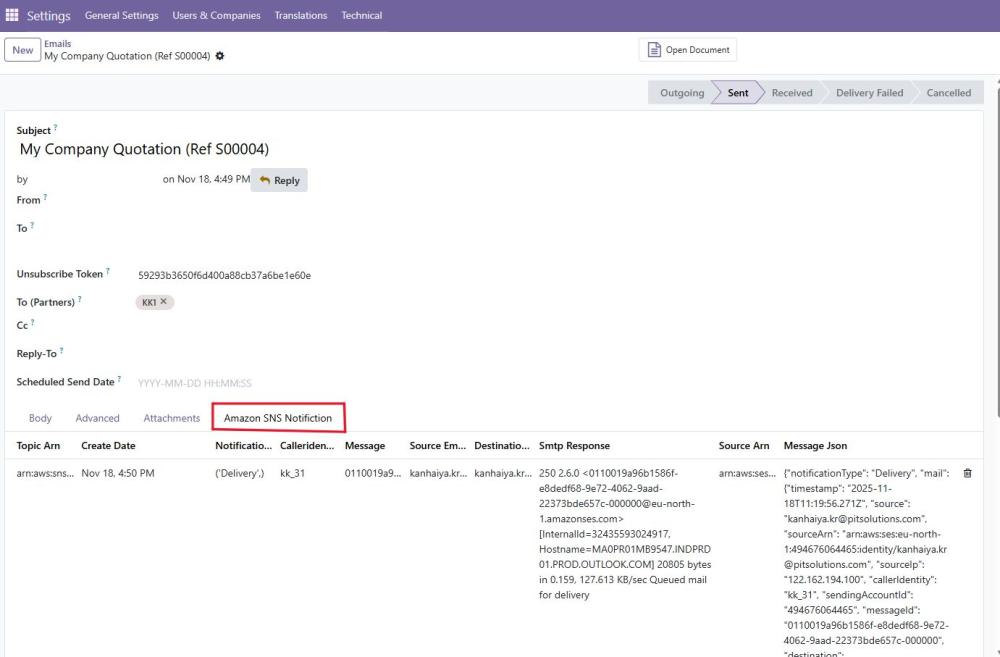
Figure 14: SNS Notification Messages in Odoo Email
Add Unsubscribe link in every outgoing email using a secure token
Each outgoing email automatically includes an unsubscribe link containing a secure token.
When a recipient clicks the link:
- They are taken to a custom Odoo controller.
- The system verifies the token.
- The partner is marked as unsubscribed or added to a blacklist.
- Future emails to the recipient are blocked.
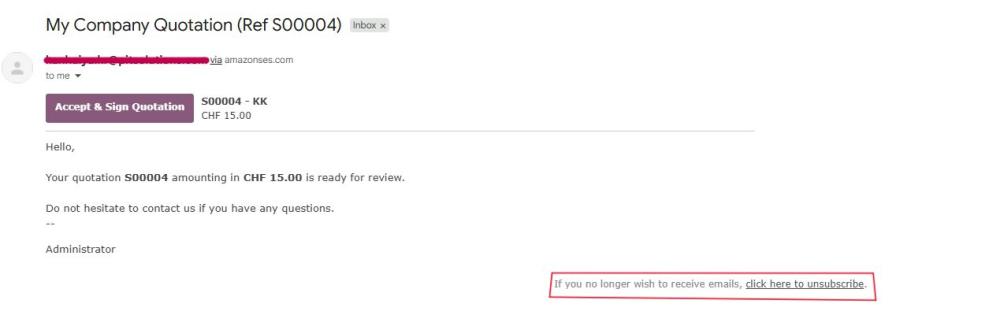
Figure 15: Unsubscribe Link
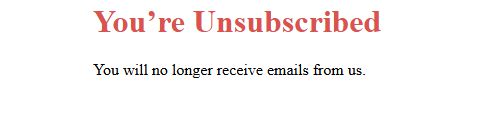
Figure 16: Unsubscribe Page.
Resubscribe partners to allow future communication
A Re-subscribe button is added to the Partner form in Odoo.
- Navigate to Contacts → Open Contact form → Click on Re-Subscribe Email Button.
- When clicked:
o The partner is removed from the blacklist.
o They can receive emails again
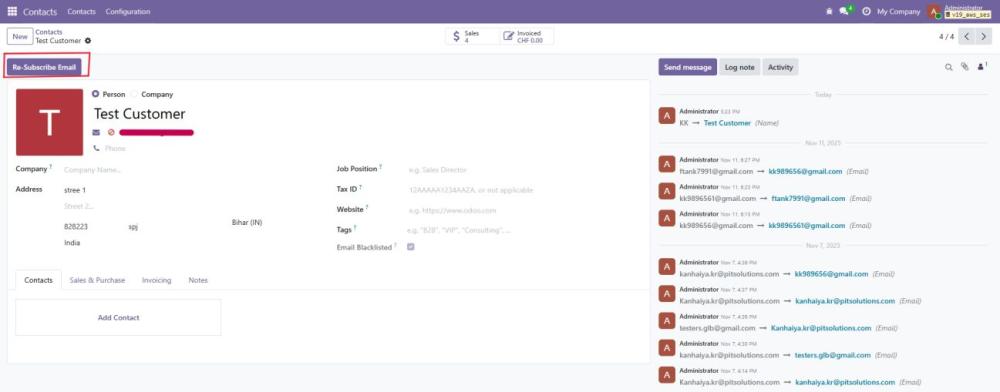
Figure 17: Resubscribe Button
Disable AWS SES Configuration
The AWS Configuration can be disabled by clicking on the radio button showing Active. The disabled AWS configuration will get archived and will be removed from the list view. To access it again we must filter the archived records
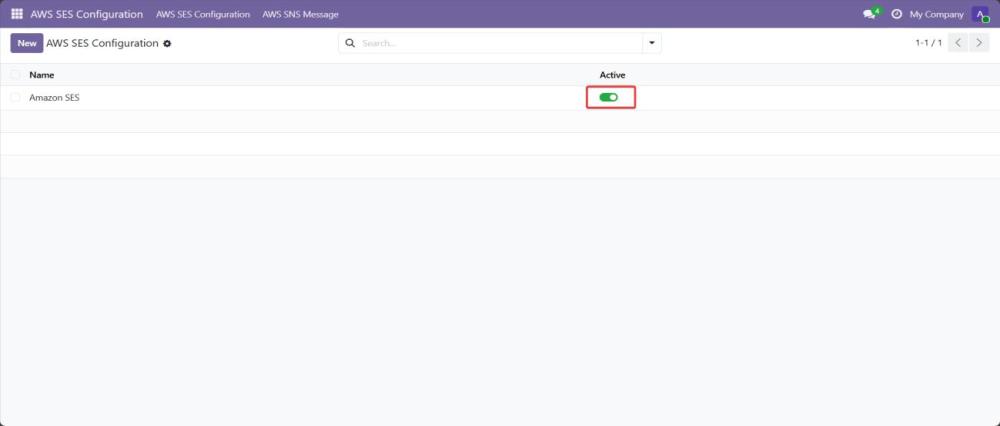
Figure 18: Disable AWS SES Configuration
Technical Requirements & Compatibility
- Technical Requirements:
o Required Odoo modules: Mail, Contacts (must be installed and enabled).
- Compatibility:
o Compatible with Odoo Community Edition and Odoo Enterprise Edition v19.0.
Change Log / Release Notes
- Version 1.0.0 – March 2026
o Initial release
Support
If you have questions, use our contact form at webshopextension.com or email at support@webshopextension.com.