Categories
Magento
WordPress
SAP Commerce
Odoo
Shopify
Typo3
Shopware
nopCommerce
Pimcore
Hyvä
OXID eShop


1. Introduction
The Advanced Payment Control module for Odoo 17 is designed to transform how businesses manage their payment processes. It introduces configurable, automated workflows for each payment method, enabling organizations to streamline sales, invoicing, and payment operations across both backend (manual) sales and e-commerce.
By bridging sales, accounting, and logistics, this module ensures every order follows an automated flow tailored to the selected payment method. Whether you need to support classic invoicing, prepayment, or custom payment workflows, the module delivers the flexibility and control needed for an efficient, error-free order-to-cash cycle.
2. Key Features
- Payment Method Automation – Define workflows (order confirmation, invoice creation, payment registration, etc.) for each payment method, covering both backend and e-commerce sales.
- New Payment Providers – Introduces Invoice (post-delivery payment) and Payment in Advance (pre-delivery payment), suitable for B2B and B2C models.
- Integration – Links payment logic to sale orders, invoices, partners, and stock pickings for consistent enforcement.
- Automation – Automatically creates, validates, sends invoices, and registers payments based on workflow rules, reducing manual effort.
- E-commerce Support – Configure workflows specifically for website sales, ensuring proper payment handling during online checkout.
- Payment Status Tracking – Real-time status updates control stock release so goods are shipped only when payment conditions are satisfied.
3. Installation
Follow these steps carefully to install the module:
- Upload the Module
- Download the module ZIP file from the provider.
- Extract the ZIP file on your local computer.
- Copy the entire folder to your Odoo custom addons directory.
Example path:/odoo/custom/addons/ - Ensure proper file permissions.
- Update the Apps List
- Log in to Odoo with an Administrator account.
- Navigate to Apps from the main menu.
- In the Apps dashboard, click Update Apps List( If you don’t see this button, enable Developer Mode from Settings → General Settings → Developer Tools).
- In the pop-up, click Update to refresh the list of available apps.
- Install the Module
- In the Apps search bar, type: Advanced Payment Control
- The module will appear in the search results.
- Click the Install button.
- Wait for Odoo to finish installing and updating menus.
- The module is now active.


Figure 1: Plugin Install Page
4. Odoo Advanced Payment – Configuration & Usage
4.1 Global Settings
- Navigate to Settings → Sales → Default Payment Method.
- Select a default payment method to be applied automatically when new sales orders are created.
- Save changes.
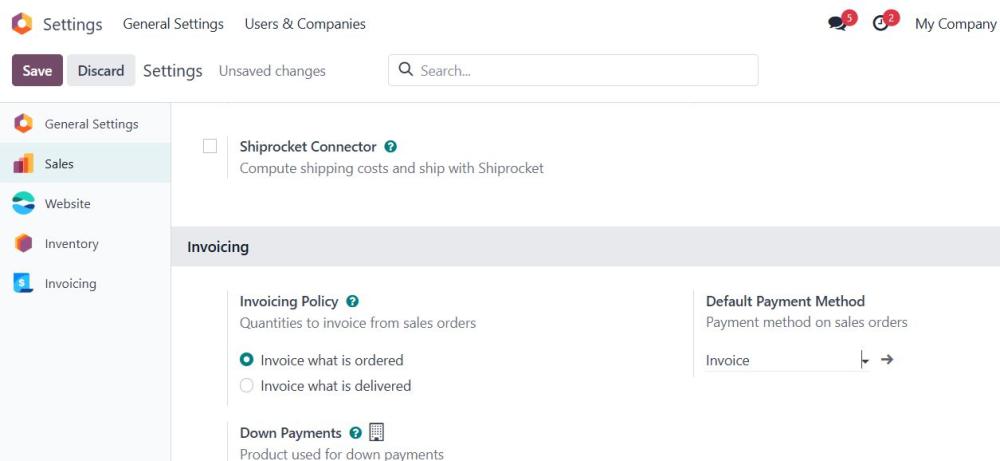
Figure 2: Global Payment Method Configuration
4.2 Create Payment Workflows
- Go to Invoicing → Configuration → Payment Workflows.
- Click Create.
- Fill in the details:
- Name: e.g., Invoice or Payment in Advance
- Code: Internal code for the workflow
- Company: Select applicable company (for multi-company setups)
- Payment Journal: Choose the journal to record transactions (e.g., Cash, Bank, Online Payment)
- Configure workflow steps (check the boxes for actions like Create Invoice, Validate Invoice, Send Invoice, Create Payment).
- Save the workflow.
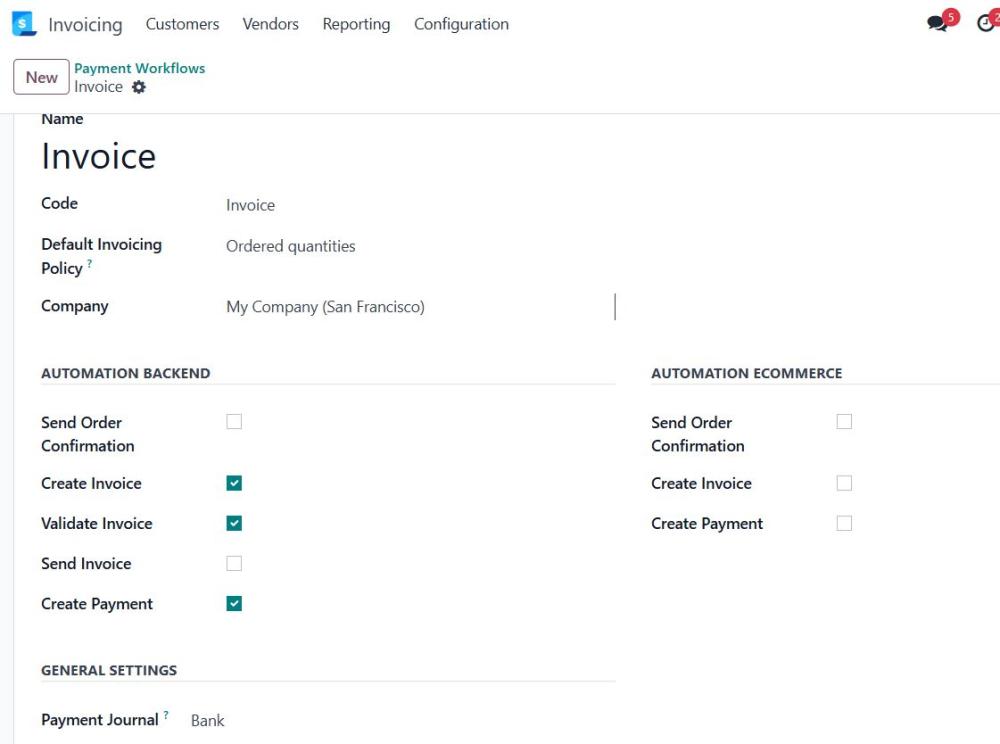
Figure 3: Payment Workflow Setup
4.3 Sale Order Integration
When creating a Sale Order, you can attach a workflow that automates invoicing and payments.
Steps:
- Navigate to Sales → New Sale Order.
- Add customer and product details.
- In the Payment Workflow field, select the desired workflow.
- Confirm the order.
Based on the workflow rules, Odoo will:
- Send confirmation email.
- Create and validate an invoice.
- Send the invoice to the customer.
- Register a payment (if configured).
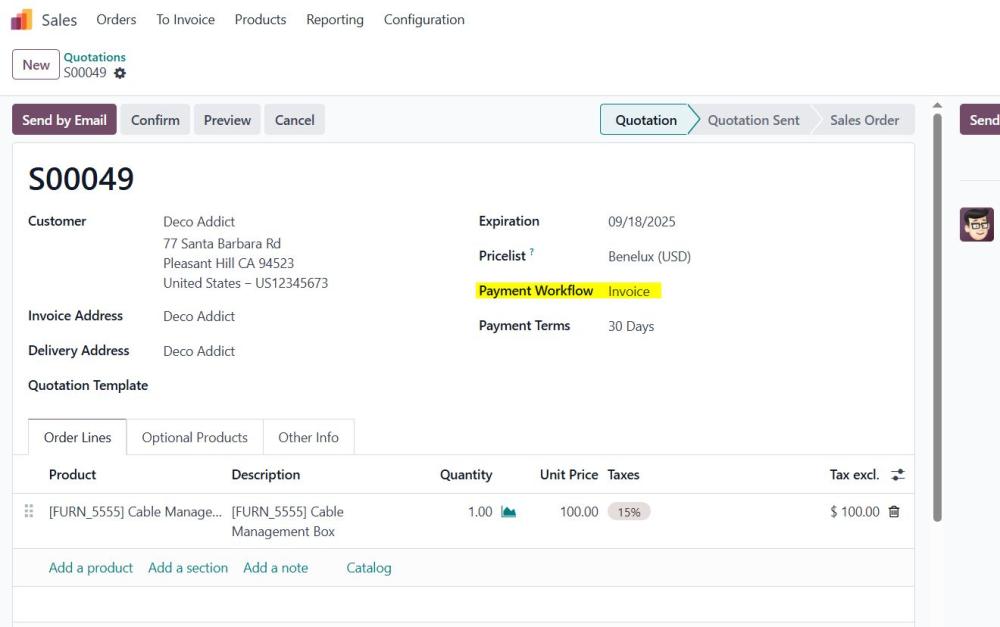
Figure 4: Sale Order Integration
4.3.1 Send Order Confirmation
If “Send Order Confirmation” is enabled:
- After confirming the sale order, Odoo automatically sends an email confirmation to the customer.
- Customer receives the order details instantly.
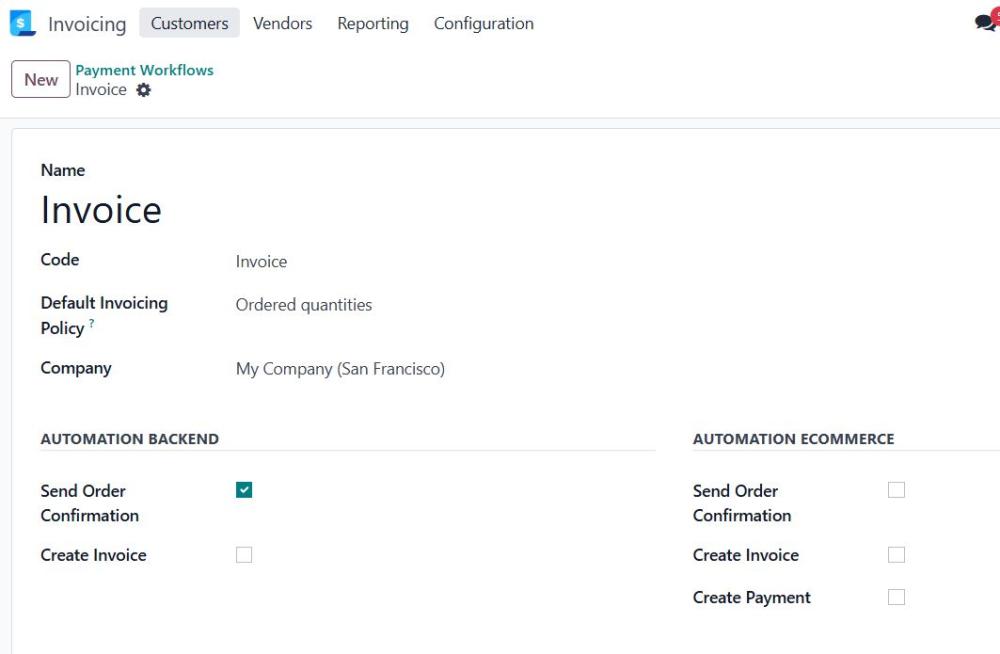
Figure 5: Order Confirmation Configuration
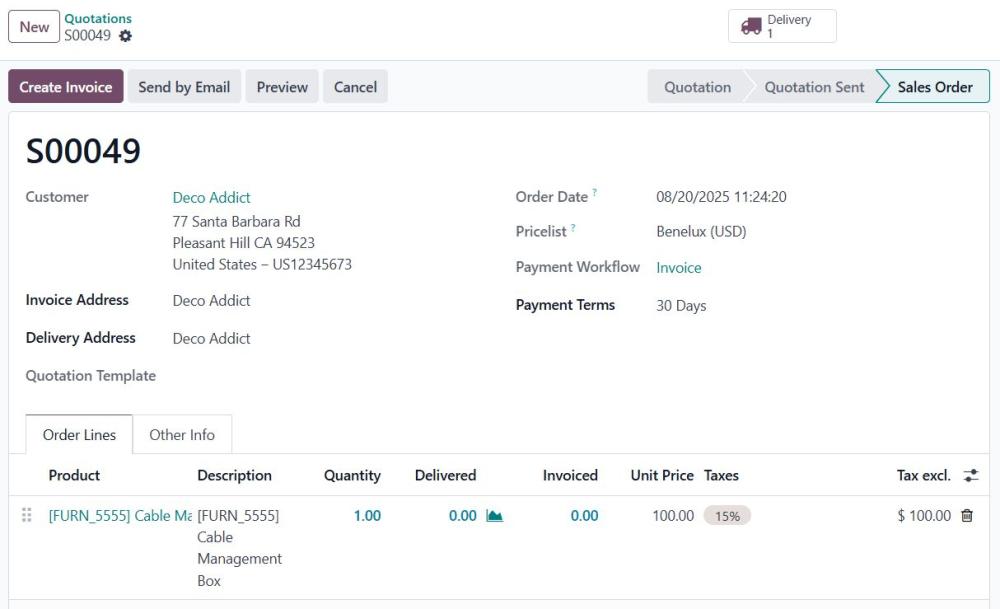
Figure 6: Sale Order Email Confirmation
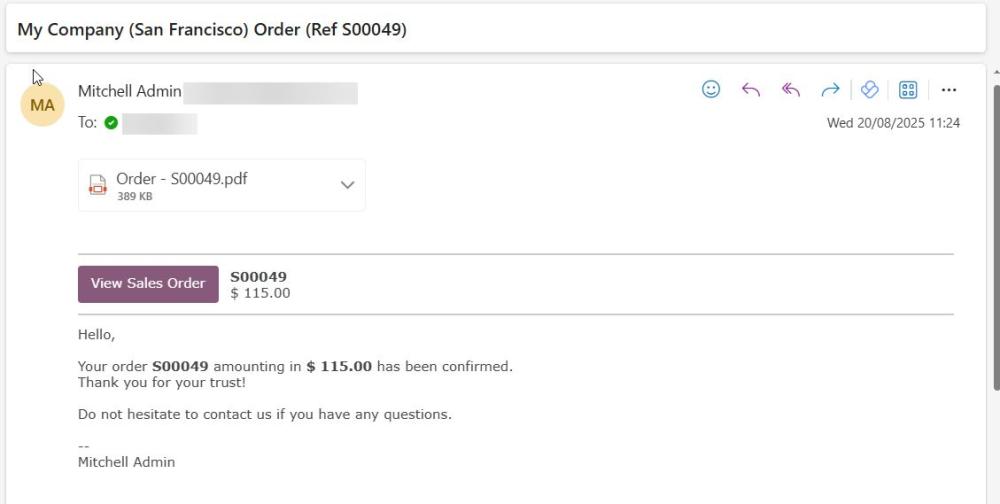
Figure 7: Order Confirmation Example Email
4.3.2 Invoice Workflow
- Create Invoice – System generates invoice automatically after order confirmation.
- Validate Invoice – Posts the invoice immediately, updating status to Posted.
- Send Invoice – System emails the invoice to the customer.
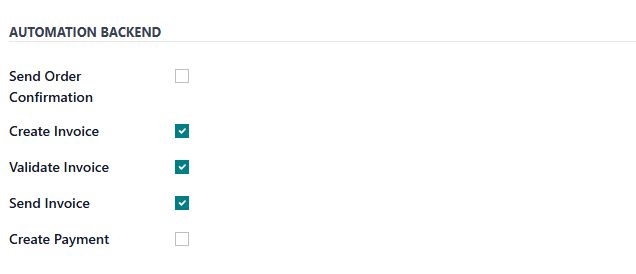
Figure 8: Invoice Configuration
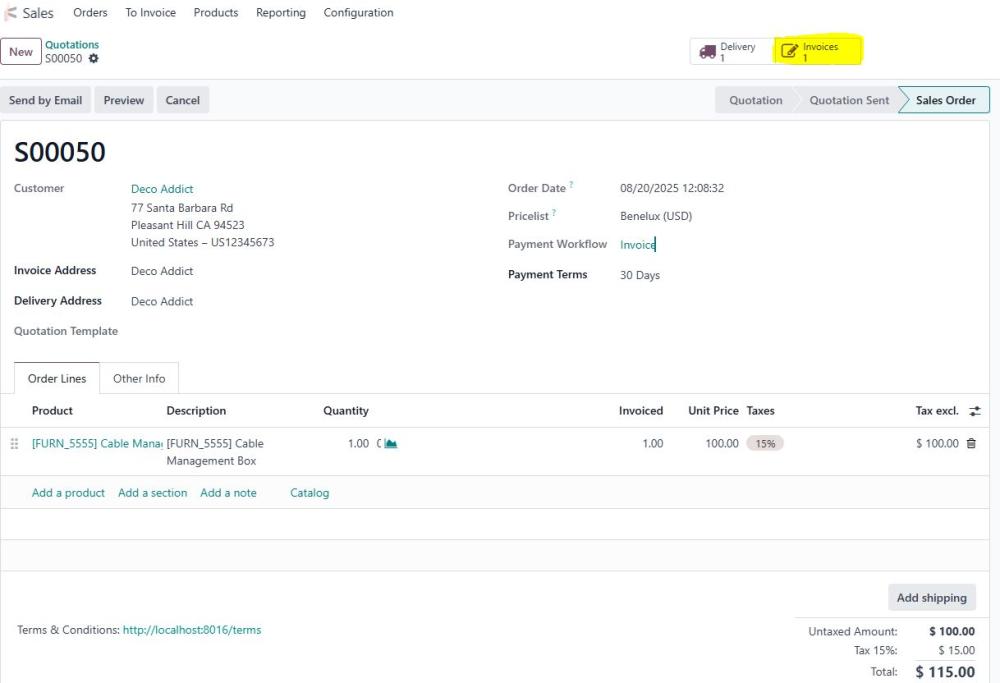
Figure 9: Sale Order
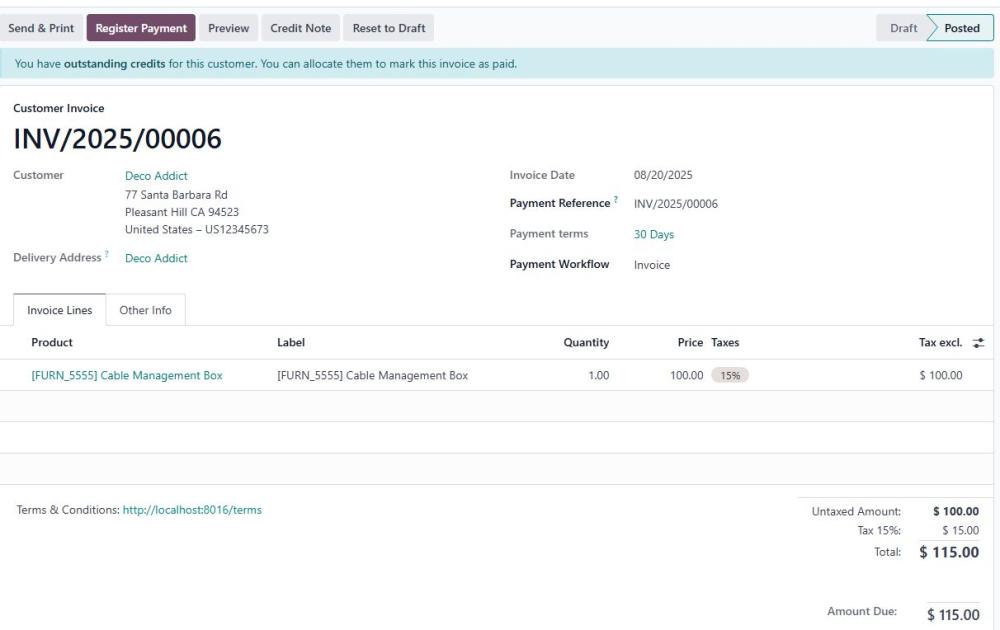
Figure 10: Validated Invoice
4.3.3 Payment Workflow
If “Create Payment” is enabled:
- After the invoice is posted, the system automatically creates a payment entry.
- The payment is linked to the invoice and reflected in the Payments tab.
Important: To auto-register payments, you must enable both:
- Create Invoice
- Validate Invoice
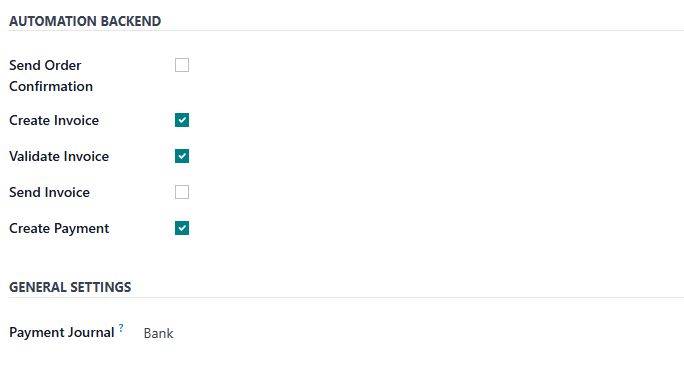
Figure 11: Payment Configuration
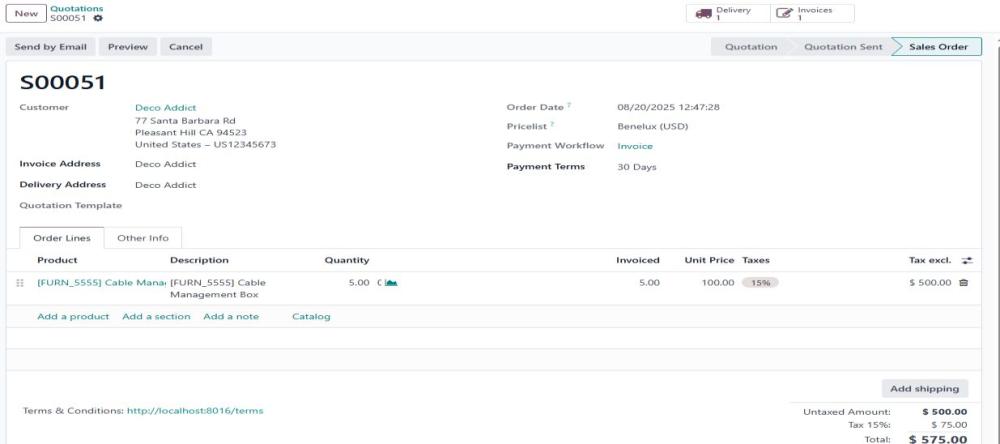
Figure 12: Sale Order
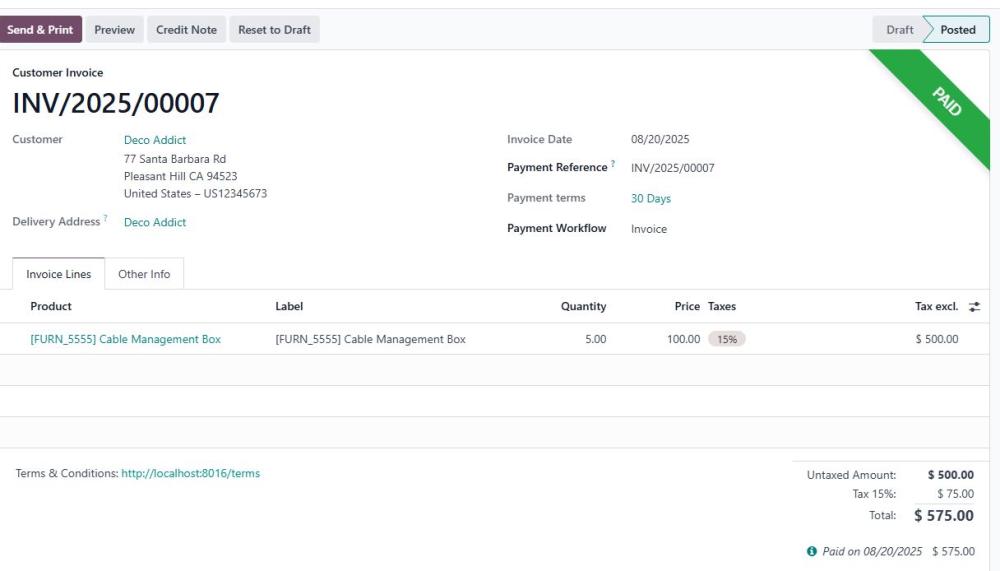
Figure 13: Invoice
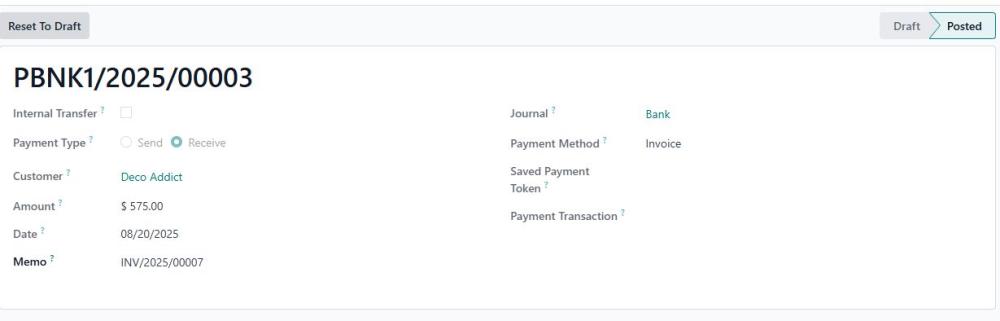
Figure 14: Payment Record
4.4 E-Commerce Integration
For website sales, customers select a payment method during checkout. The system applies e-commerce-specific workflows such as ecom_send_order_confirmation, ecom_create_invoice, and ecom_create_payment.
4.4.1 Payment Provider Setup
- Navigate to Invoicing → Configuration → Payment Providers.
- Select or create a provider.
- Assign the relevant Payment Workflow.
- Save changes.
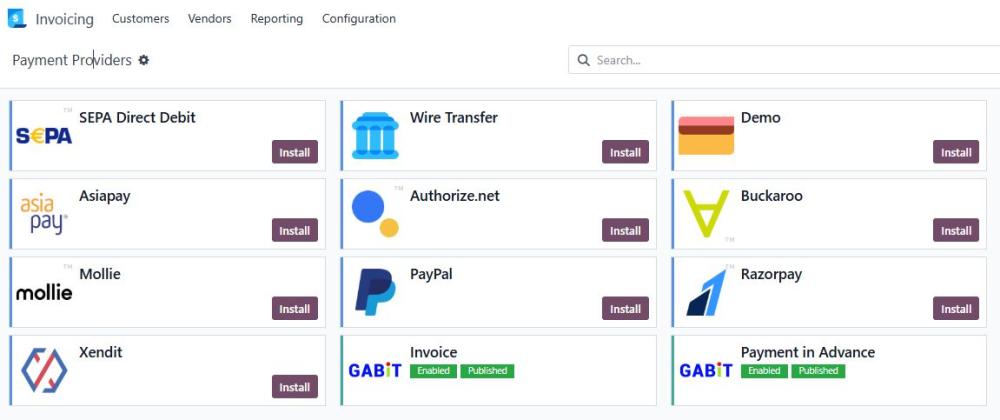
Figure 15: Payment Provider Configuration
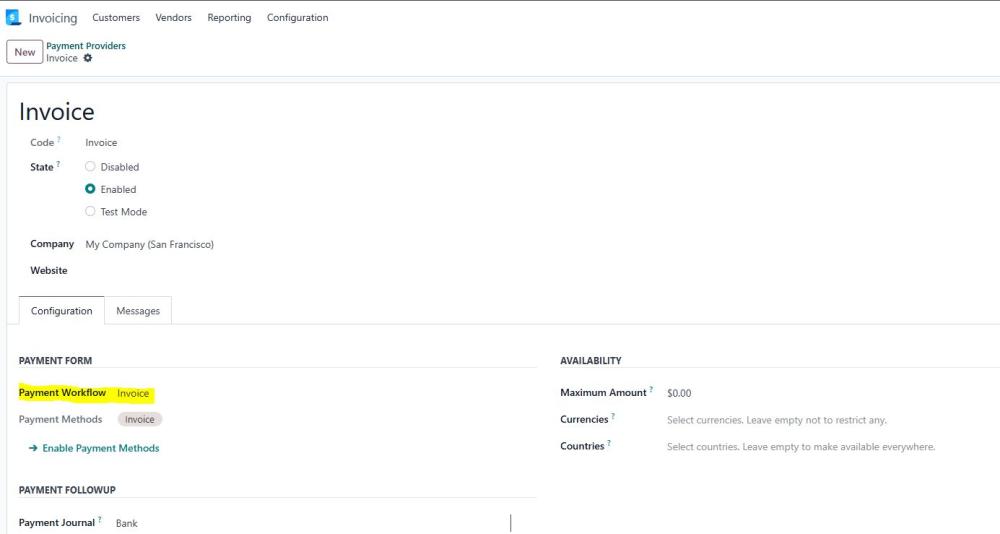
Figure 16: Payment Provider Configuration
4.4.2 Send Order Confirmation
If enabled, an order confirmation email is sent automatically after checkout.
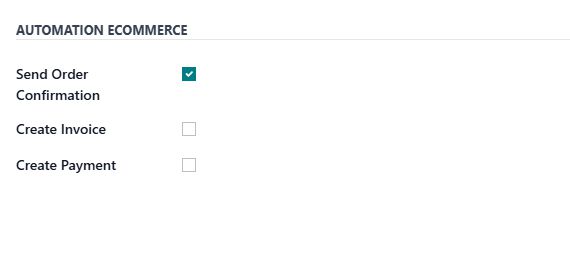
Figure 17: Order Confirmation Configuration
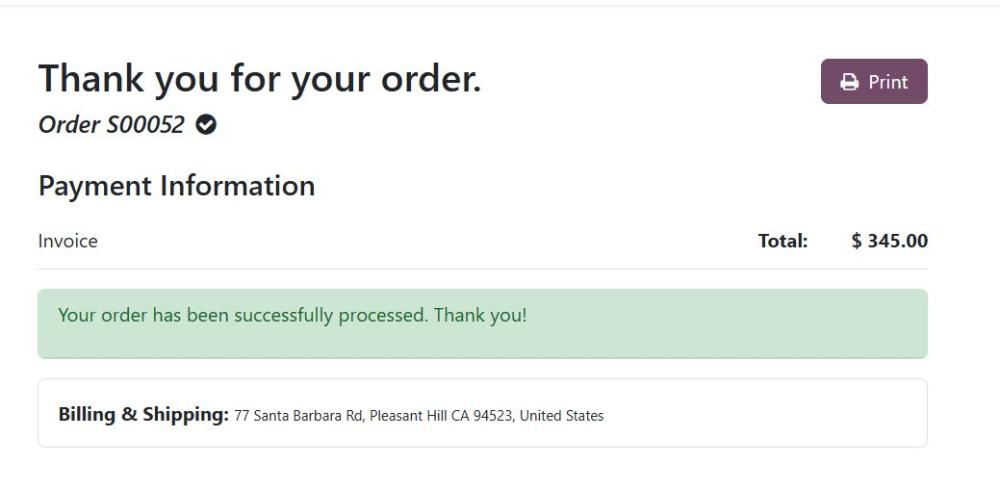
Figure 18: Sale Order Placed
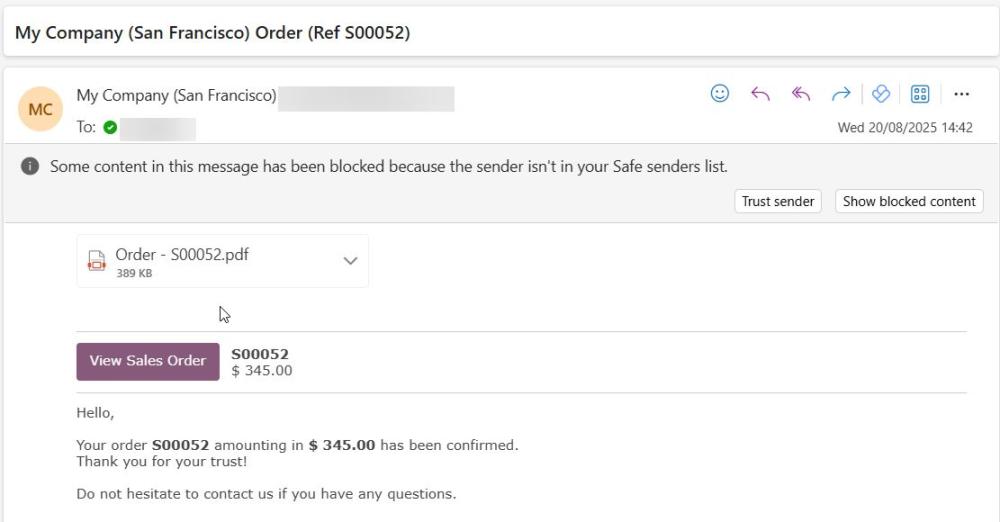
Figure 19: Example Email
4.4.3 Invoice Automation
- Ecom Create Invoice – Automatically generates invoice after order confirmation.
- Ecom Send Invoice – Automatically emails invoice to the customer.
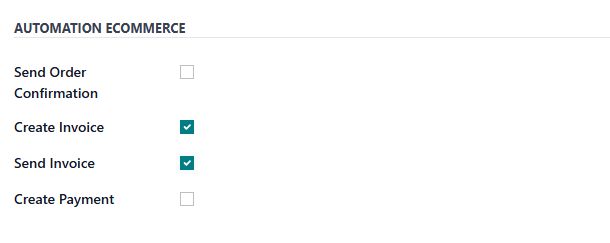
Figure 20: Invoice Configuration
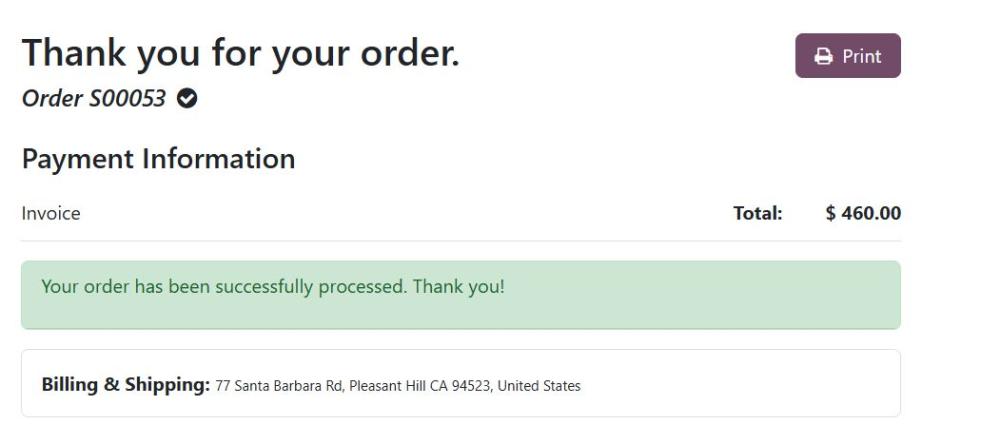
Figure 21: Sale Order Placed

Figure 22: Invoice
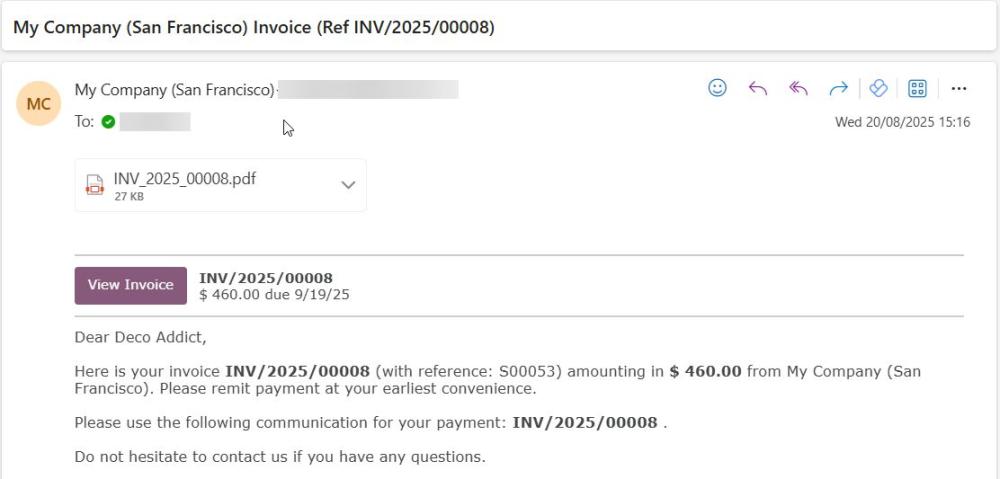
Figure 23: Example Invoice Mail
4.4.4 Create Payment
- If Ecom Create Payment is enabled, Odoo automatically records a payment once the invoice is posted.
- For manual workflows, the payment is linked once invoice is confirmed.
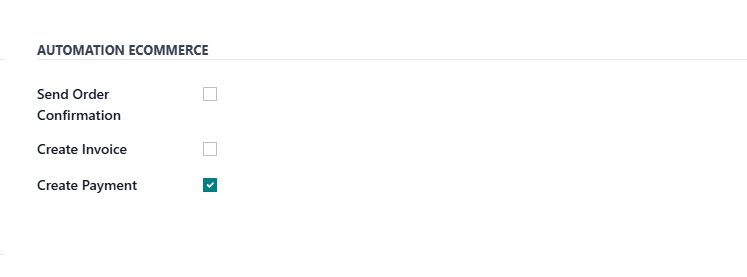
Figure 24: Ecom Payment configuration
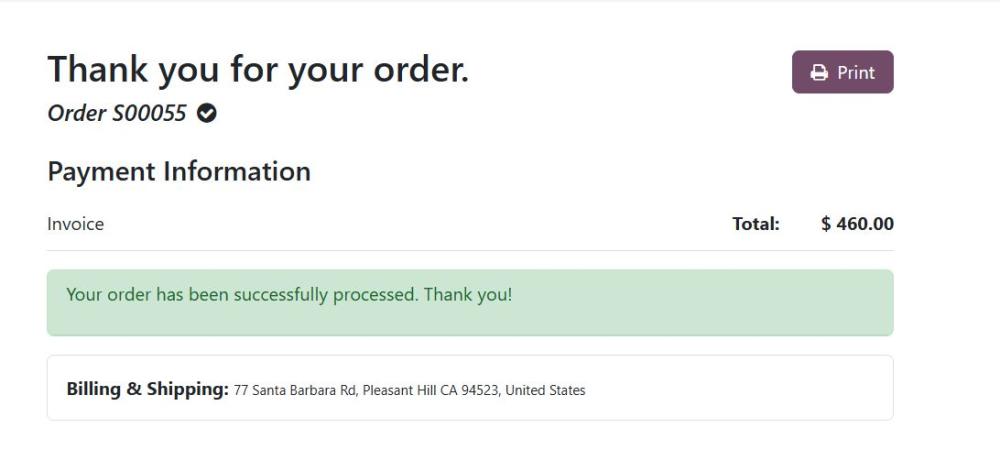
Figure 25: Sale Order Placed
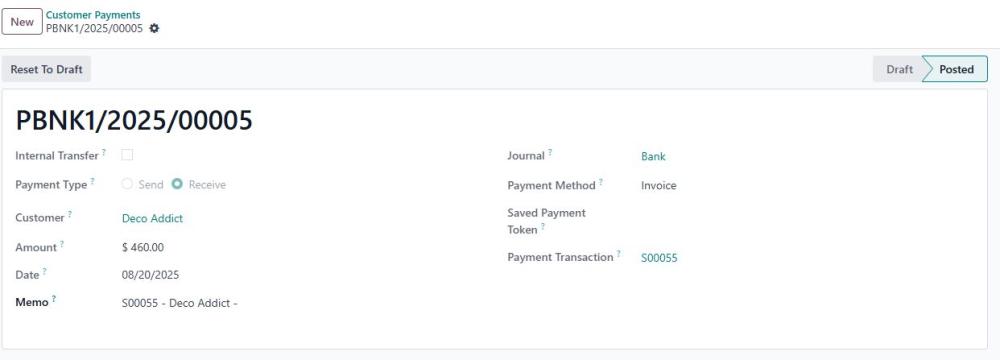
Figure 26: Customer Payment

Figure 27: Paid Invoice
4.5 Customer configuration
You can assign a default payment workflow per customer.Steps:
- Go to Customers → Select Customer.
- Open Sales & Purchase tab.
- Select the Payment Workflow.
- Save changes.
Next time you create a sale order for this customer, the workflow will be applied automatically.
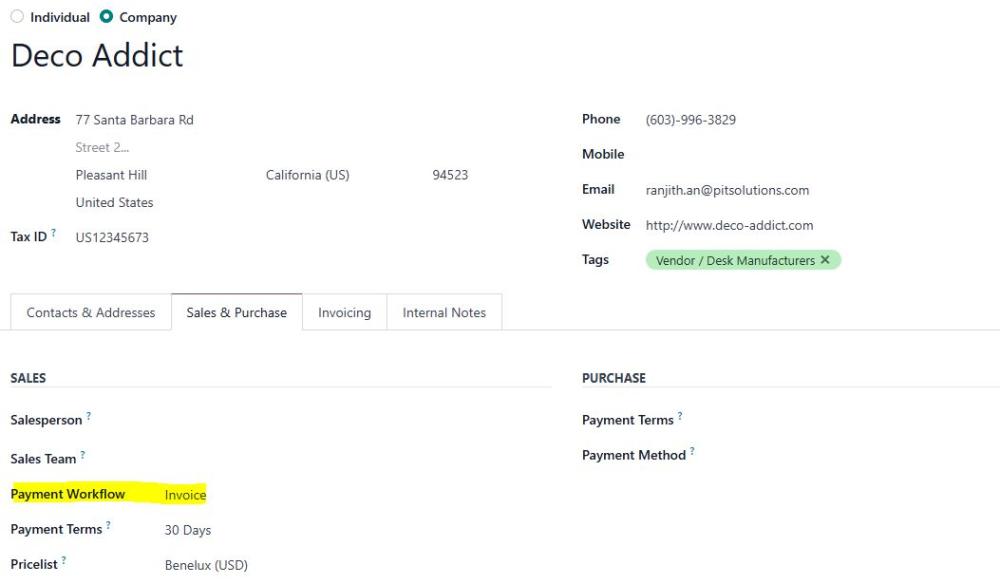
Figure 28: Customer Configuration
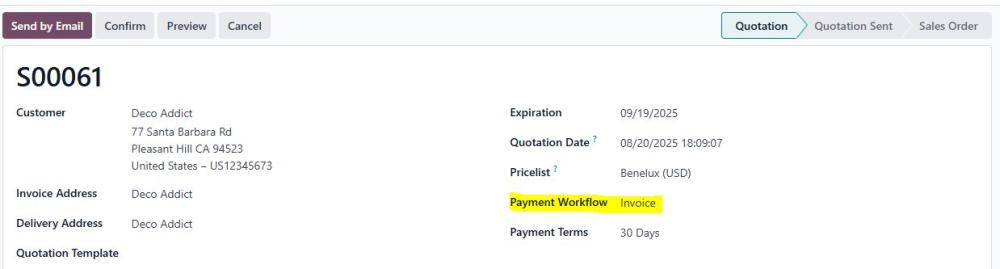
Figure 29: Auto Payment Workflow Mapped
4.6 Payment in Advance Workflow
The “Payment in Advance” (PIA) payment method is designed for scenarios where you want to ensure that payment is received before goods or services are delivered. This is common in B2C, high-value, or custom order situations, and is fully supported in both backend and e-commerce (website) flows by the module.
Steps:
- Create a Sale Order.
- In Payment Workflow, select Payment in Advance.
- Confirm the order.
- Odoo will generate the invoice.
- Delivery order status changes to Waiting Payment.
- Once the invoice is paid, the system releases the delivery automatically.
Alternatively, you can use the Release Picking button to manually release delivery if needed.
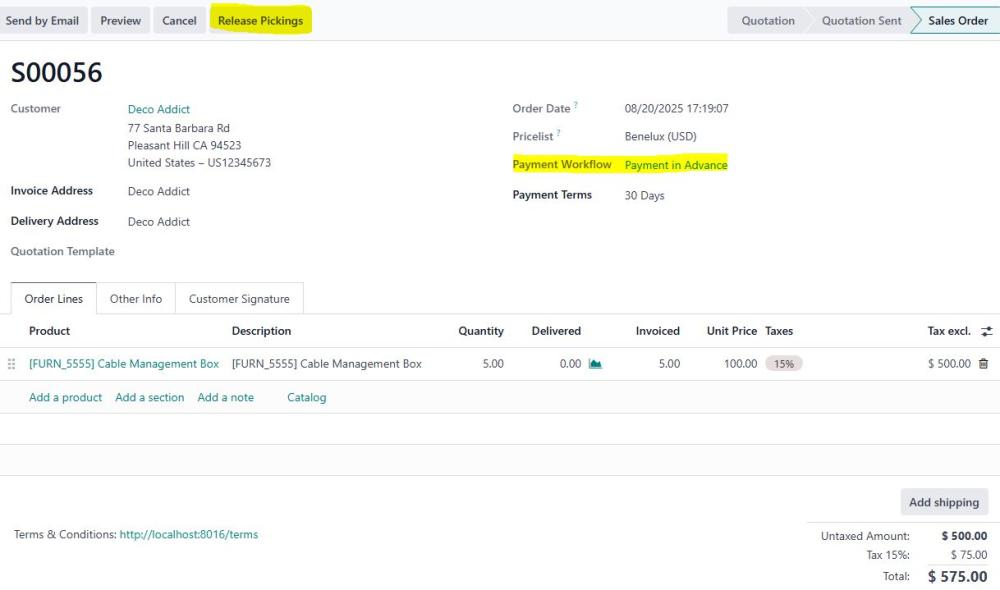
Figure 30: Sale Order
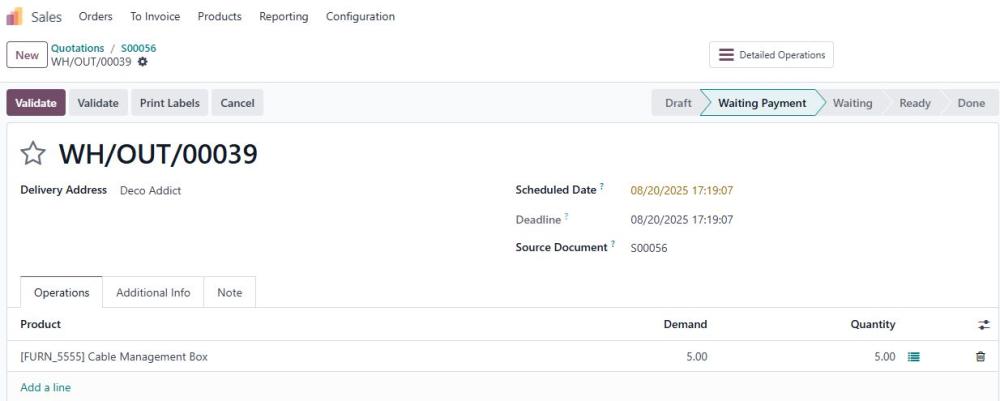
Figure 31: Delivery for Payment Advance
5. Queue Job Automation
The Queue Job feature enables payment operations in Odoo to run asynchronously in the background using the Queue Job module. Instead of making users wait for transactions to complete, tasks are processed by dedicated workers and safely stored in the database. This approach enhances performance, delivering a faster and smoother user experience while optimizing system resource usage.
It also improves reliability through automatic retries in case of failures, clear monitoring of job status, and prioritization of critical tasks. Advanced capabilities such as scheduling, delayed execution, and job dependencies provide additional flexibility for managing complex processes efficiently.
5.1 Post Processing with Queue Job
To enable the Queue Job feature, navigate to:
Settings > General Settings > Website > Invoicing section and set “Use Queue Job for Post Processing”to Yes.

Figure 32: Configuration - Enable Queue Job
When a customer places an order and completes a transaction in eCommerce, the process runs smoothly and quickly. The Queue Job feature assigns the task to the background job queue, which starts automatically and completes the processing without interrupting the user experience.
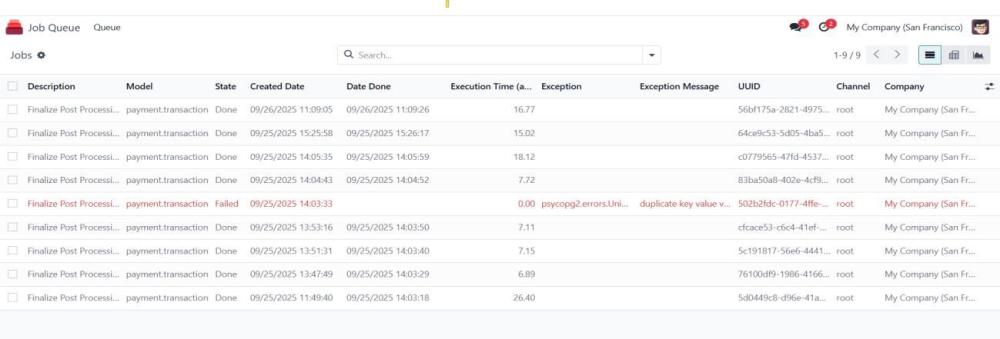
Figure 33: Queue Job List
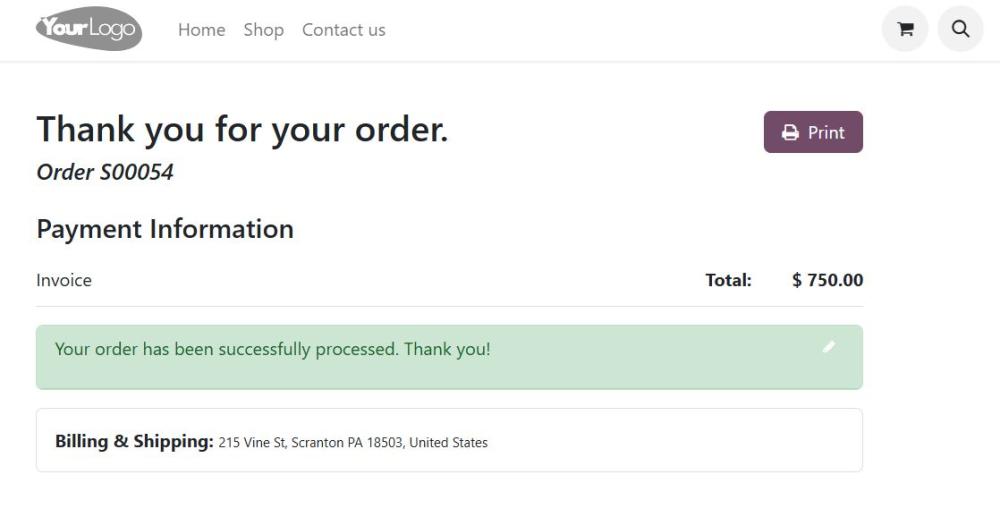
Figure 34: E-commerce Sale Order
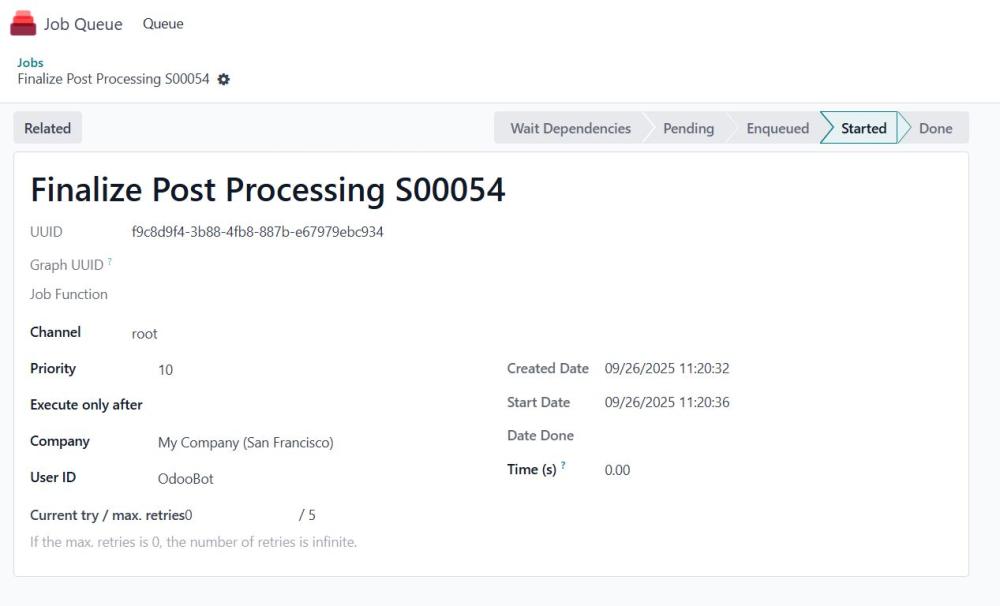
Figure 35: Initiating the Queue Job Process

Figure 36: Done Queue Job Process
- Note: To enable the Queue Job process, you must install the dependency module queue_job.
https://apps.odoo.com/apps/modules/17.0/queue_job - A warning will appear when configuring Queue Job settings if the module is not installed.
- Add the following parameters to your configuration file:
queue_job__no_delay = True
server_wide_modules = web,queue_job
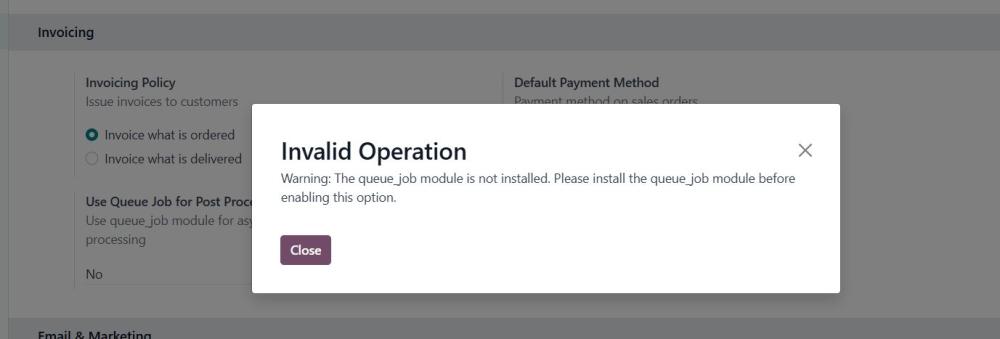
Figure 37: Validation for the Queue Job Installation
6. Technical Requirements & Compatibility
- Technical Requirements:
- Odoo module: account_payment, website_sale_stock, sale_management(must be installed).
- queue_job - if required the Post Processing with Queue Job
- Compatible With:
- Odoo Community & Enterprise Edition v17.0
7. Change Log / Release Notes
- Version 1.1.0 – October 2025
- Added support for post-processing using queue jobs.
- Version 1.0.0 – September 2025
- Initial release.
8. Support
If you have questions, use our contact form at webshopextension.com or email at support@webshopextension.com.