Push Notification Magento 2 Extension
Categories
Magento
WordPress
SAP Commerce
Odoo
Shopify
Typo3
Shopware
nopCommerce
Pimcore
Hyvä
OXID eShop


Product Specification
The push notification Magento 2 extension is used to send updates to users through Firebase Cloud Messaging. It allows messages to be delivered to users even when they are not actively using the website. This helps in sending information that needs to reach the user without waiting for them to visit the store again. The extension is built to handle real-time updates and keep communication active through notifications.
Customers are given the option to allow or deny notifications through a prompt. This choice is controlled by the user. If enabled, notifications can be sent for order-related updates. These include order placement, invoice creation, shipment updates, and credit memos. The updates are sent directly to the user’s device. This process does not require the customer to manually check their account for updates.
From the admin side, notifications can also be created and sent using a form available in the backend. Store owners can write custom messages and send them to customers when needed. The extension also supports multiple store views, languages, and websites. It works on Chrome, Firefox, and Opera on Windows, Safari on macOS, and Android devices. iOS devices are not supported. The push notification Magento 2 extension includes options to control how notifications are displayed and when they are sent.
Features
- Can easily Enable / Disable the Push Notification extension.
- Supports multi-website, multi-store and multi-lingual.
- Can easily Enable / Disable push notification for each order update (order placing, invoice generation, shipment and credit memo).
- Admin can add custom message for each order update push notification.
- The Push Notification extension allows store owner to customize push notifications for when the website is in the frontend and use the default design when the website is in the background.
- Admin can customize the position of push notification in frontend.
1. Fire Base cloud messaging
In our extension we used Firebase Cloud Messaging (FCM) for send push notification. FCM is a cloud-based service that delivers push notifications to Android, iOS, and web devices. FCM empowers developers to engage users in real time, providing personalized updates and information. With cross-platform support, user segmentation, and instant delivery, FCM enhances user experiences and retention. Its integration with Firebase amplifies its capabilities, ensuring efficient communication and effective user engagement.
For using Pits Push Notification extension in any website admin need to create a project in Fire base. Follow the steps given below to create a project in FCM.
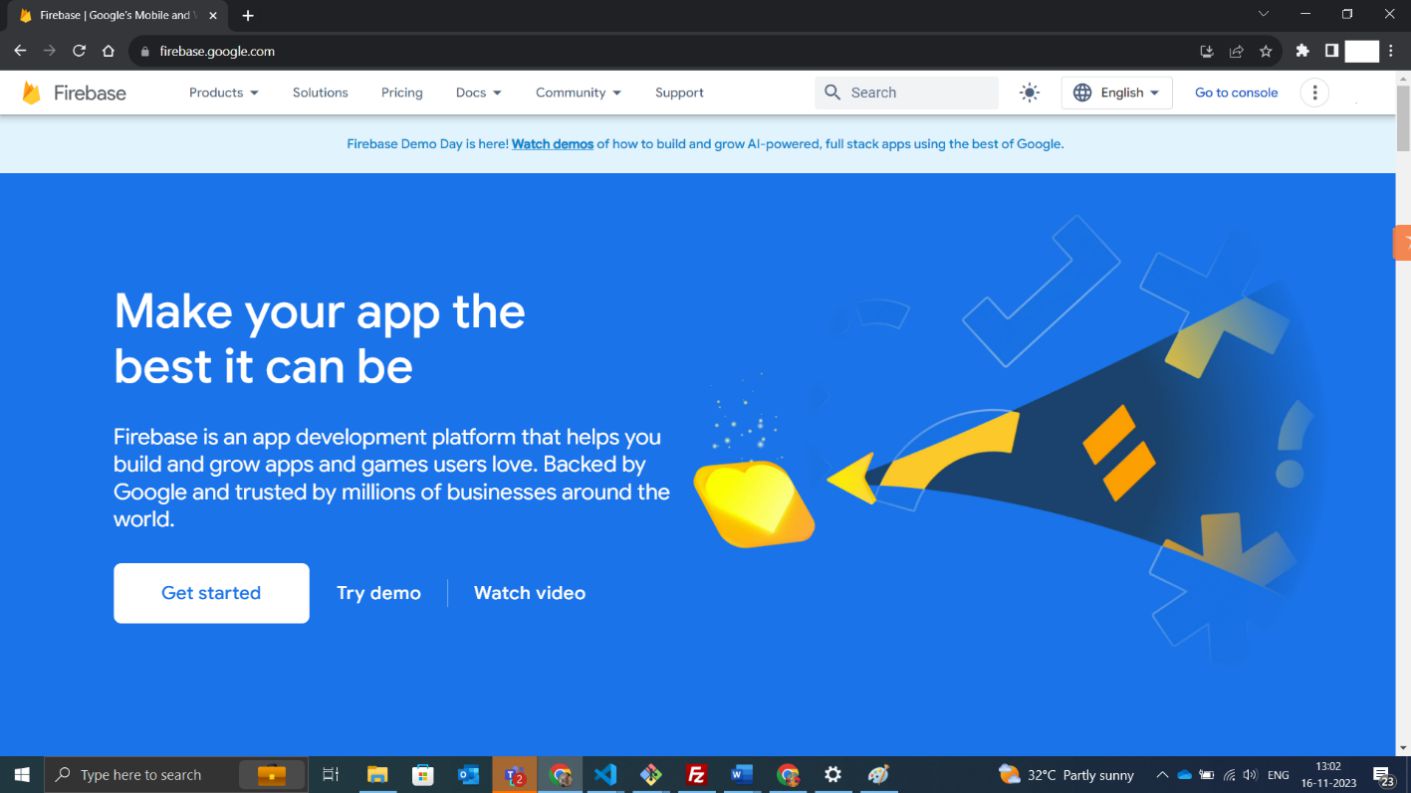
- Go to the fire base website https://firebase.google.com/ create an account and click “go to console” button.
- Open console, create new project.
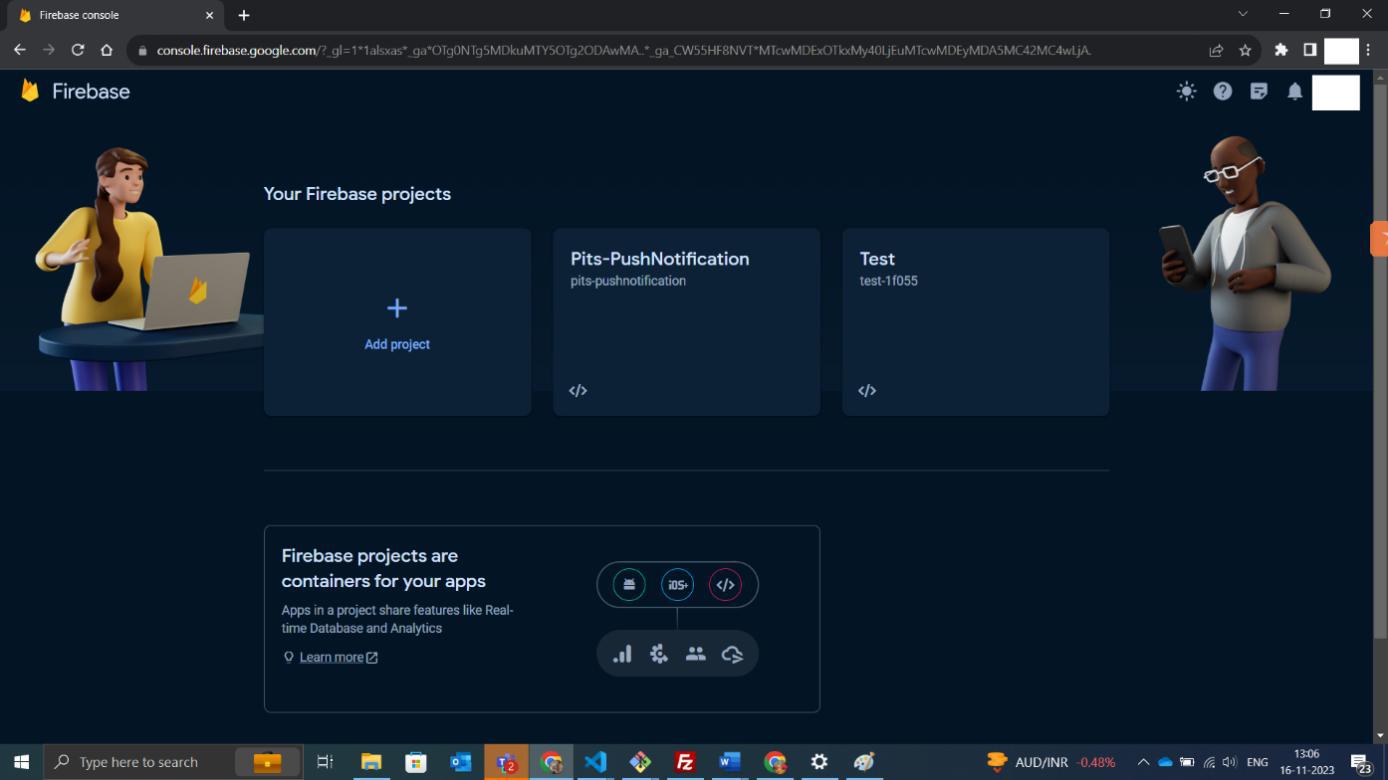
- After creating project create your app in web. Click on the icon in the page, which is marked in the image below.
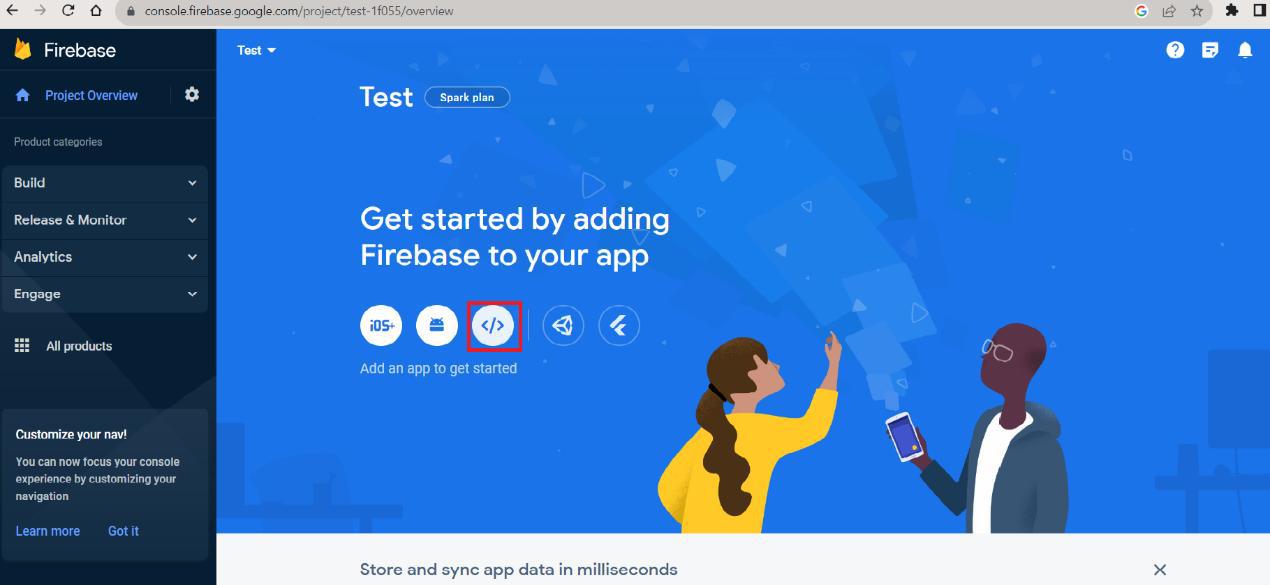
Now you have created your web app for push notification.
- After creating web app open web app settings.
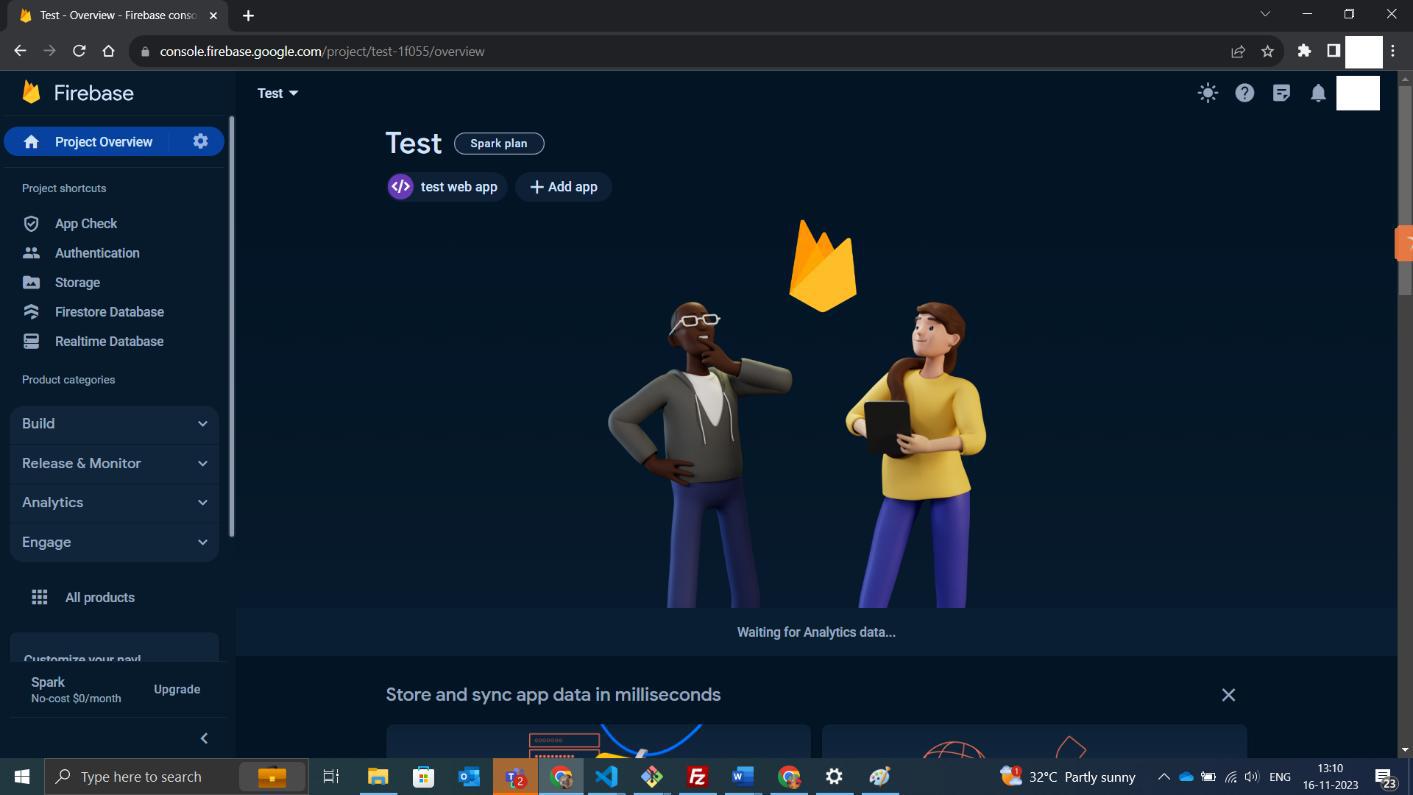
In web app setting open general tab and scroll down now you can see all required keys.
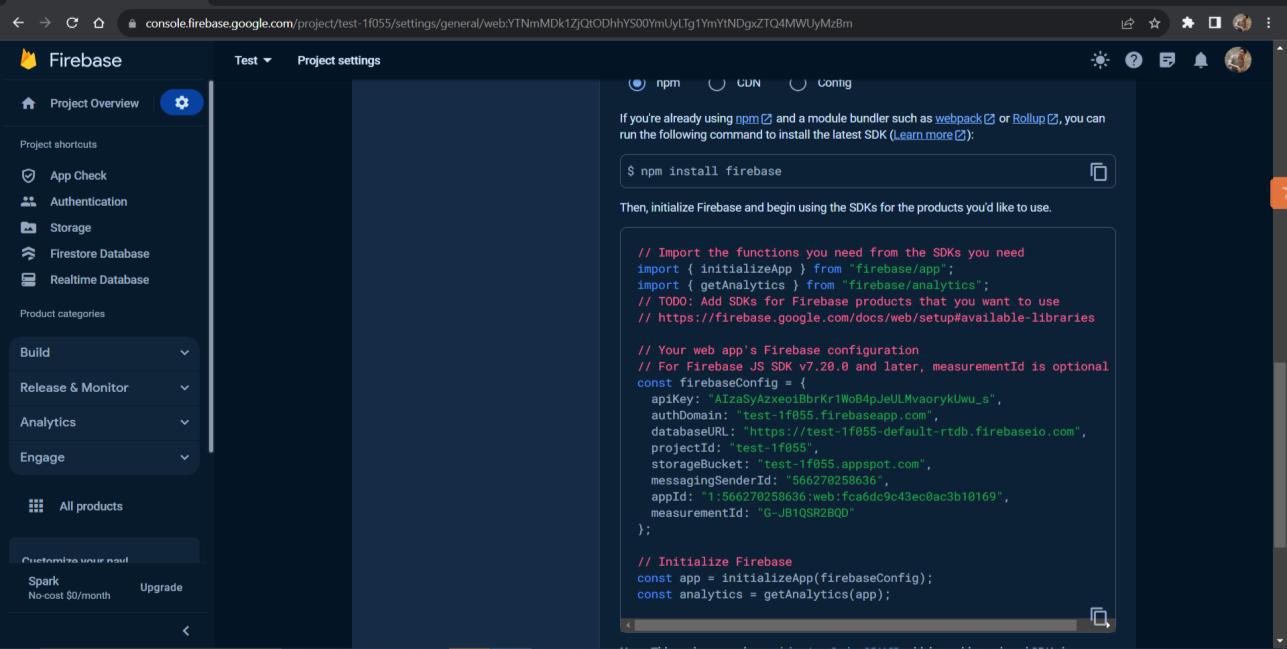
- Create Real time database for your project from the side bar. After creating real time database, it will show in the general tab.
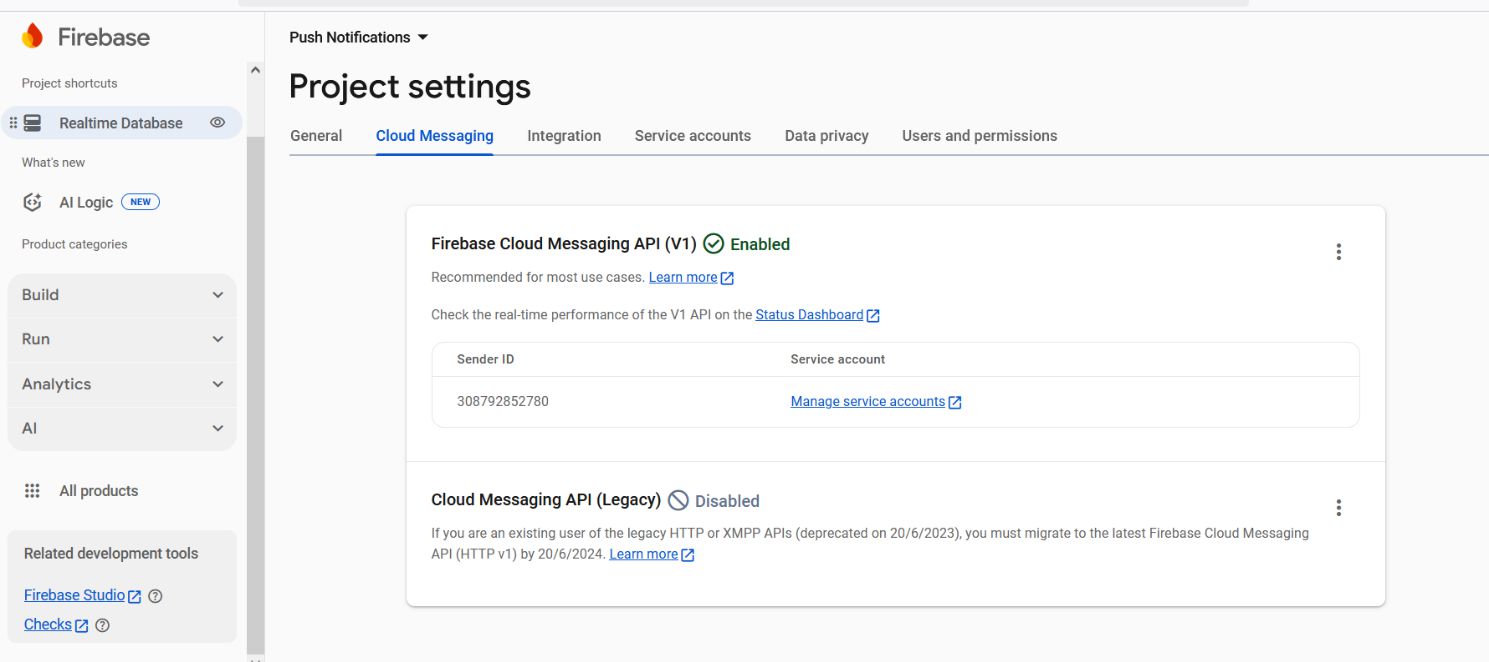
After that you need to configure Firebase Cloud Messaging (FCM) using the HTTP v1 API.
Follow these steps:
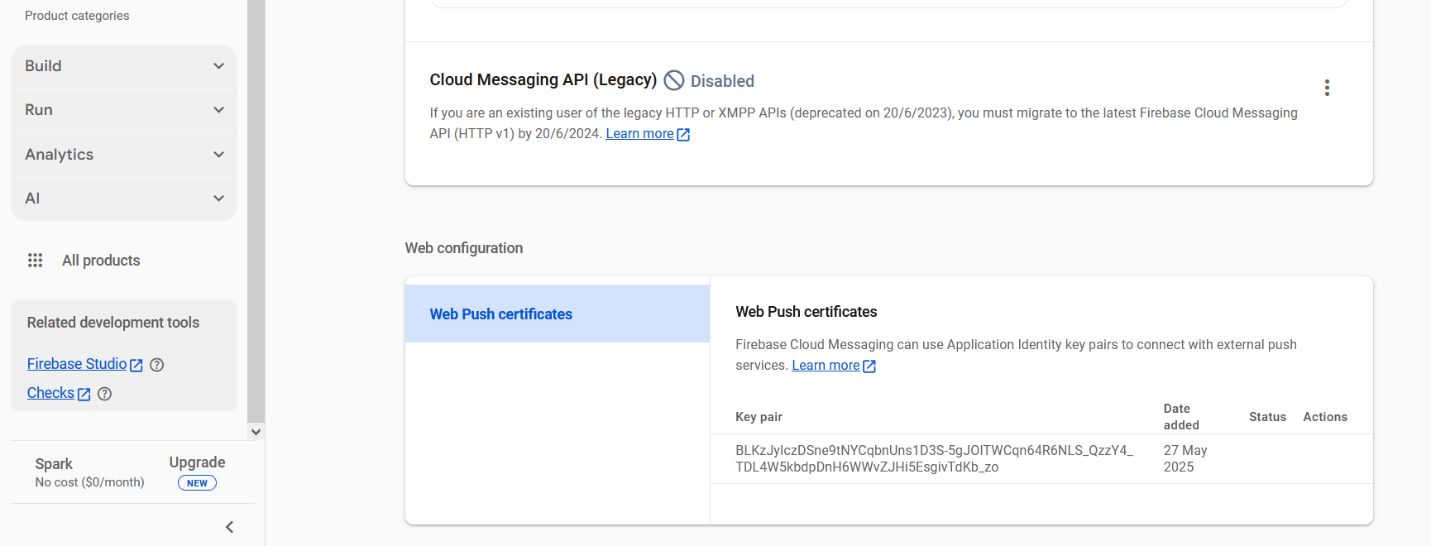
- Enable Cloud Messaging API:
Under the Cloud Messaging API (Legacy) section, locate the Cloud Messaging API (Legacy) toggle. If needed, click to enable it (used only for backward compatibility — optional for HTTP v1). HTTP v1 uses OAuth2 access tokens for authorization and does not rely on the legacy server key.
Generate a Key Pair:
Scroll to Web Push certificates section. Click Generate Key Pair to generate your VAPID key pair. Copy the Public Key .
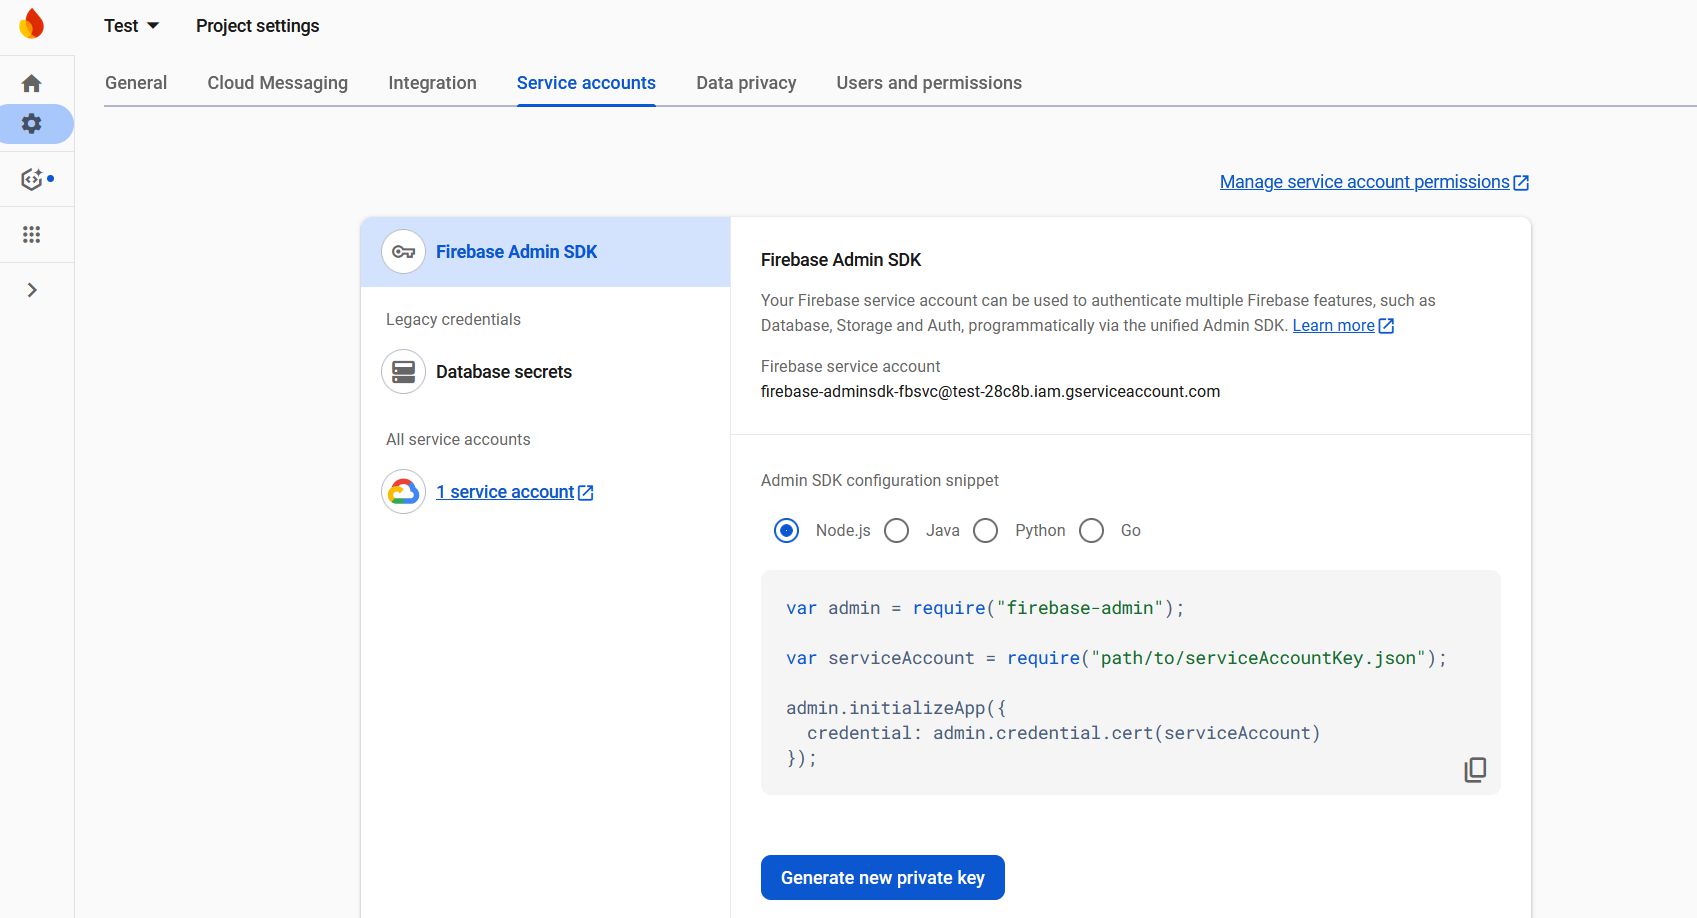
- Create a Service Account for HTTP v1:
Go to Project Settings > Service Accounts tab. Click Generate new private key for the Firebase Admin SDK. This will download a .json file containing your service account credentials.
Now we have all the keys, now you only need to add this value into pits store configuration.
2. Admin Configuration
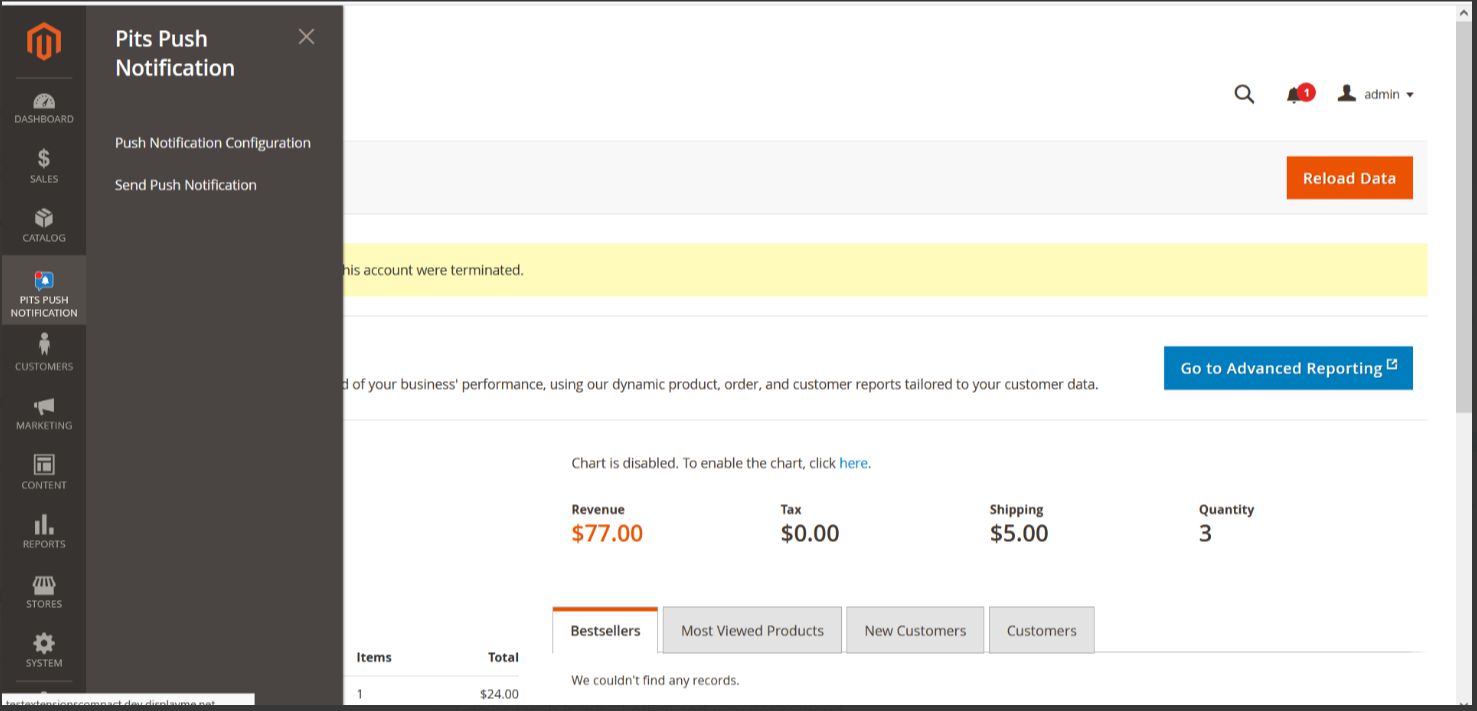
Login to the Admin panel and navigate to Pits Push Notification-> Push Notification Configuration.
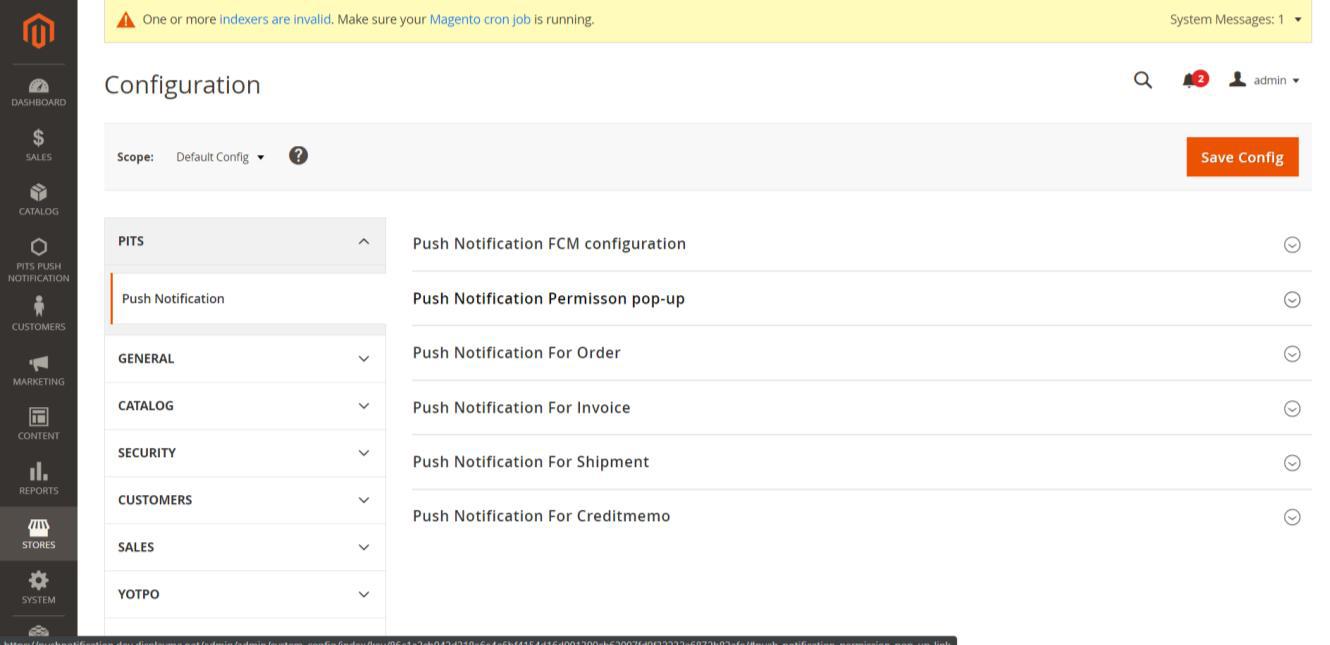
In push notification configuration there are 5 sections.
2.1 Push Notification FCM configuration
The first section is for enabling / disabling push notification, configure FCM and to set push notification position
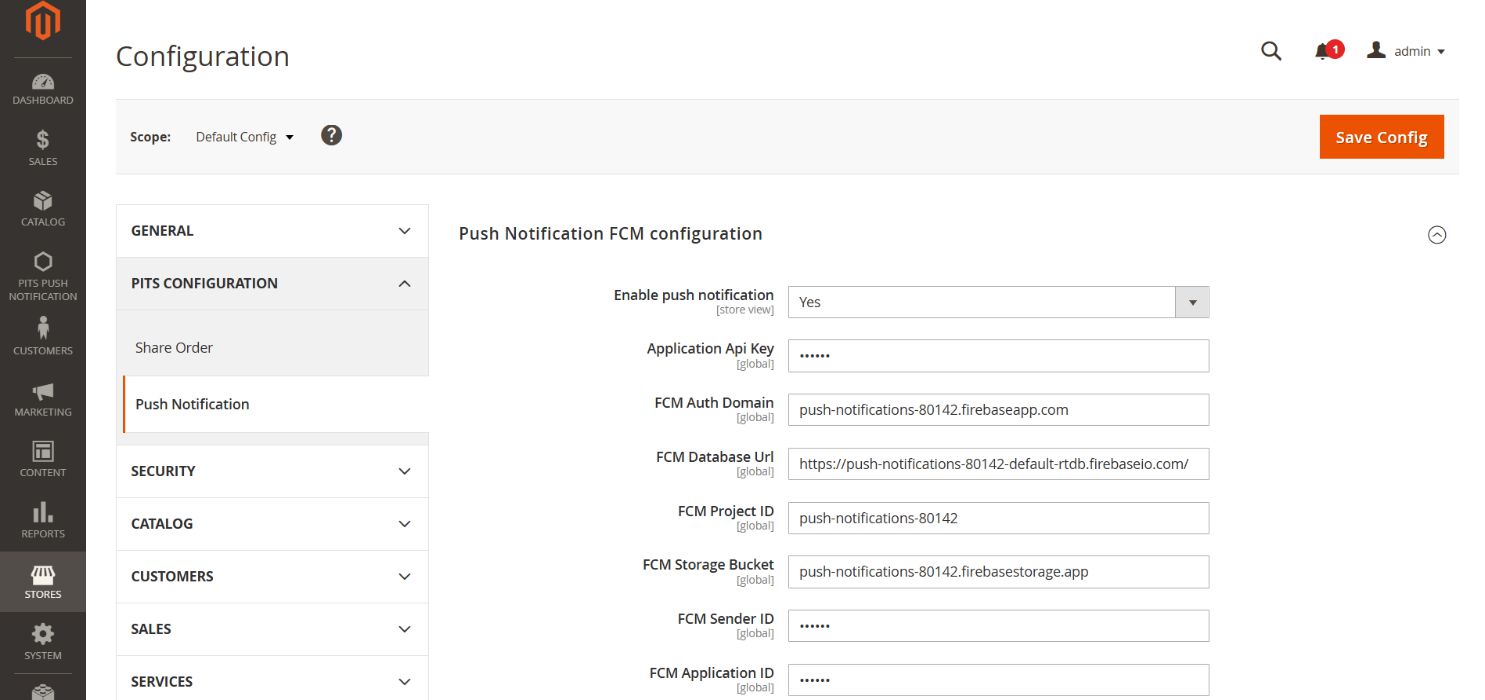
Push notification FCM configuration fields
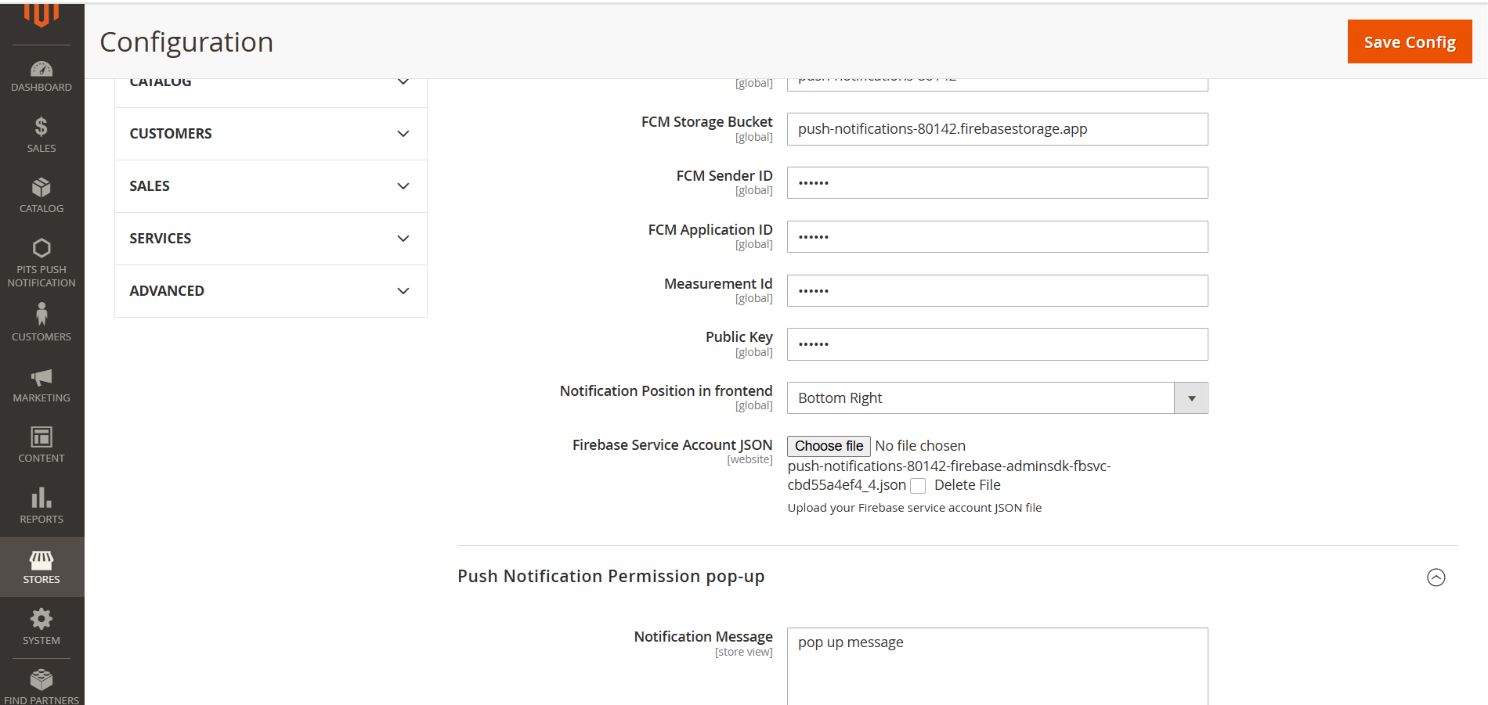
Push notification FCM configuration fields
Here you need to fill up the fields with FCM configuration values. In Notification Position in frontend option you can select the position where push notification should appear in the frontend. If the website is running in the background then position will not change and the notification it will appear in the default position.
There are four options available in Notification Position in frontend (bottom left, bottom right, top left and top right) if we select top right position then push notification will appear in top right position.

Push notification in the top right position of the website.
If the site is running in the background then the custom positioning will not work and it will have the default position which is bottom-right.
Push notification appears in its default position and design as the website was running in the background.
2.2 Push Notification Permission pop-up
This section is for configuring the push notification permission pop up text and icon. Here we can see two fields: one for entering the permission pop-up message and the other for uploading image for the permission pop-up.
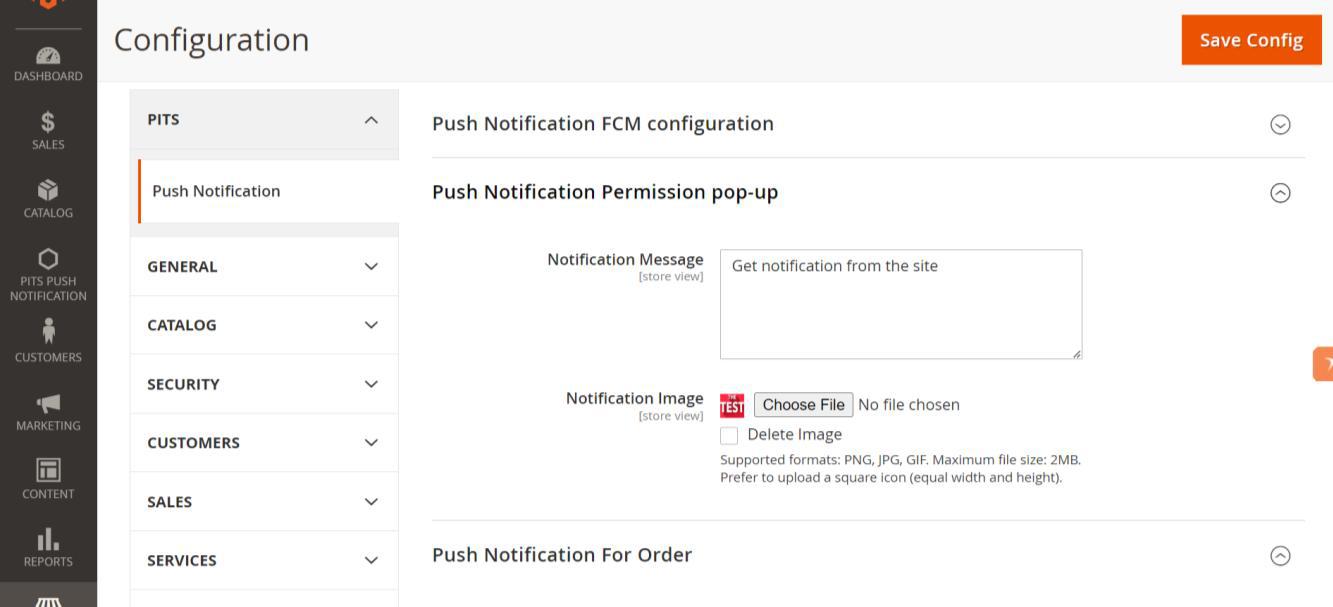
Configuration for permission pop-up.

Permission pop appearing in front end.
By default, “Get custom notification from the site” message will appear in the permission pop-up box. After allowing the permission pop-up, you will also need to allow notification permission from the browser.

Permission pop up from the site.
2.3 Push Notification for Order updates

Push notification for order update has 4 sections
2.3.1 Push Notification for Order
This section is used to handle push notification while placing an order.

Fields for push notification while placing an order.
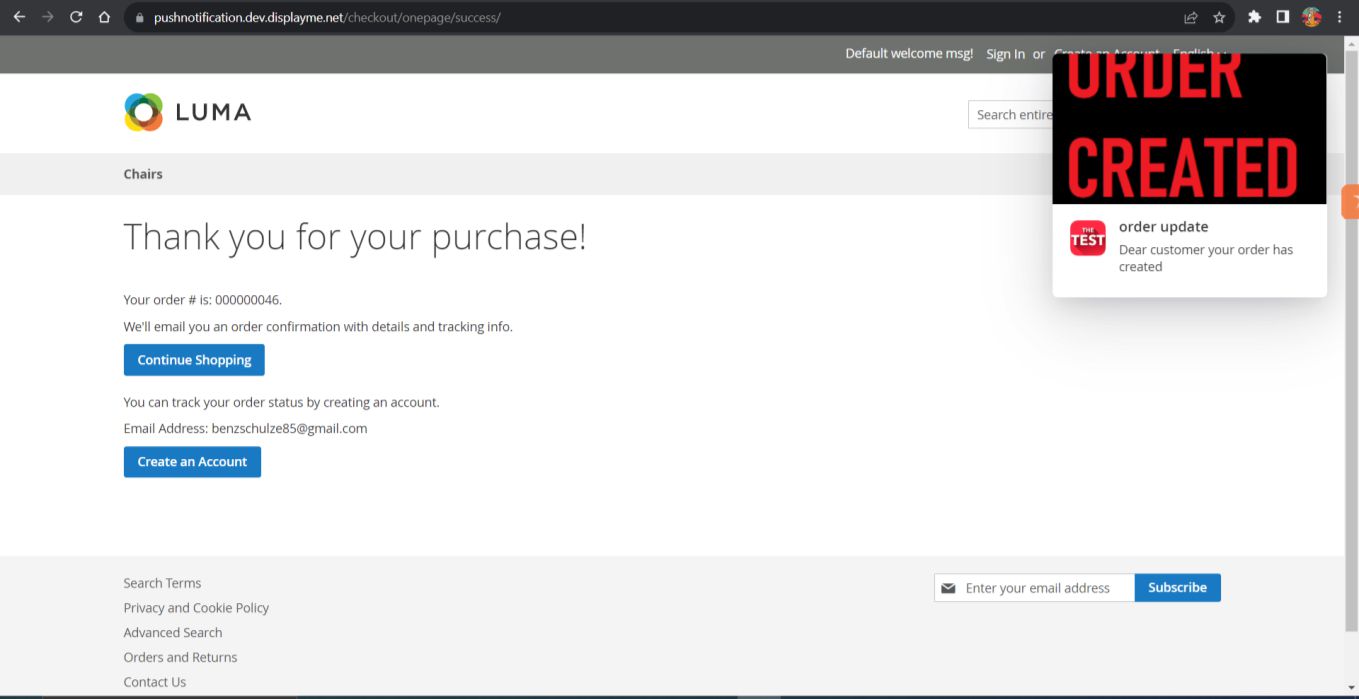
Push notification while placing an order.
2.3.2 Push Notification for Invoice, Shipment, Creditmemo
“Push Notification for Invoice”, “Push Notification for Shipment” and “Push Notification for Creditmemo” sections are used to configure push notification for order updates like invoice, shipment and creditmemo creation. Admin can enable/disable push notification for each section.
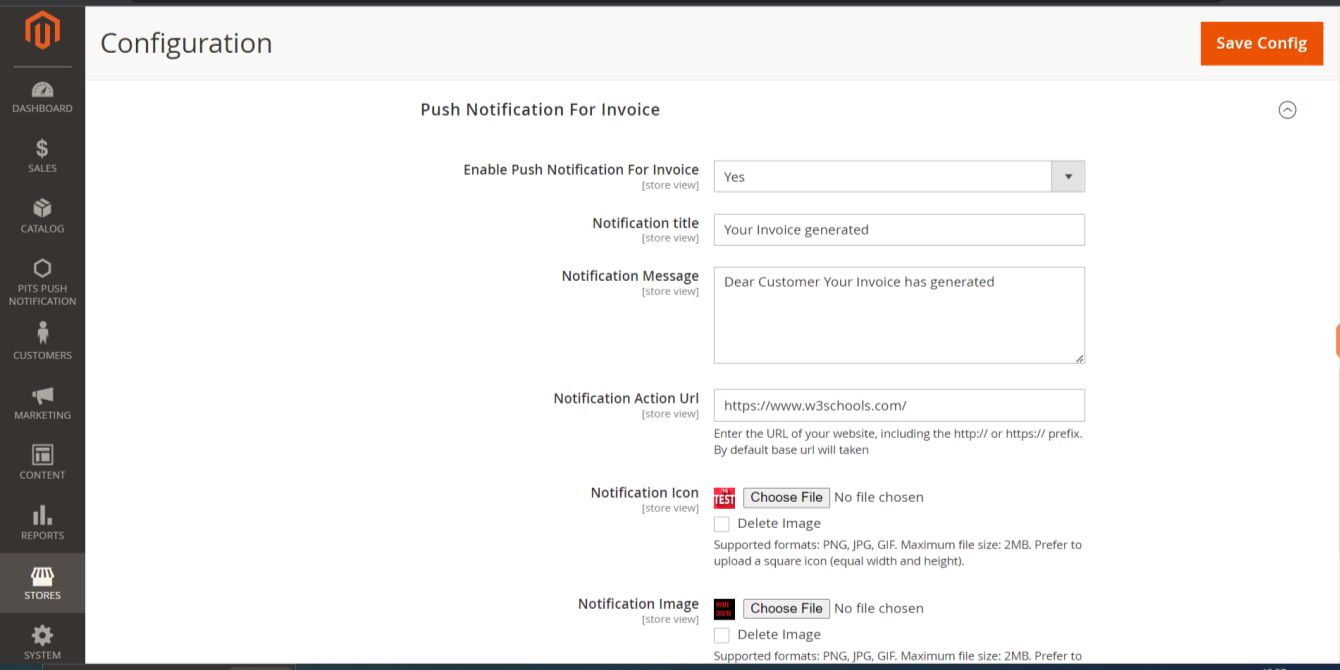
Invoice Sections and its fields for push notification.
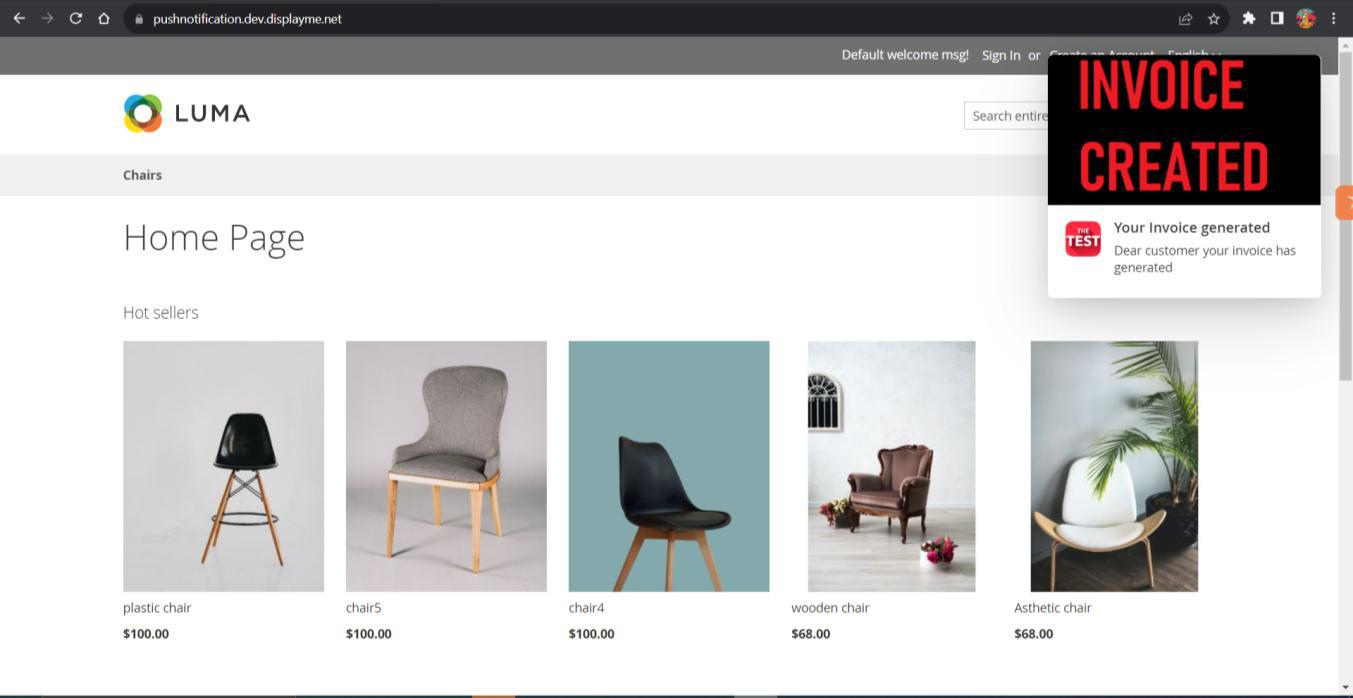
Push notification for invoice generation.

Shipment sections and its fields for push notification.

Push notification for shipment creation.

Creditmemo sections and its fields for push notification.

Push notification for creditmemo creation.
2.4 Push notification for Product
In this section we have three sub sections for product notification.

Three sub sections of “push notification for product”
2.4.1 Push notification for new product

Push notification for new product config values
In this section, we can add configuration values for push notifications for new products. The notification image will be used only if the product image is missing, and the action URL for the product will be the product URL. After configuring the store settings, you need to check the box in the push notification section of the product edit/add form for the product you want to send a new product alert for, and then save the product. After saving the product with selected checkbox for “New product alert”, the notification will be sent to all customers who have enabled push notifications. If you want to send the push notification again, you need to repeat the process. The new product alert is only applicable if the product is enabled and visible on the storefront.

New product alert check box in product edit/add form
2.4.2 Push notification for product price drop

Configuration filed for push notification for price drop
Here we can configure the fields for product price drop alert push notifications. The "Enable price drop alert" setting is used as the default value for all products. The notification image will be used only if the product image is missing, and the action URL for the product will be the product URL.
After saving the store configuration, you can individually select each product and decide whether to enable the product price drop alert, disable it, or use the default "Enable price drop alert" setting from the store configuration. To do this, navigate to Catalog -> Products, click the edit action link for the product you want to edit, and go to the "Push Notification" section to configure "Product Price Drop Alert” field.
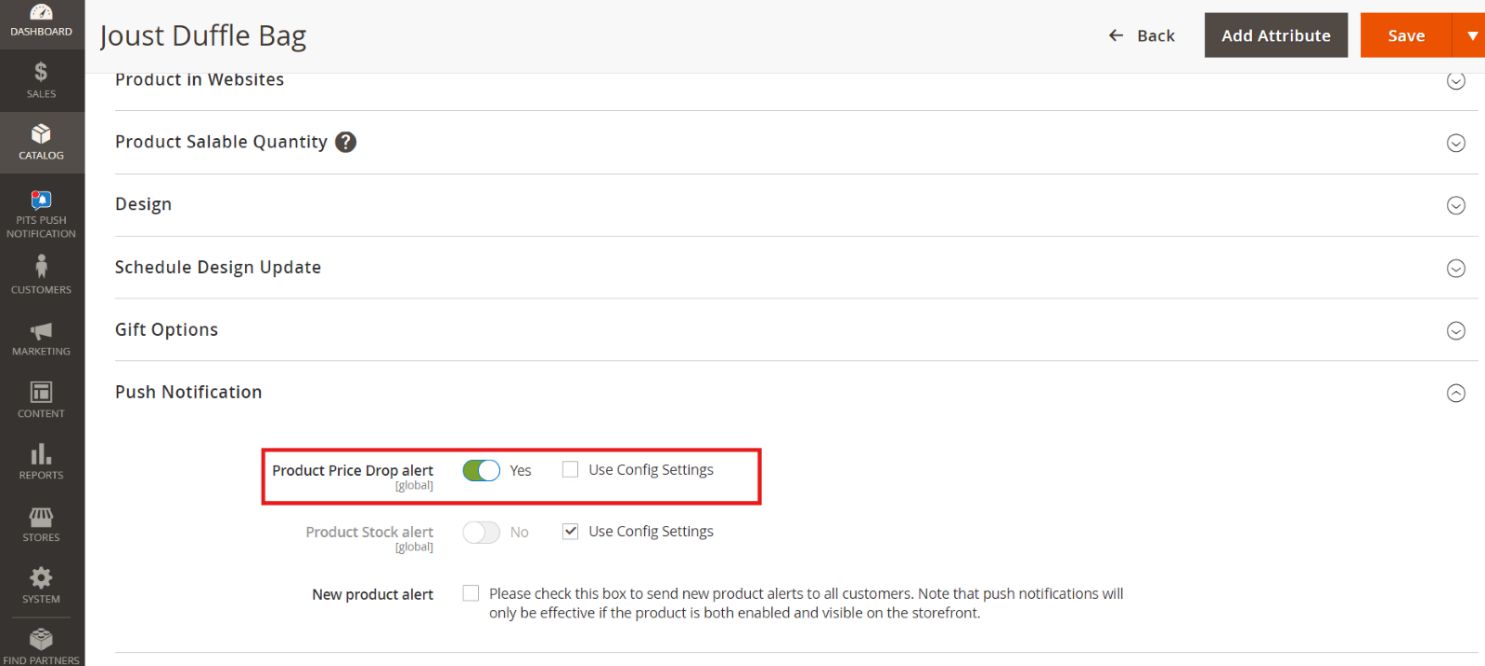
Product price drop alert field in Push notification section of product edit form
If you select a product for a price drop alert, customers will receive a notification each time the price of that product drops.

Product price drop alert in store front
2.4.3 Push notification for product stock alert

Configuration field for product stock alert
Here we can configure the field for stock alert push notifications. In this section, we have the “Threshold quantity for stock,” where we can assign the threshold quantity. This means that if the product quantity decreases below this threshold, a stock alert will be triggered. All other fields in the stock alert configuration are the same as the price alert configuration.
After saving the store configuration, you can individually select each product and decide whether to enable the product stock alert, disable it, or use the default "Enable stock alert" setting from the store configuration. To do this, navigate to Catalog -> Products, click the edit action link for the product you want to edit, and go to the "Push Notification" section to configure the "Product Stock Alert” field.

Product stock alert filed in Push notification section of product edit form
A stock alert is triggered when someone places an order from the storefront and the salable stock decreases below the threshold quantity.

Product stock alert Push notification in front end
3.0 Custom Push Notification from Admin
Admin can send custom push notification to all the customers through custom form in backend. Navigate to Magento Admin -> Pits Push Notification -> Send push notification.

Custom form to send push notification.
In the Push Notification configuration, there is an "Action Link for push notification" field where a URL can be provided. When the user clicks on the push notification, they will be redirected to the specified link, enabling deep linking to specific pages (e.g., product, promotion, or order detail pages).
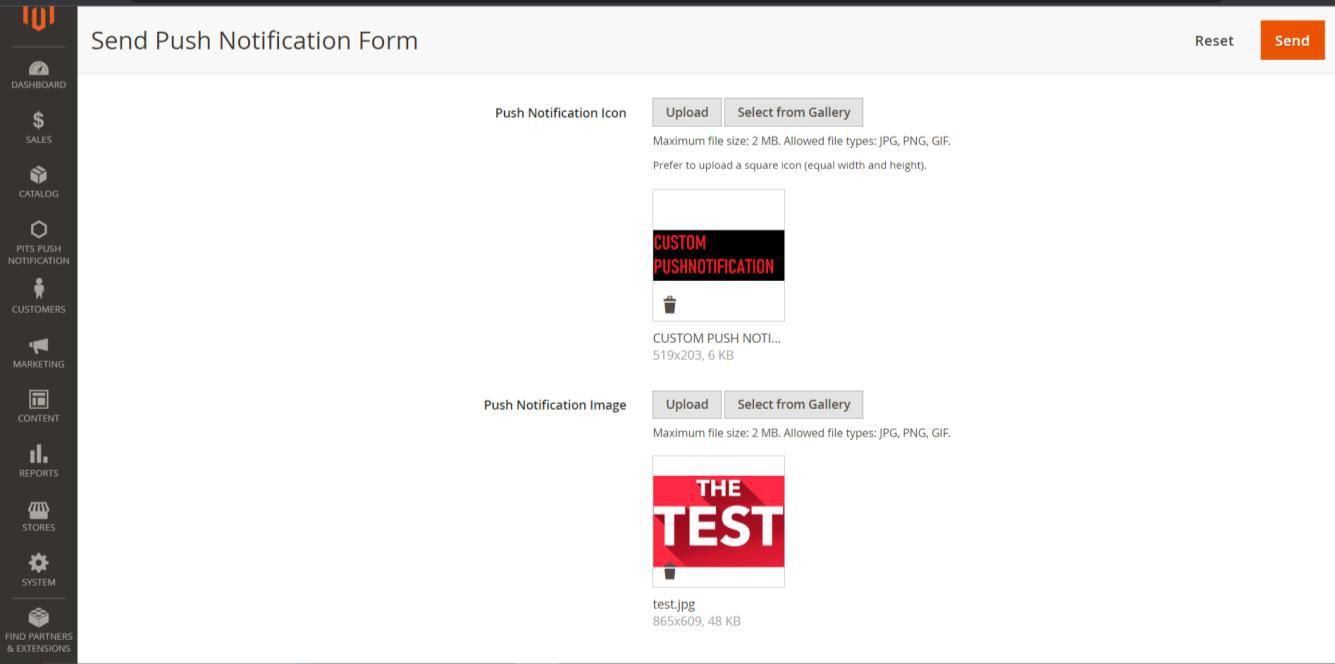
Custom form to send push notification.

Custom push notification in frontend.
4.0 Push Notification in Mobile devices
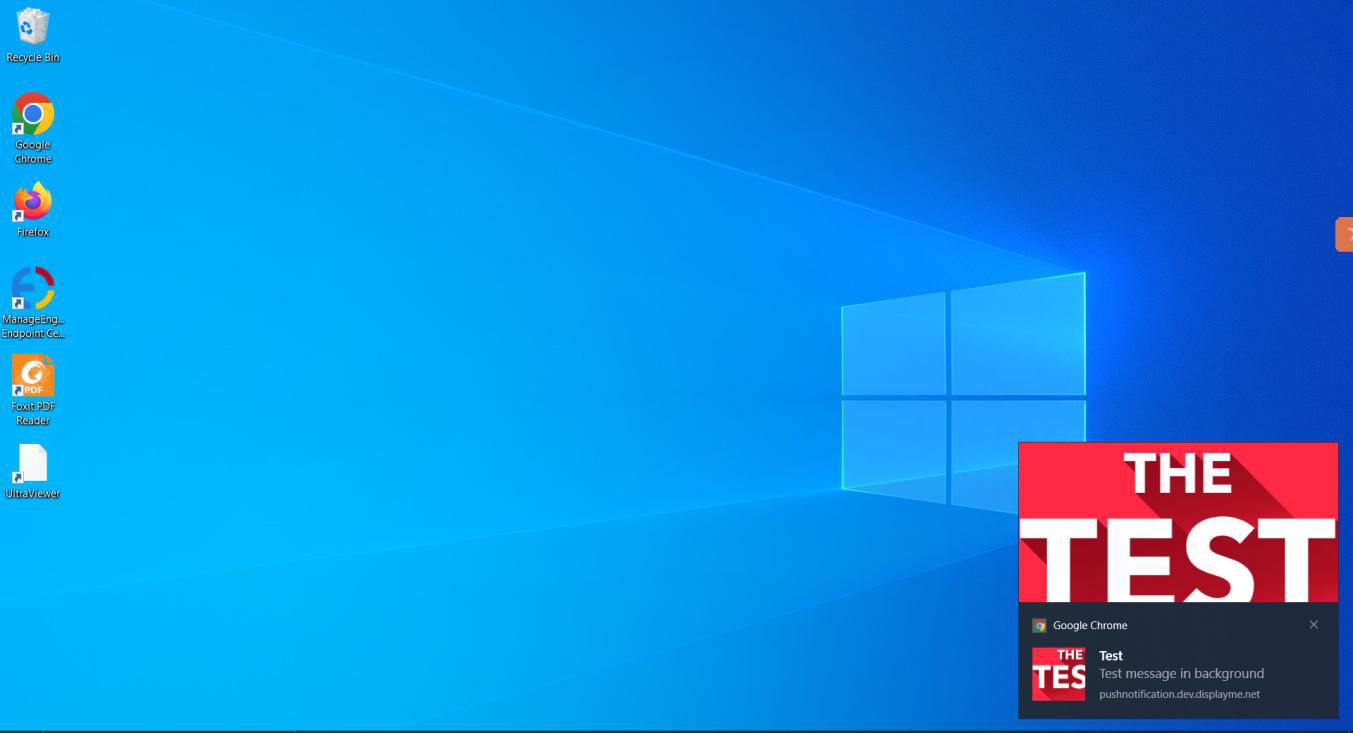
In mobile device push notification design have changes in both frontend and background. Push Notification image is hidden in frontend. In background push notification appear in notification bar.

Background push notification in notification bar.
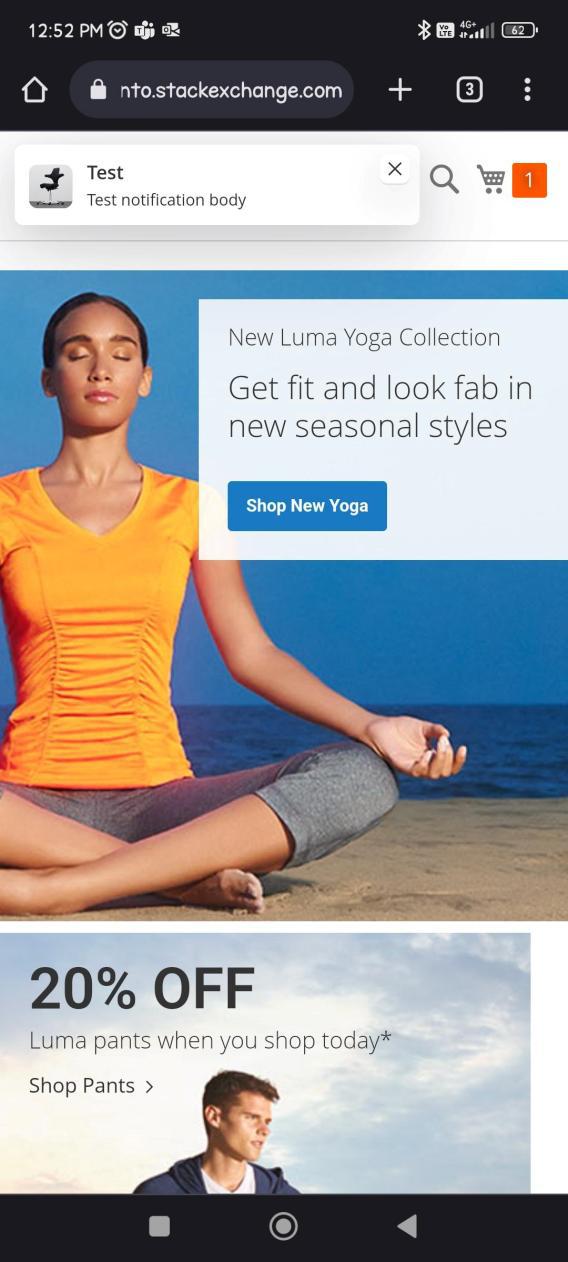
Frontend push notification in mobile device.
5.0 Installation Requirements
- PHP 8.1 or later.
- Magento Open Source 2.4.4 and later.
- Google Auth dependency via Composer is required for FCM (Firebase CloudMessaging) functionality
- No other third-party plugins are required — this extension is self-sustaining beyond Firebase support
5.1 Installation Steps
To install the Push Notification module, follow the steps below.
- Download the module.
- Access your web server directories and unzip and upload the content of the zip file to app/code/Pits/PushNotification directory.
- Install the required Firebase libraries using Composer:
composer require google/auth:^1.18 - Run the below commands on terminal
- php bin/magento setup:upgrade
- php bin/magento setup:di:compile
- php bin/magento setup:static-content:deploy -f
- php bin/magento cache:clean
6.0 Technical Requirements / Compatible with:
- Magento Open Source 2.4.4 - 2.4.9
- Adobe Commerce (EE & Cloud) 2.4.X
6.1 Developer Notice
- After saving Firebase configuration values in the backend, please ensure that a firebase-messaging-sw.js file is created in both the pub and root directories.
- The site needs to be secured (SSL enabled) in order to receive push notifications.
- The Firebase Service Account JSON file must be uploaded manually through Magento backend. Once uploaded, file will be saved to the
app/etc/fcm_config/default directory.
6.2 Supported Browsers
- Windows: Chrome, Firefox and Opera
- Mac: Safari
- Android: Chrome, Firefox and Opera
6.3 Important Notes
- iOS devices will not support firebase push notification.
- Safari on macOS may limit silent push notifications to 3 per hour per origin. Excessive background notifications may be suppressed.
6.4 Supported Languages
- English
- German
- French
6.5 Change Log / Release Notes
Version: 1.0.3: July 2026
- Compatible with Magento Open Source (CE): 2.4.4 - 2.4.9
Version: 1.0.2: September 2025
- Enhancement: Added compatibility with Adobe Commerce (EE & Cloud) for version 2.4.x.
Version: 1.0.1: June 2025
- Compatible with Magento Open Source (CE): 2.4.4 - 2.4.8
- New product alert added.
- Product stock alert added.
- Product price drop alert added.
Version: 1.0.0: Sept 2023
- Initial Version.
7.0 Support
If you have questions, use our contact form at webshopextension.com or email at support@webshopextension.com