QuickBooks Connector
Categories
Magento
WordPress
SAP Commerce
Odoo
Shopify
Typo3
Shopware
nopCommerce
Pimcore
Hyvä
OXID eShop


1. Introduction
The QuickBooks Connector plugin by PIT Solutions simplifies data migration between Odoo and QuickBooks, making it ideal for users transitioning between platforms or using both in parallel. With seamless import and export capabilities, it saves time, minimizes manual effort, and ensures data accuracy throughout the migration process.
2. Features
- Efficient Data Migration: Import/export data seamlessly between Odoo and QuickBooks, significantly reducing migration time and effort.
- Historical Data Tracking: Keep a record of historical data for better analysis and reference.
- Individual Record Export: Export specific records as needed for greater flexibility.
- Reference Maintenance: Maintain references to ensure data consistency and integrity.
- Customizable Activity Control: Select specific objects for import/export to tailor the process to your needs.
- Error Logging: Identify and resolve issues quickly with detailed error logs.
- Record Linking: Establish and maintain links between related records for better data management.
- Scheduled Data Synchronization: Automate data synchronization at predefined intervals for added convenience.
- Timeframe Sync: Synchronization operations for Import/export data from specific time periods
3. QuickBooks Configuration
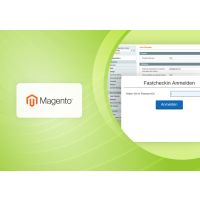
3.1 Sign Up and Setup
- Create an Intuit Developer Account and register a new app.
- Configure the required data and set up the Odoo QuickBooks Connector with QuickBooks account credentials.

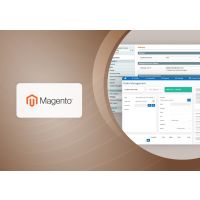
Figure 1: General Configuration
3.2 Testing with Sandbox
- Use a Sandbox Company for testing by navigating to API Docs & Tools -> Sandbox.
- Sandbox companies mimic real QuickBooks Online experiences with sample data and are region-specific.
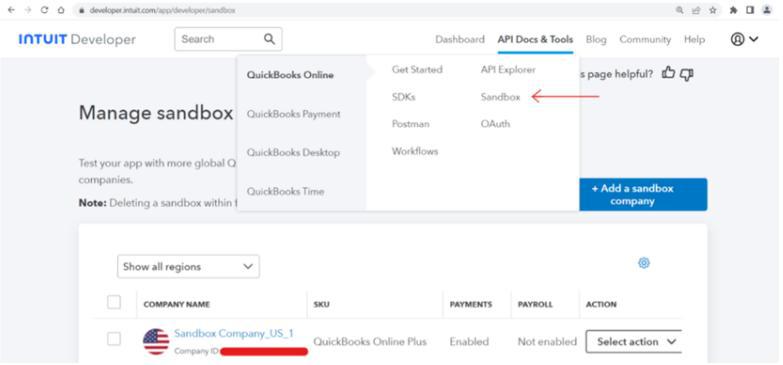
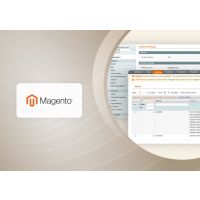
Figure 2: Retrieving QuickBooks Company details
3.3 Configure QuickBooks in Odoo
a. Installation and Module Selection
- Install the QuickBooks Connector module in Odoo.
- Select the QuickBooks module for configuration.
b. Account Configuration
- Configure QuickBooks account details such as Client ID and Secret Key for the desired company in the Import/Export section.
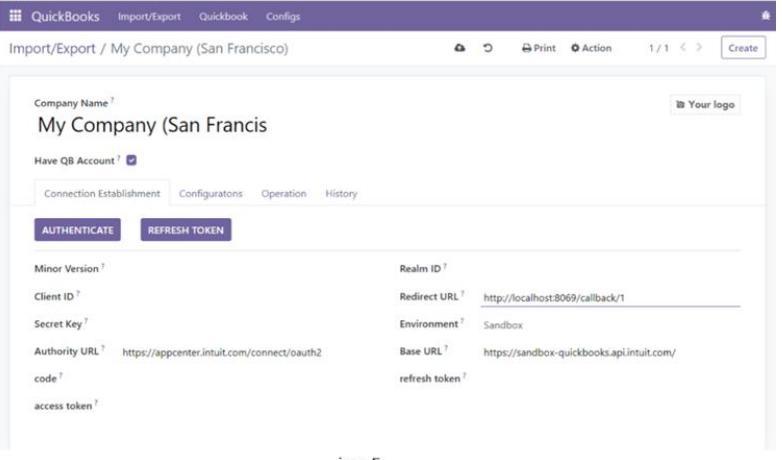
Figure 3: QuickBooks Account Configuration in Odoo
c. Retrieving App Credentials
- Obtain QuickBooks credentials (e.g., Client ID, Secret Key) from the 'Keys & Credentials' section in your QuickBooks app.
- Choose between Sandbox or Production environments.
- Set the Redirect URI to: [web.base.url]/callback/[company id]
Example: http://localhost:8069/callback/1 (for company ID 1)
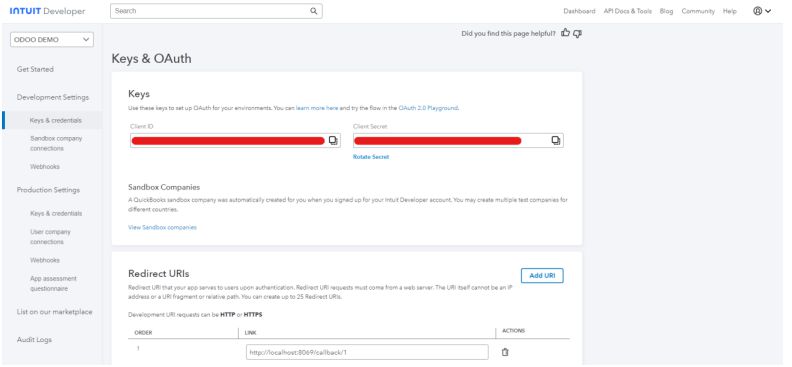
Figure 4: Retrieving Client ID and Client Secret
d. Manual Data Sync and Cron Jobs
- Use the 'Sync' button to manually import or export data within specified limits.
- Activate the corresponding cron job (initially inactive) with the 'Activate Cron' button.
- Enable the 'Blocked' status for specific tables to manage and control synchronization.
- The following models support syncing of both active and inactive (archived) records [Payment Terms, Payment Methods, Employees, Customers, Vendors]
- When the scheduled cron job runs, it will import or export all records that have been updated within the past three days.
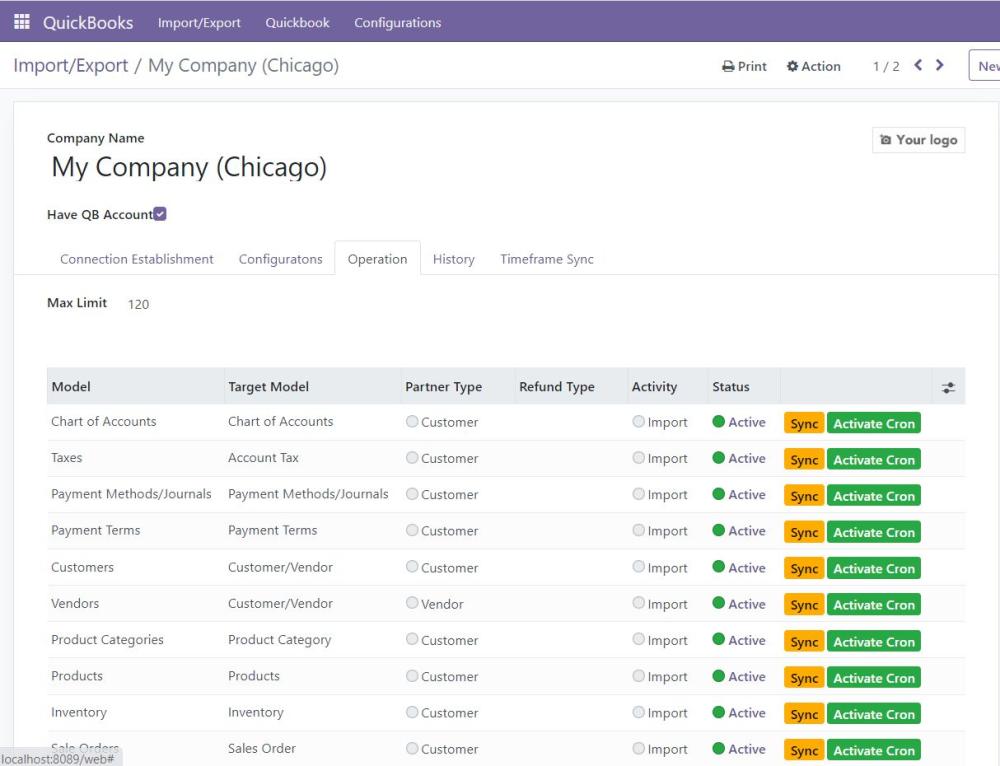
Figure 5: Sync and Cron Jobs
e. Company-Specific Configuration
- Switch the corresponding company in which the QuickBooks is configured before importing.

Figure 6: Company Specific Configuration
f. Mapping Imported Records
- View the ID of the last imported records along with the corresponding Odoo record ID, except for the Chart of Accounts (COA)
- For COA, the Last Imported QB ID is saved based on creation time, allowing easy reference for data mapping.
- When Full Sync is disabled, the synchronization process is based on the Last Synced QB ID. Only records with a QB ID greater than the last synced QB ID will be imported or exported. After the sync is completed, the Last Synced QB ID in the History tab will be updated to reflect the QB ID of the most recently synced record. However, if the records being synced already exist in both systems, the Last Exported QB ID field in the History tab will not be updated.
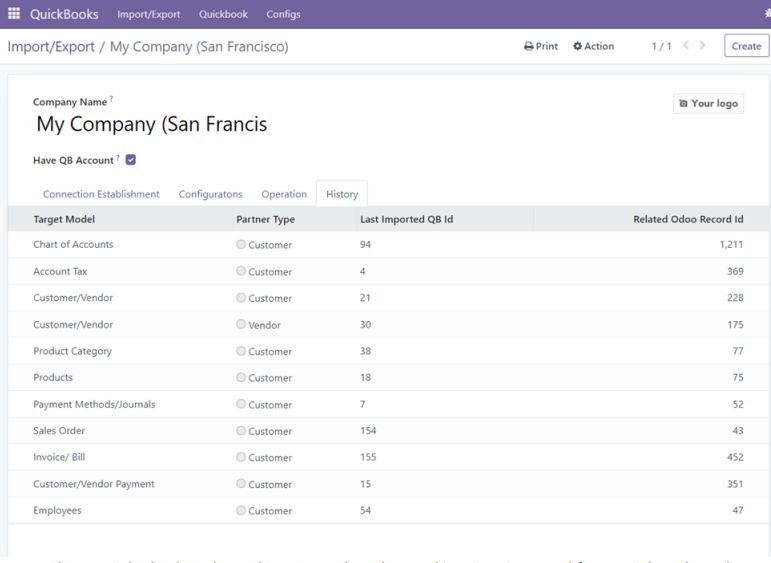
Figure 7: Mapping Imported Records
g. Record Update Permissions
- Enable all fields in the "Record Update Permissions" section to allow updates to all imported records from QuickBooks.
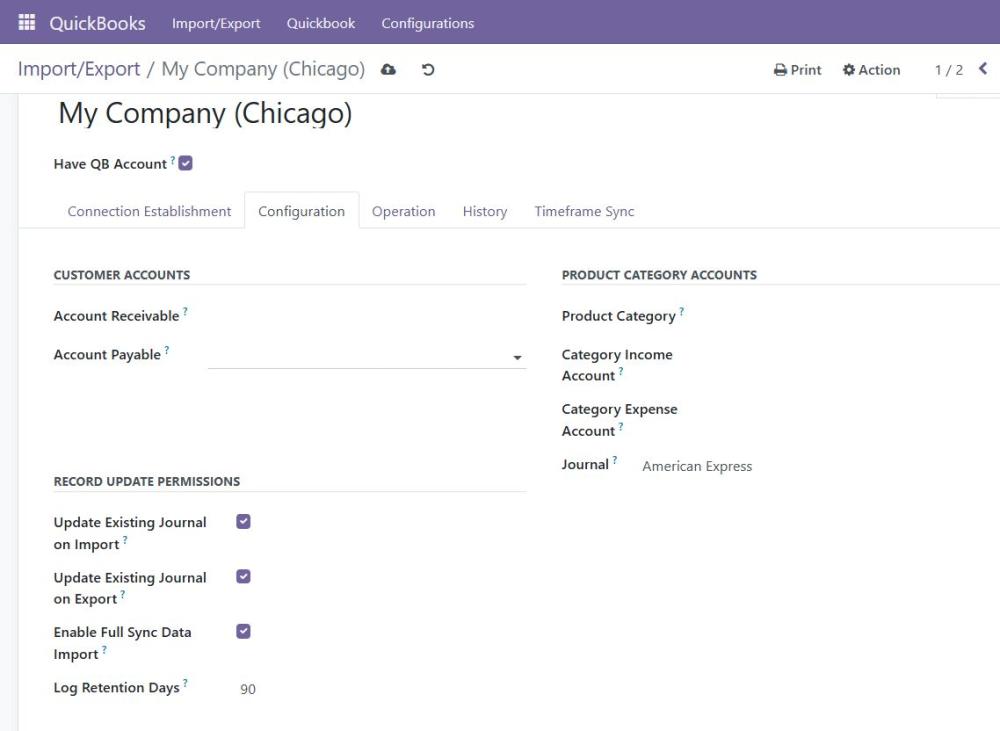
Figure 8: Record Update Permission
3.4 Configuration Tab Menus
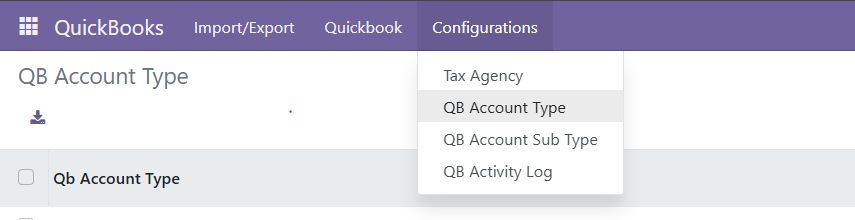
Figure 9: Configuration Tabs
a. QB Account Type
- Displays the QuickBooks account types linked to Odoo account types.
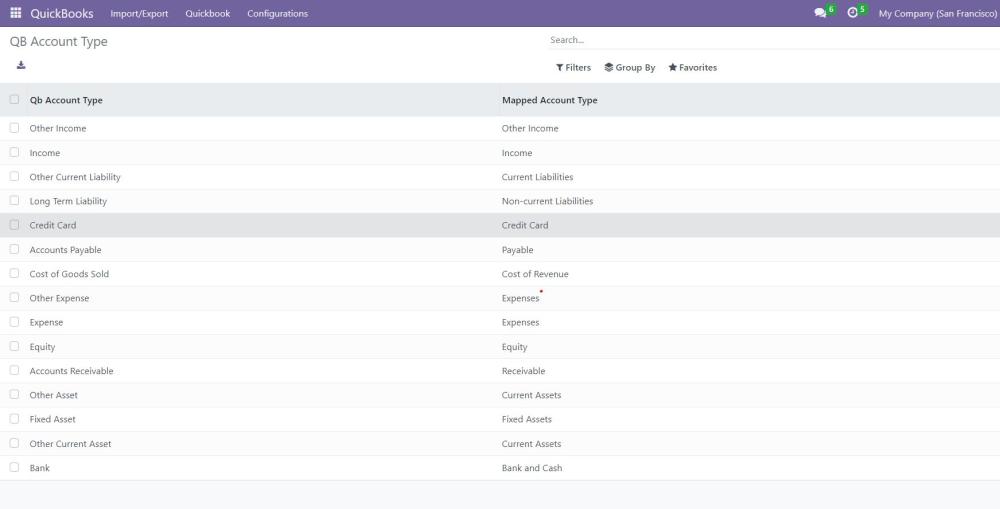
Figure 10: QB Account mapping to Odoo
b. QB Account Subtype
- Displays the QuickBooks account subtypes linked to Odoo account types.
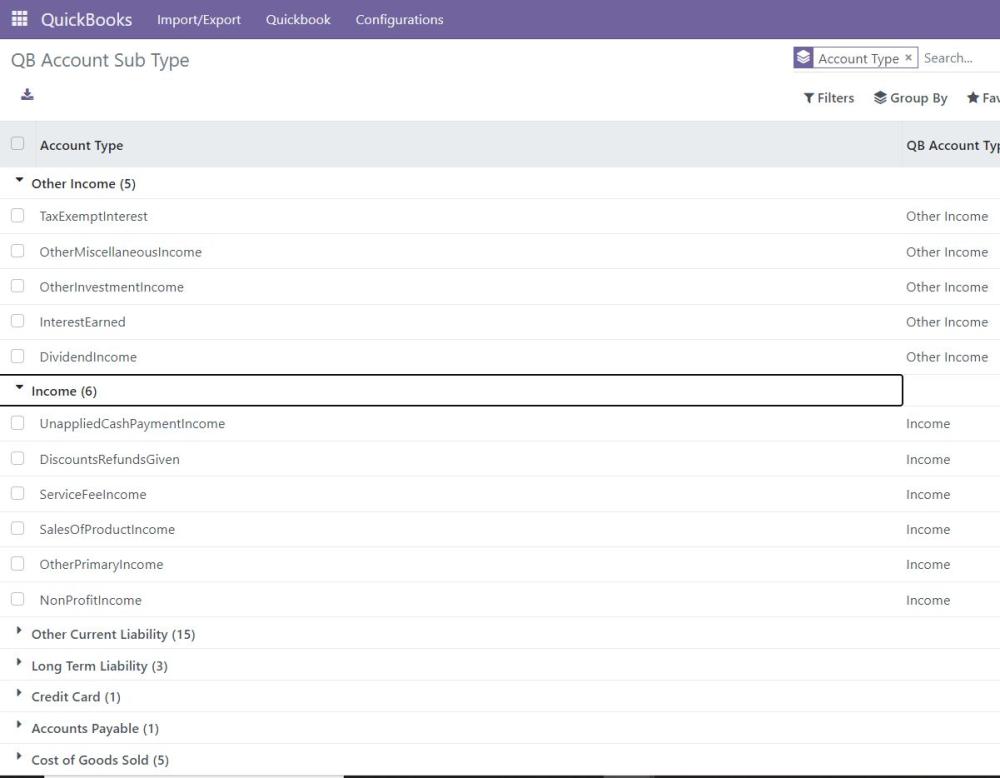
Figure 11: QB Account Subtype linked with Odoo
c. QuickBooks Activity Log
- Provides a complete log history of QuickBooks activities.
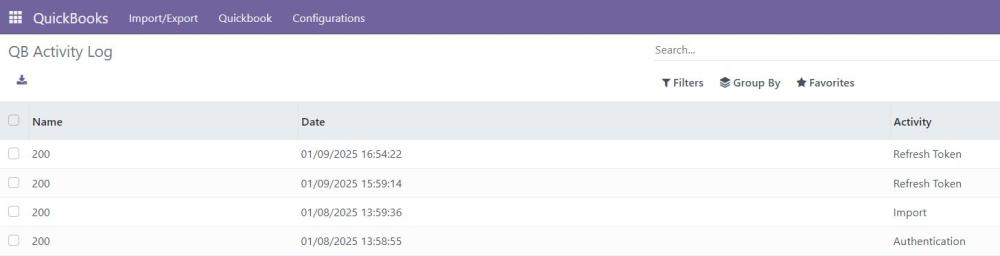
Figure 12: QuickBooks Activity Log
3.5 Imported and Exported Records
a. Chart of Accounts
- Odoo Data:
- Shows how Odoo maps its chart of accounts.
- Opening balances in the Chart of Accounts must be created manually in Odoo, as QuickBooks does not provide journal item data of type Deposit in the API response for opening balances.
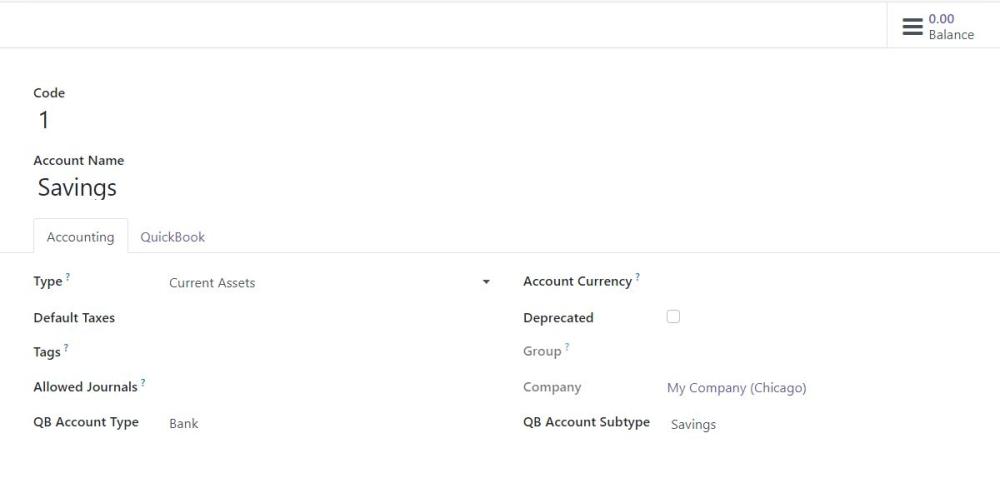
Figure 13: Chart of Account in Odoo
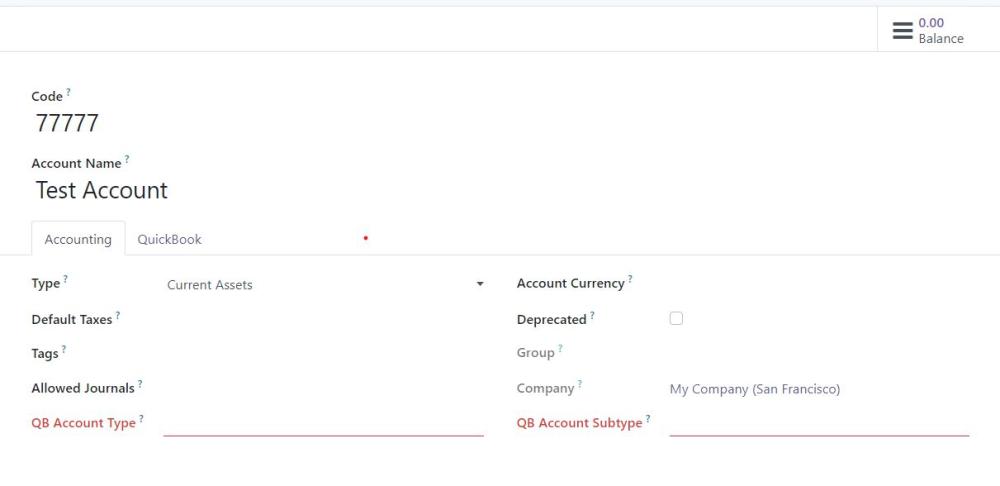
Figure 14: To export the Chart of Accounts, it is mandatory to provide both the QB Account Type and QB Account Subtype
- QuickBooks Data: Displays the corresponding data from QuickBooks.
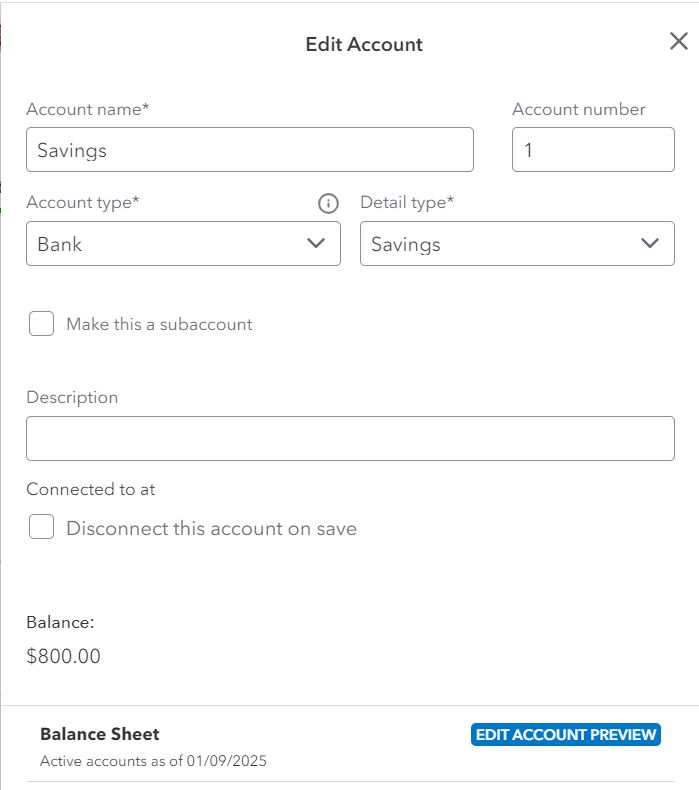
Figure 15: Chart of Account in QBO
- Limitations
Accounts with the same name are not supported.
Before export the record should be mapped to a QB Account Type and QB Account Subtype.
b. Taxes
- Odoo Data:
- Taxes are saved in groups based on percentages.
- Imported taxes cannot be edited. A new tax must be created for exports.
- Deactivated QuickBooks records remain inactive in Odoo upon re-import.

Figure 16: Group of tax in Odoo
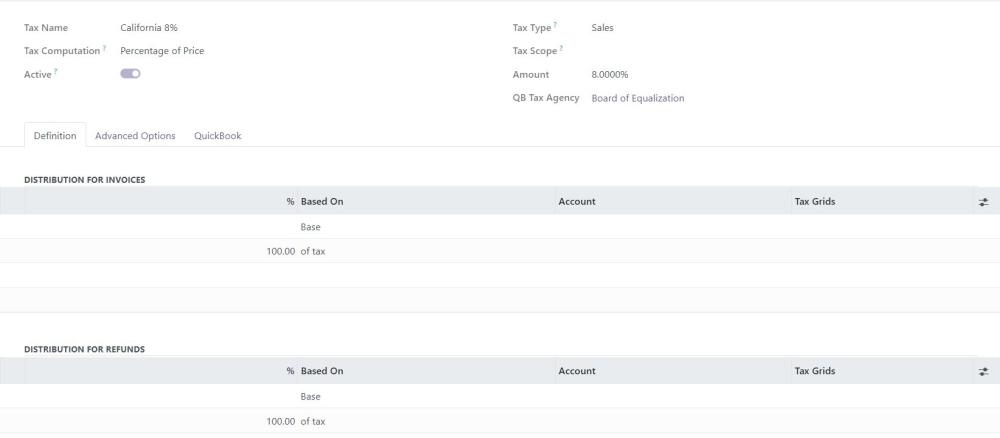
Figure 17: Percentage of tax in Odoo
- QuickBooks Data: Displays tax configurations.
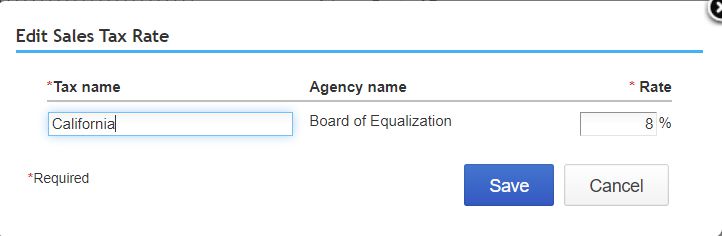
Figure 17: Tax in QBO
c. Payment Methods/Journals
- Odoo Data: The journal’s account type is derived from the linked chart of accounts.
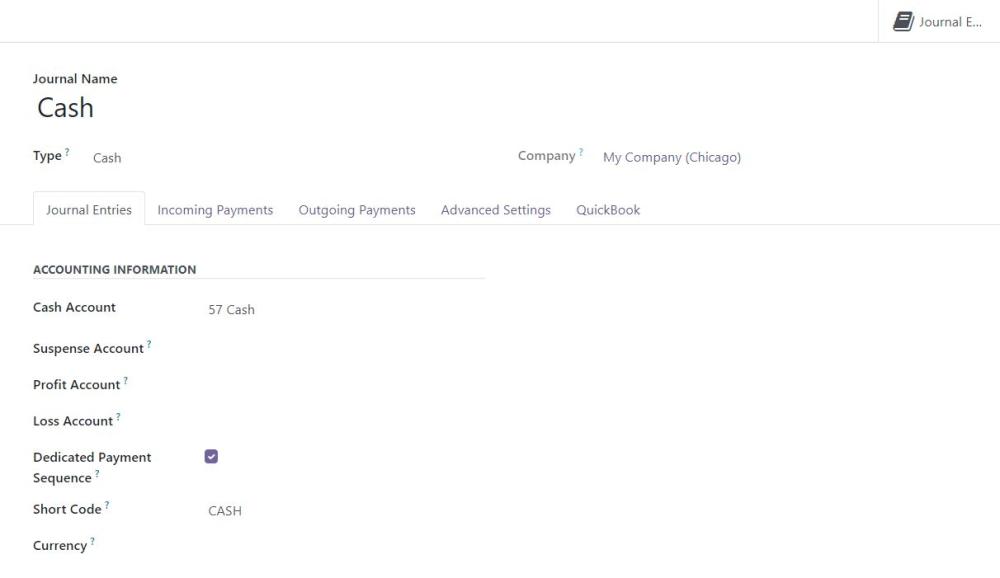
Figure 18: Journal in Odoo
- QuickBooks Data: Shows QuickBooks journal details.
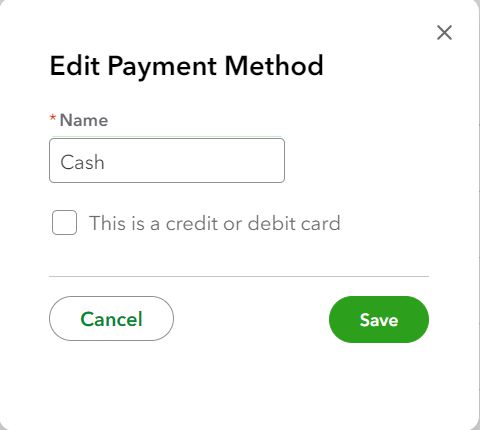
Figure 19: Payment method in QBO
d. Payment Terms
1. Due in Fixed Number of Days
- Odoo Data: Configures payment terms by days.
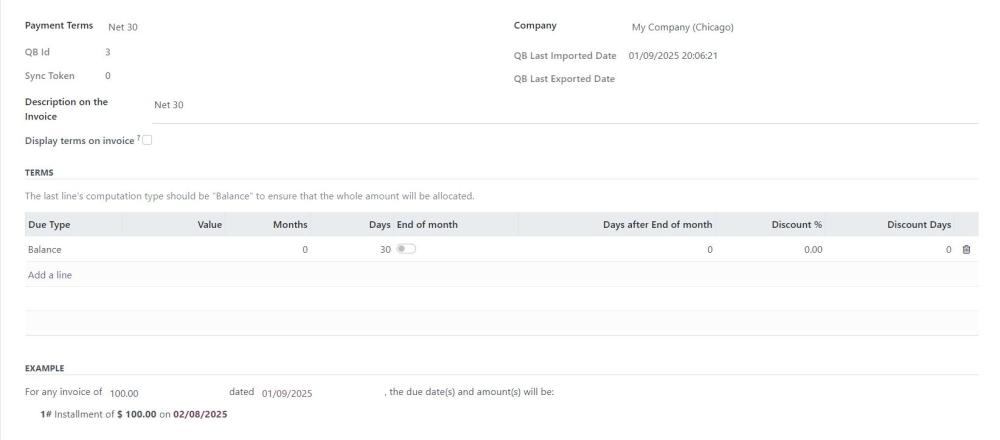
Figure 20: Payment Term in Odoo
- QuickBooks Data: Displays corresponding payment terms.
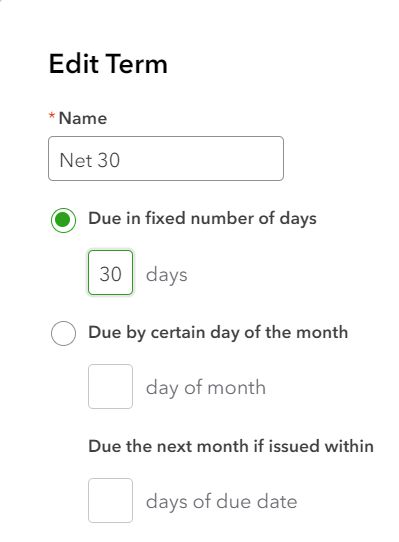
Figure 21: Payment Term in QBO
2. Due by Certain Day of the Month
- Odoo Data: Configures payment terms by the specific day of the month.
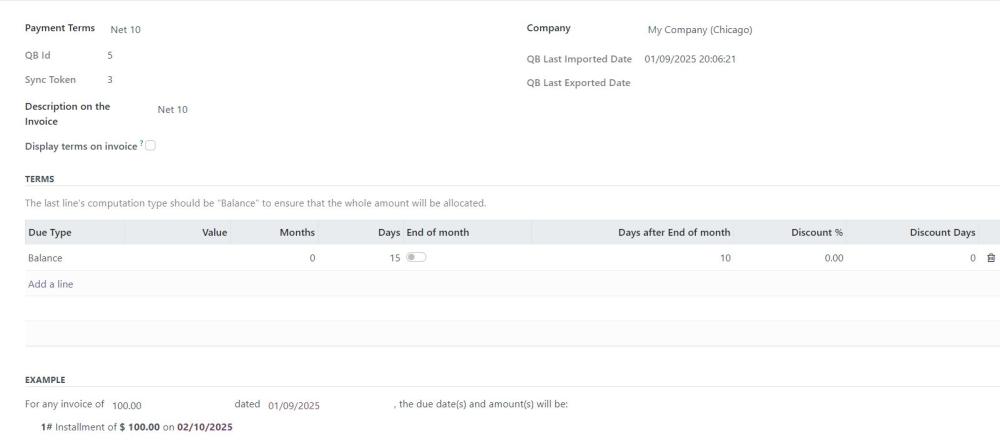
Figure 22: Payment term configuration
- QuickBooks Data: Displays corresponding QuickBooks payment terms.
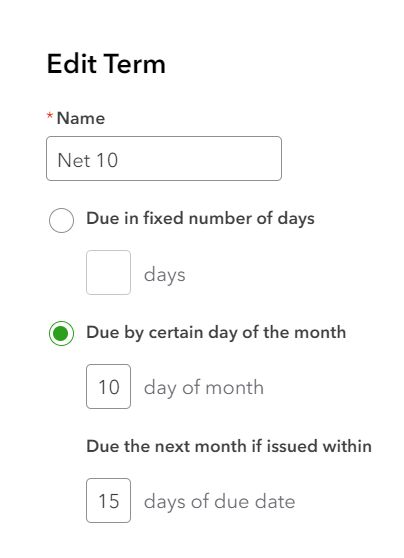
Figure 23
e. Customers
- Pre-Import Requirements:
- Set up Account Receivable and Account Payable under the Configurations tab in Odoo.
- While creating a customer, if the "Is QB Customer" option is checked, a parent customer must be selected, and the new customer will be created as a sub-customer under the selected parent customer
Odoo Data:
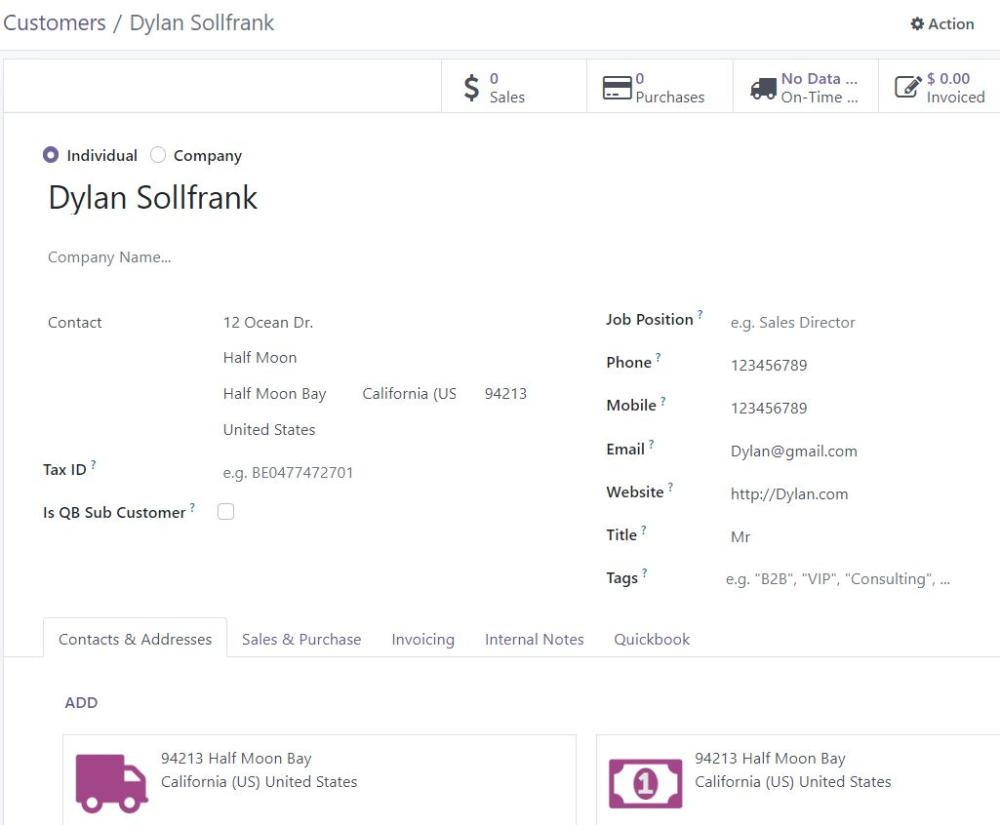
Figure 24: Customer record in Odoo
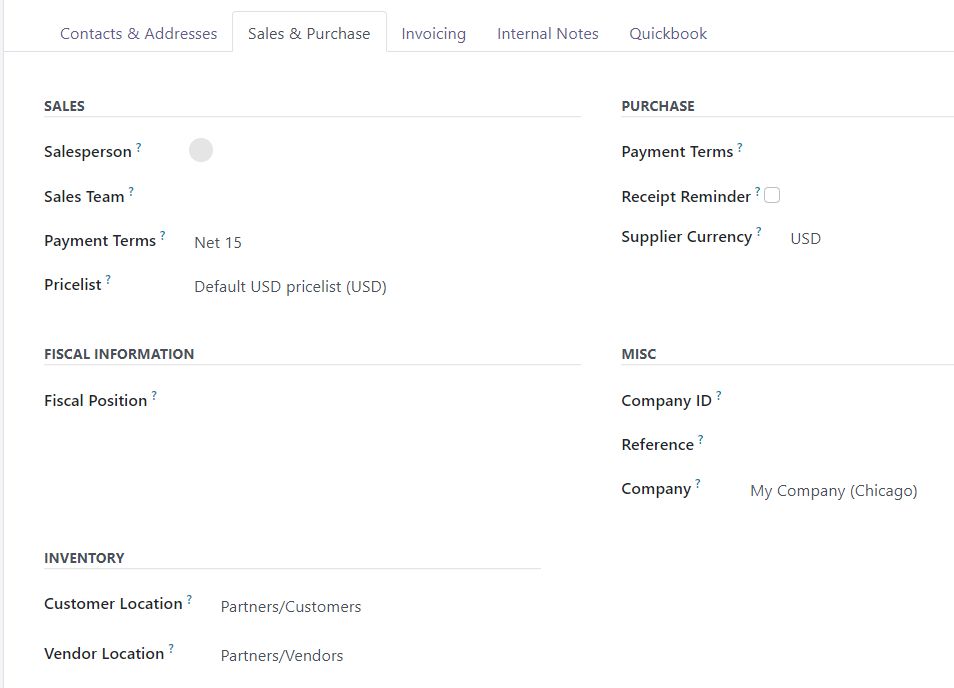
Figure 25: Customer sales and purchase details in Odoo
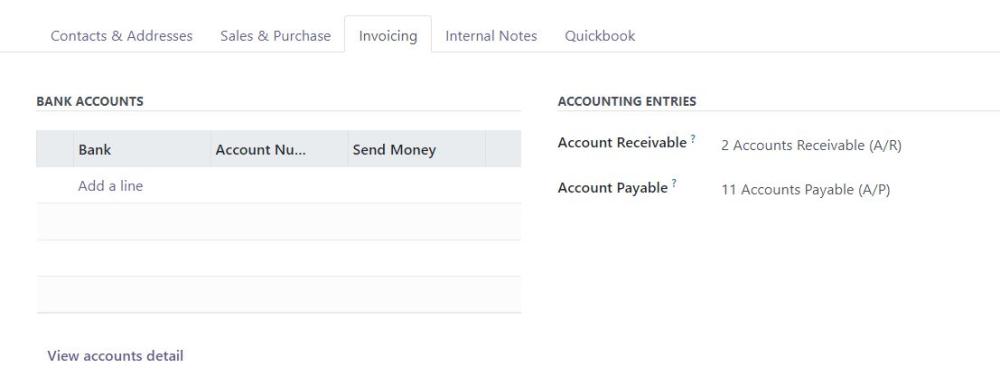
Figure 26: Customer Invoicing details in Odoo
Note:
QuickBooks system design does not allow a single contact to simultaneously represent both customer and vendor roles. QuickBooks requires separate entries for a Customer and a Vendor, even if they represent the same business or individual. If a contact must be used as both a Customer and a Vendor, create two separate contact records in Odoo
QuickBooks Data:
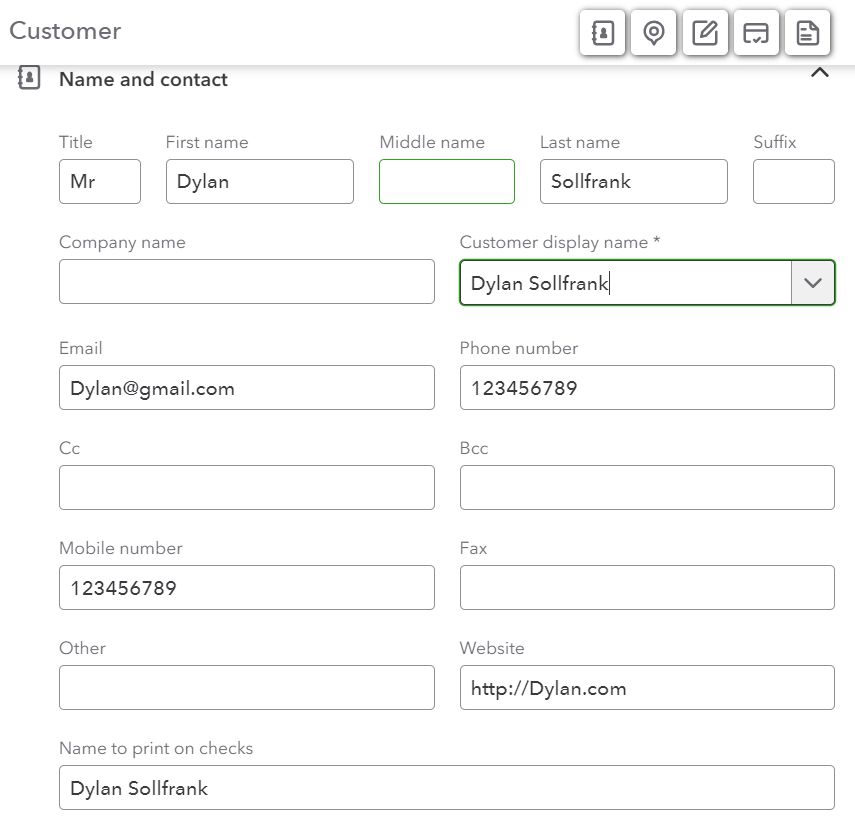
Figure 27: Customer record in QBO
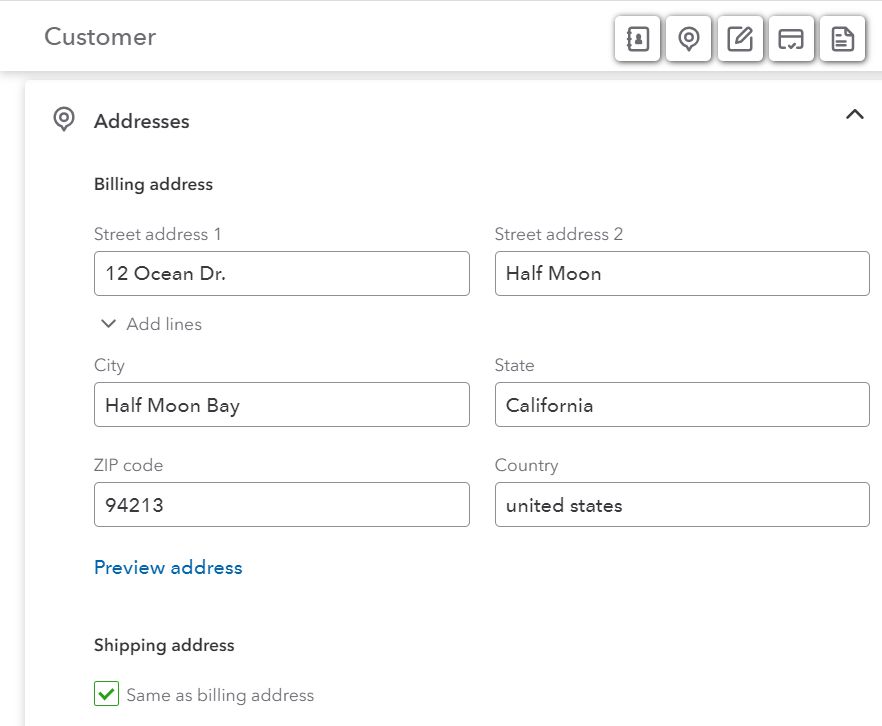
Figure 28: Customer address details in QBO
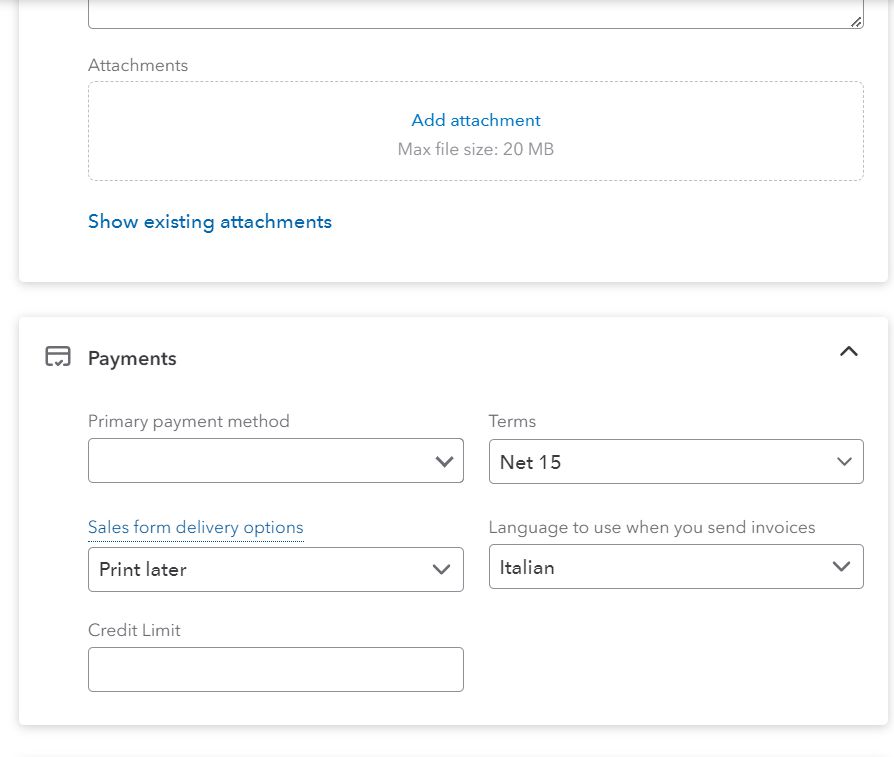
Figure 29: Customer Payment details in QBO
f. Vendors
Odoo Data: Displays vendor details imported into Odoo.
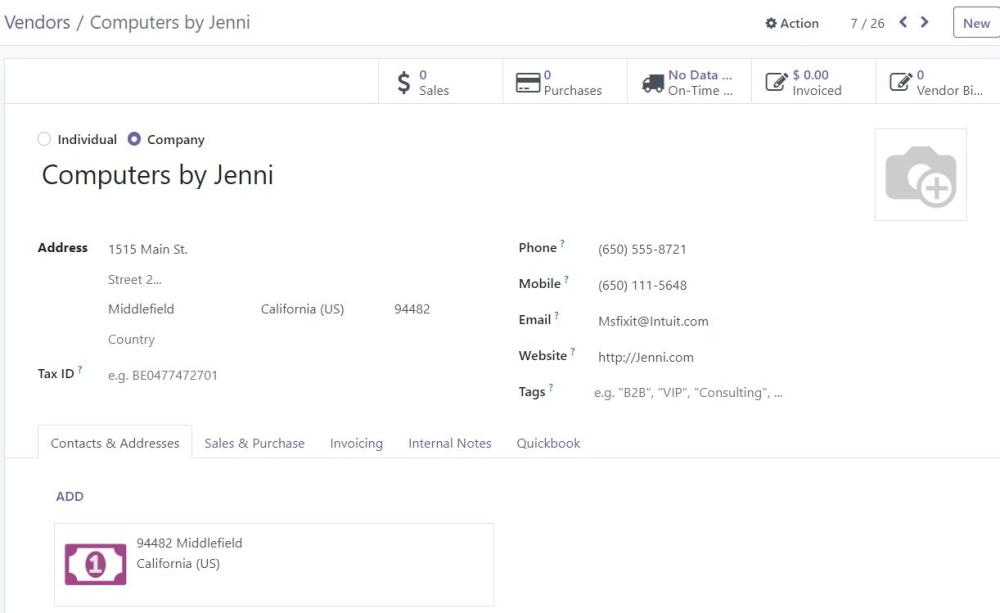
Figure 30: Vendor record in Odoo
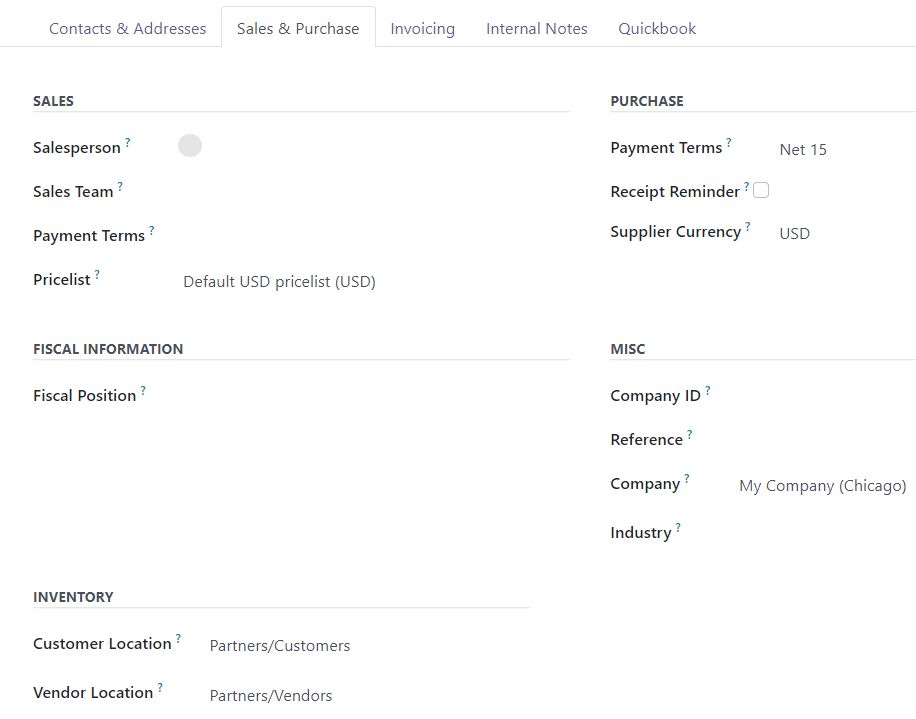
Figure 31: Vendor Sales and Purchase details in Odoo
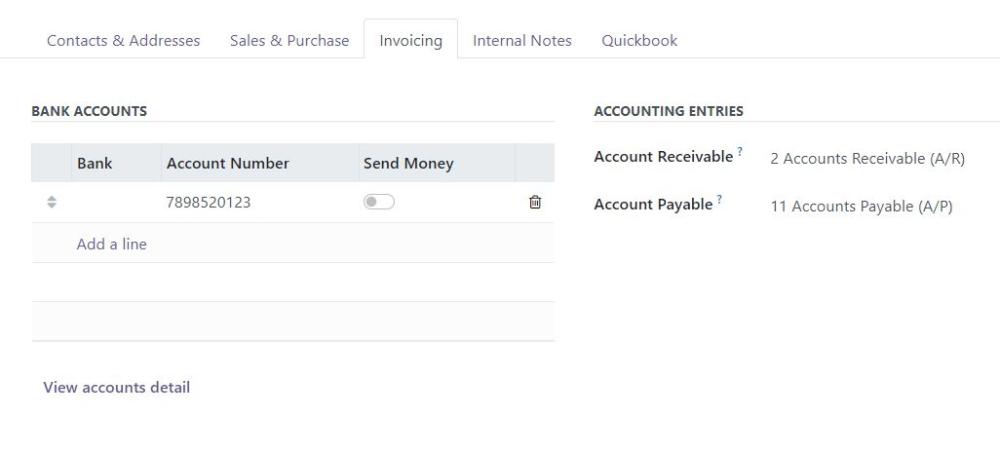
Figure 32: Vendor Invoicing details in Odoo
Note:
QuickBooks system design does not allow a single contact to simultaneously represent both customer and vendor roles. QuickBooks requires separate entries for a Customer and a Vendor, even if they represent the same business or individual. If a contact must be used as both a Customer and a Vendor, create two separate contact records in Odoo
QuickBooks Data: Displays corresponding vendor details
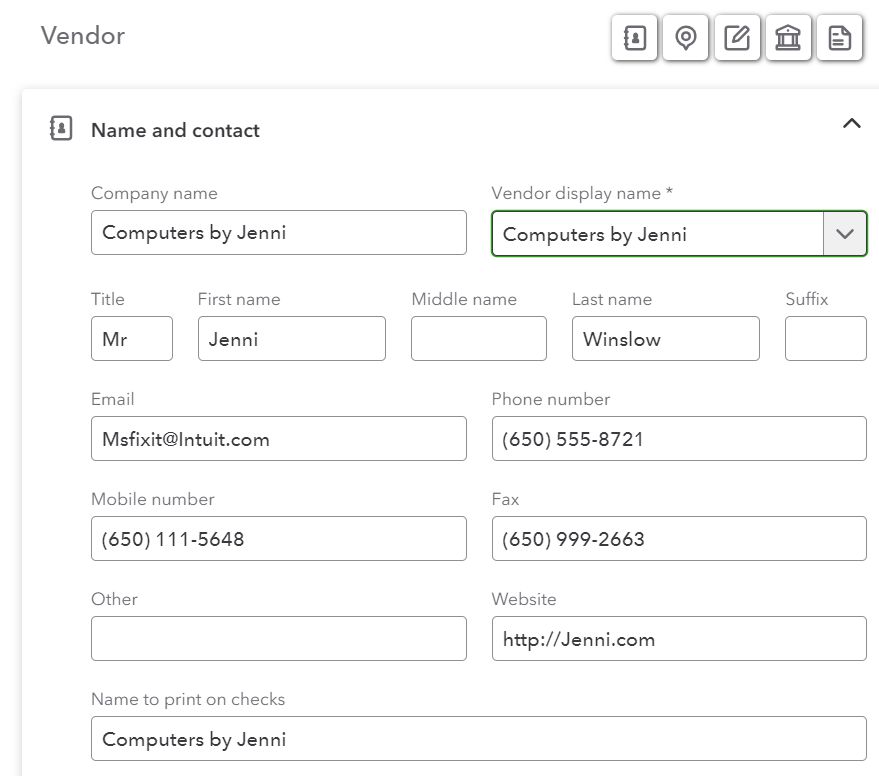
Figure 33: Vendor in QBO
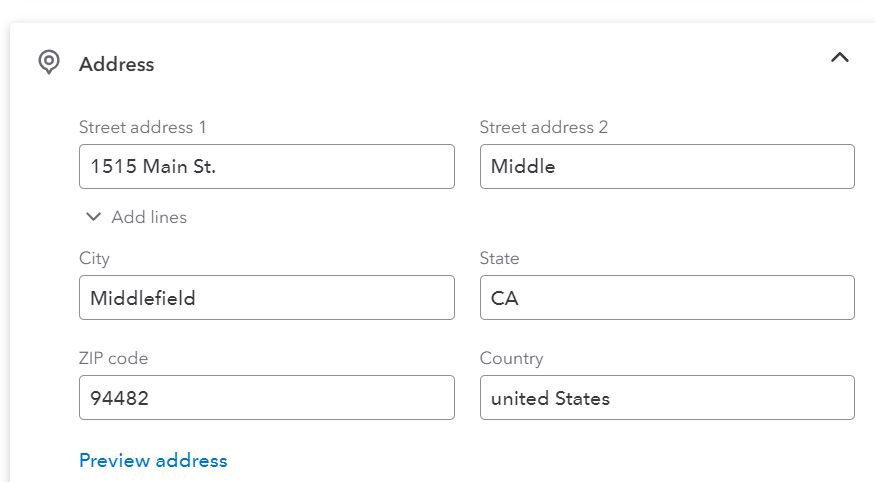
Figure 34: Vendor address details in QBO
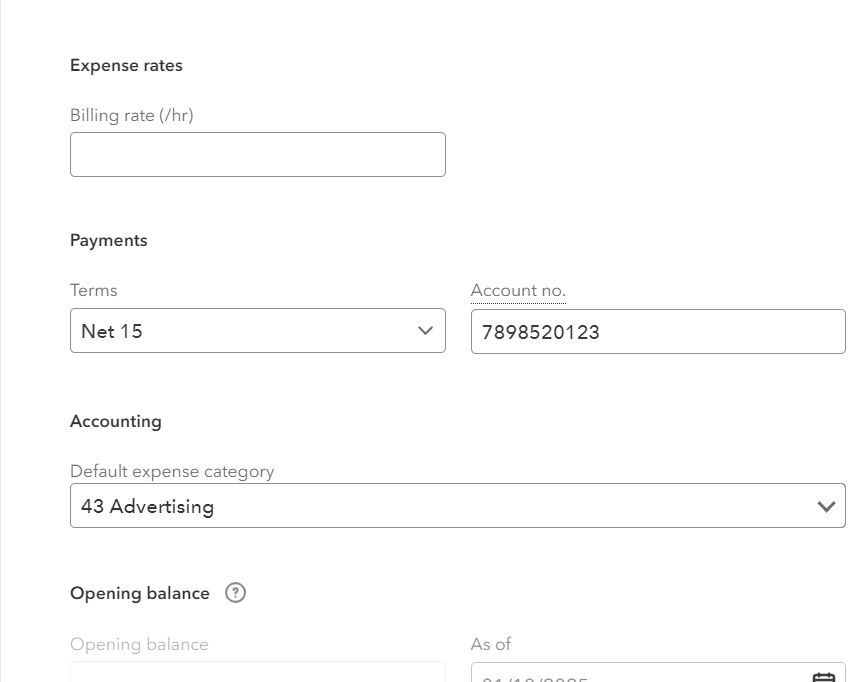
Figure 35: Vendor expense details in QBO
g. Product Categories
Pre-Import Requirements:
Configure following details under the Configurations tab.
- Category Income Account
- Category Expense Account
- Product category
Odoo Data:
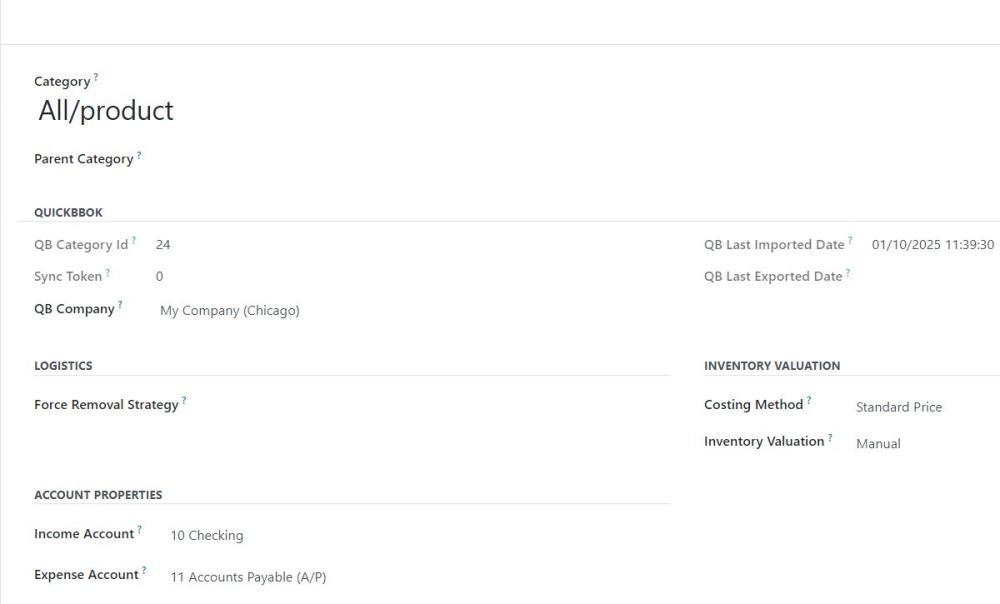
Figure 36: Product Category record in Odoo
QuickBooks data:
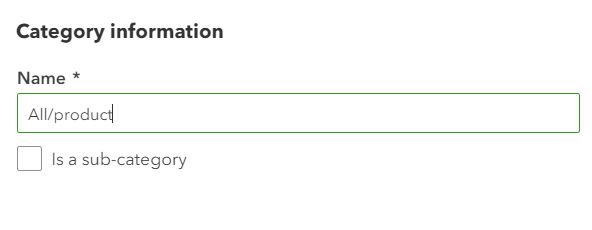
Figure 37: Product category record in QBO
h. Products
There are 3 types of products.
| Odoo | QuickBooks |
| Storable Product | Inventory |
| Consumable | Non-Inventory |
| Service | Service |
- For storable products, the Extra On hand Quantity and Minimum Quantity will be updated; all other details will remain the same for all product type.
Odoo Data:
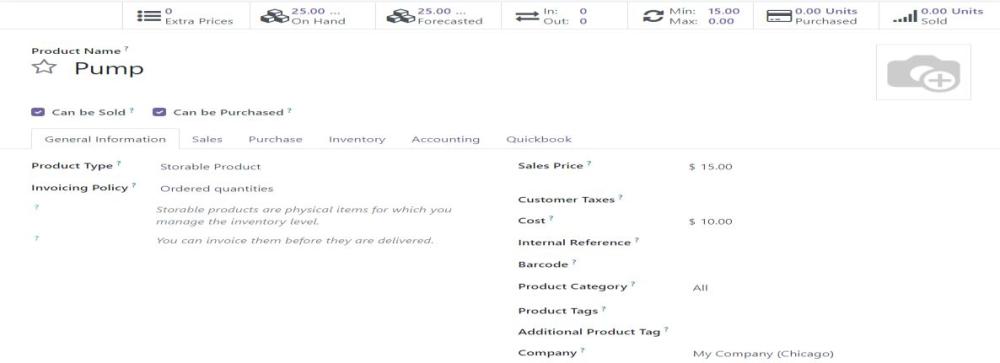
Figure 38: Product record in Odoo
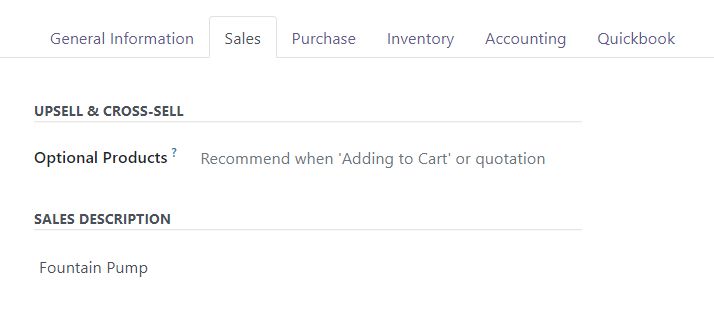
Figure 39: Product sales details
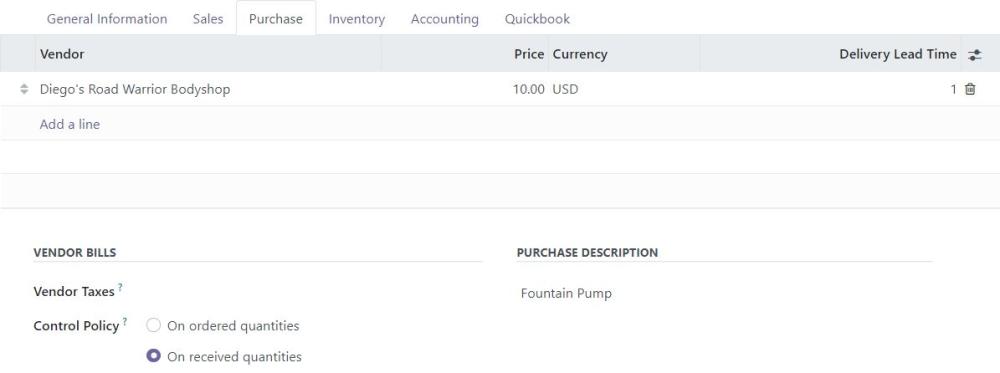
Figure 40: Product purchase details
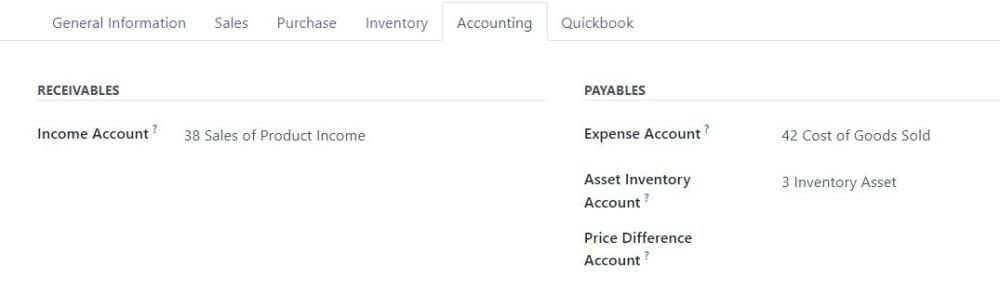
Figure 41: Product Accounting details
QuickBooks Data:
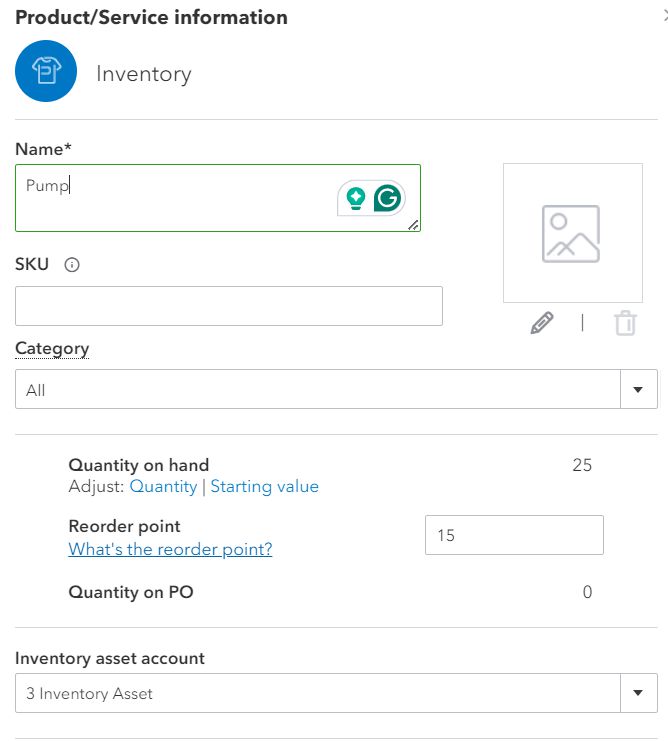
Figure 42: Product record in QBO
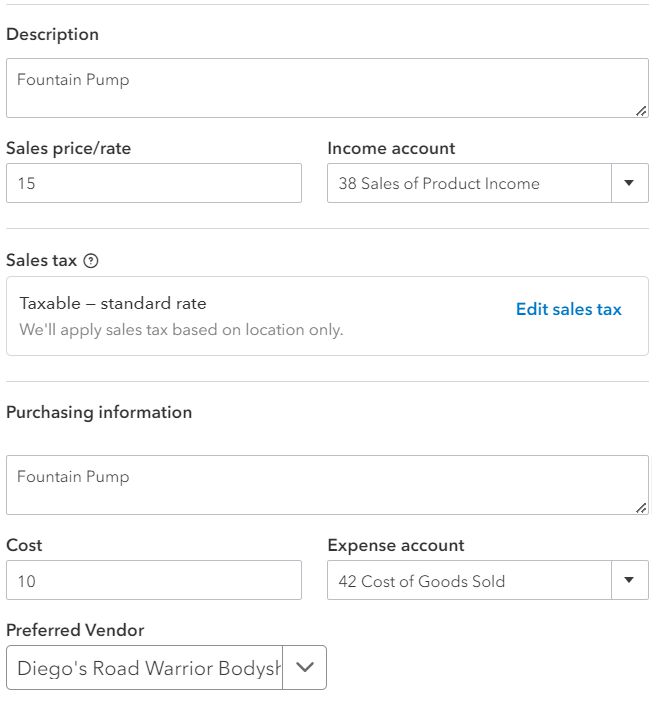
Figure 43: Product details in QBO
i. Inventory
- This is used to update the on-hand Quantity of the products.
j. Purchase Order
Odoo Data:

Figure 44: Purchase order in Odoo
QuickBooks Data:
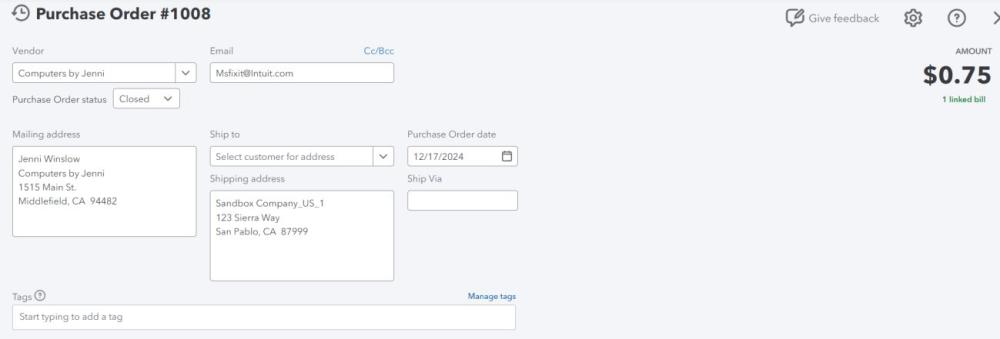
Figure 45: Exported purchase order in QBO
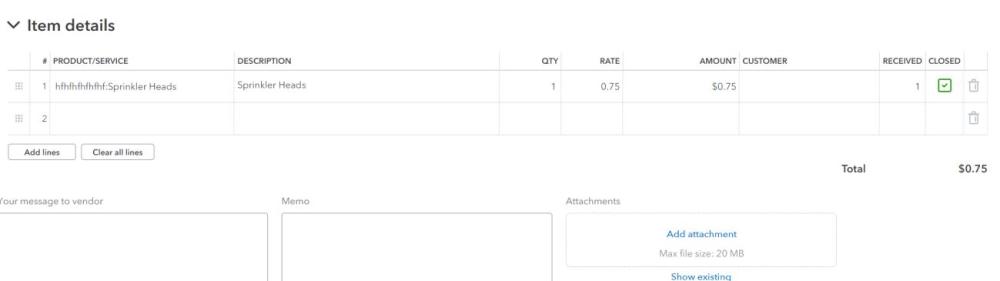
Figure 46: Purchase order item details in QBO
Limitation
- The export of purchase orders containing tax details is not supported.
k. Vendor Bills
Odoo Data:
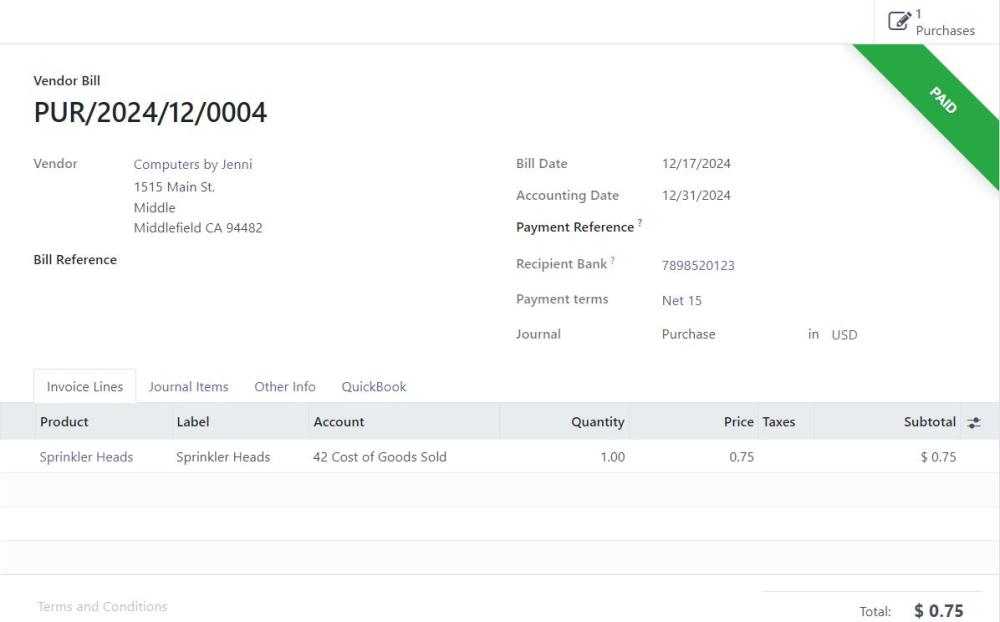
Figure 47: Vendor bill in Odoo
QuickBooks Data:
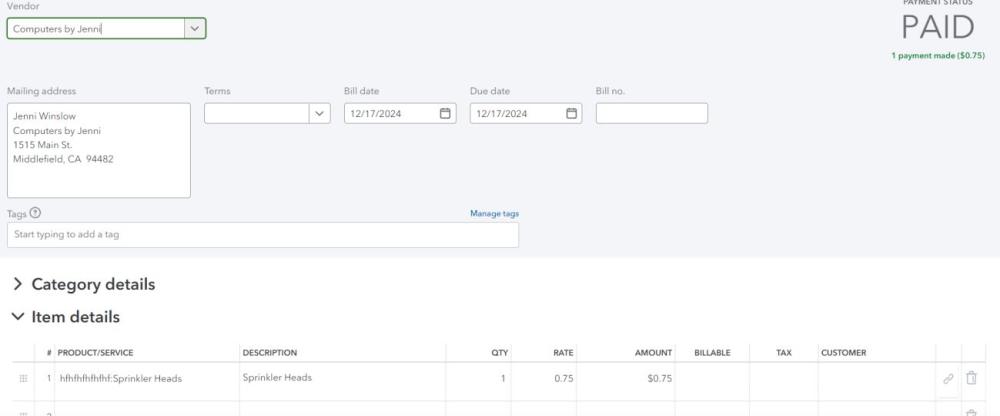
Figure 48: Vendor bill in QBO
l. Vendor Payments
Payments imported from QuickBooks into Odoo are automatically assigned to the appropriate journal based on the Payment Method. If the Payment Method or Deposit To fields are not explicitly mapped in QuickBooks, the system will use the value from the Deposit To field to determine the correct journal in Odoo. In cases where both fields are missing, the plugin will fall back to the default journal defined in the company's configuration settings in Odoo.
Limitations
- Vendor Credit Linking
- In Odoo, applying a vendor credit to a bill does not create a payment record.
- In QuickBooks, applying a vendor credit to a bill requires a payment to be created.
- Due to this difference in workflow, vendor credits cannot be directly linked to bills when exporting from Odoo to QuickBooks.
- As a result, vendor credit applications made in Odoo will not be reflected as payments in QuickBooks.
- Credit Auto-Application Issues
- When exporting a bill from Odoo to QuickBooks, QuickBooks may automatically apply any existing vendor credit to that bill.
- If the vendor credit has not yet been exported from Odoo, QuickBooks may still apply available credits, potentially causing incorrect reconciliation.
- Later, when the credit is synced from Odoo, it may appear as unlinked, leading to mismatches between the two systems.
- Our plugin cannot prevent this automatic behavior, as credit application is managed internally by QuickBooks.
Recommended Solution
To maintain accurate synchronization and reconciliation:
- Export Order
- Always export vendor credits from Odoo before exporting the corresponding bills.
This ensures QuickBooks has the credit available before it attempts to auto-apply it.
- Always export vendor credits from Odoo before exporting the corresponding bills.
- Manual Adjustment (if needed)
- If QuickBooks auto-applies a credit before it is synced:
- Open the Vendor Credit in QuickBooks.
- Unapply it from the bill.
- Re-apply it manually after syncing the credit from Odoo.
- Optional QuickBooks Configuration
- Disable auto-application of credits in QuickBooks:
- Go to Account and Settings > Advanced > Automation.
- Turn off the setting: “Automatically apply credits”.
- Disable auto-application of credits in QuickBooks:
- This ensures credits are applied only when explicitly instructed, helping to maintain consistency between Odoo and QuickBooks.
m. Employee
Odoo Data:
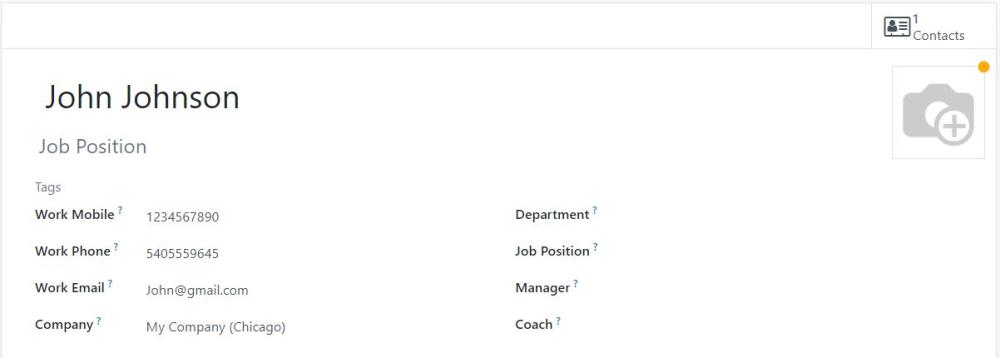
Figure 49: Employee record in Odoo
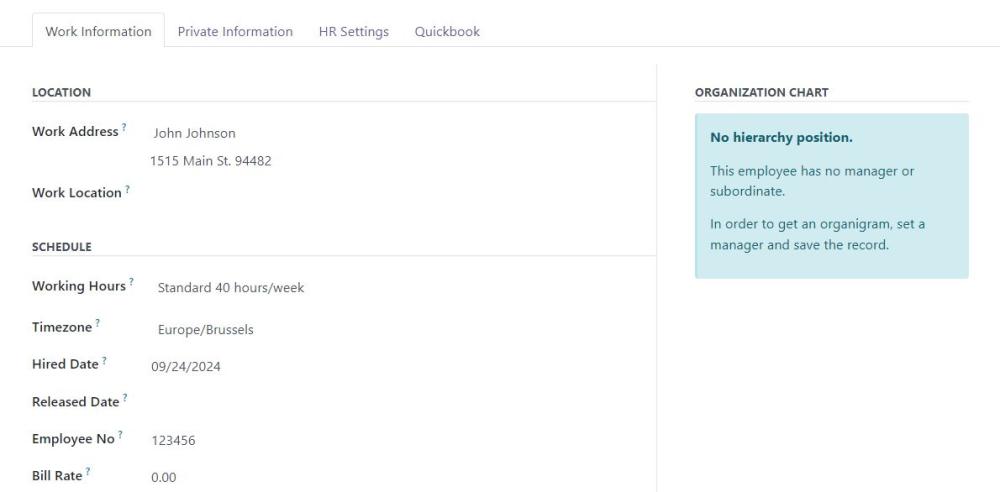
Figure 50: Employee work information in Odoo
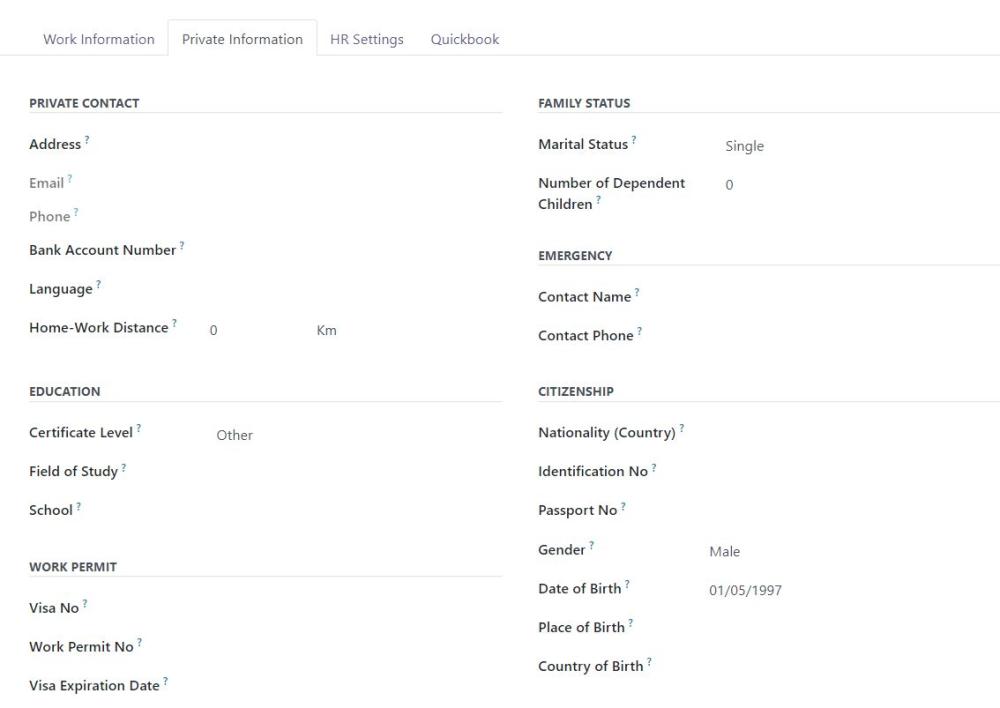
Figure 51: Employee private information in Odoo
QuickBooks Data:
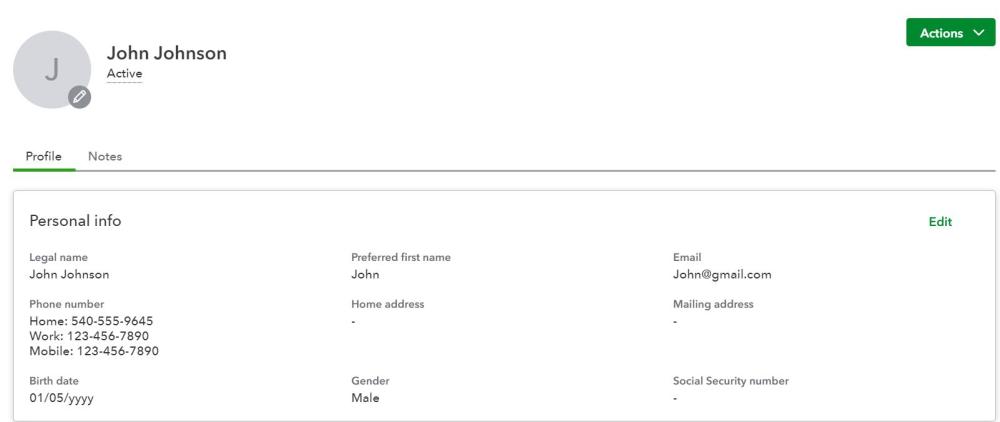
Figure 52: Employee Personal Data in QuickBooks

Figure 53: Employment Details
Limitations
- Inactive records in QuickBooks or Odoo will be skipped during the import/export process.
- Employee with the same name is not supported.
n. Sale Orders:
Odoo data:
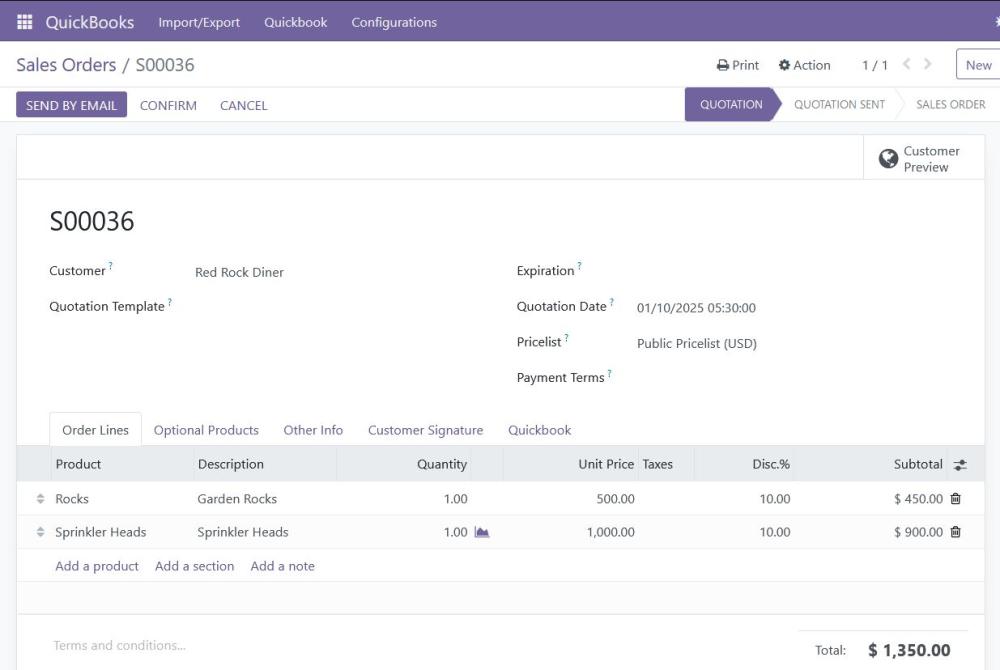
Figure 54: Sale order in Odoo
QuickBooks data:
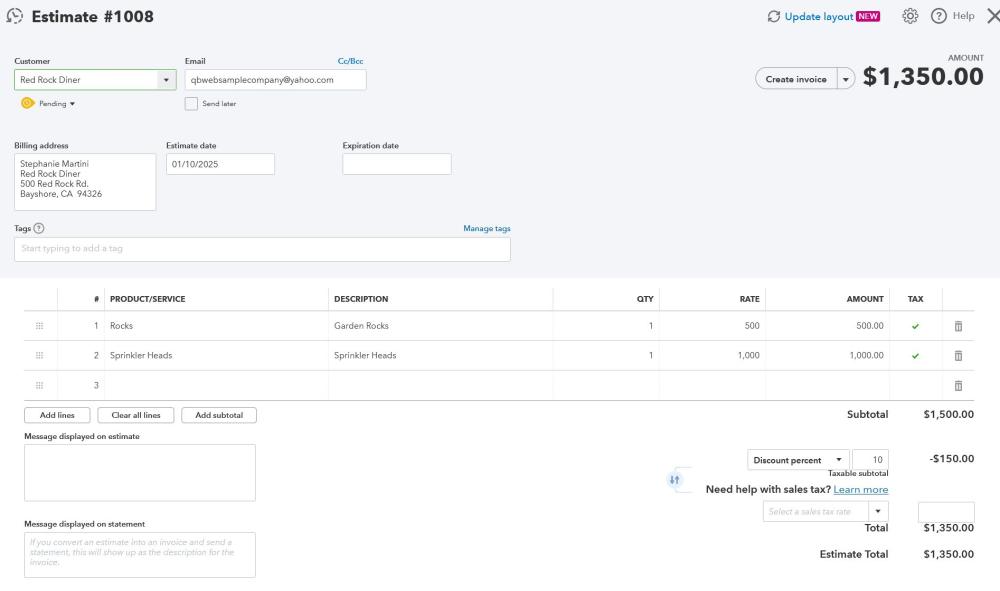
Figure 55: Sale order in QBO
Limitation
- Multiple Tax and Discount
- If a record (such as a Sale Order, Invoice, Purchase Order, or Bill) contains multiple taxes or discounts applied across multiple product lines, it will not be considered for export.
o. Customer Invoice
Odoo data:
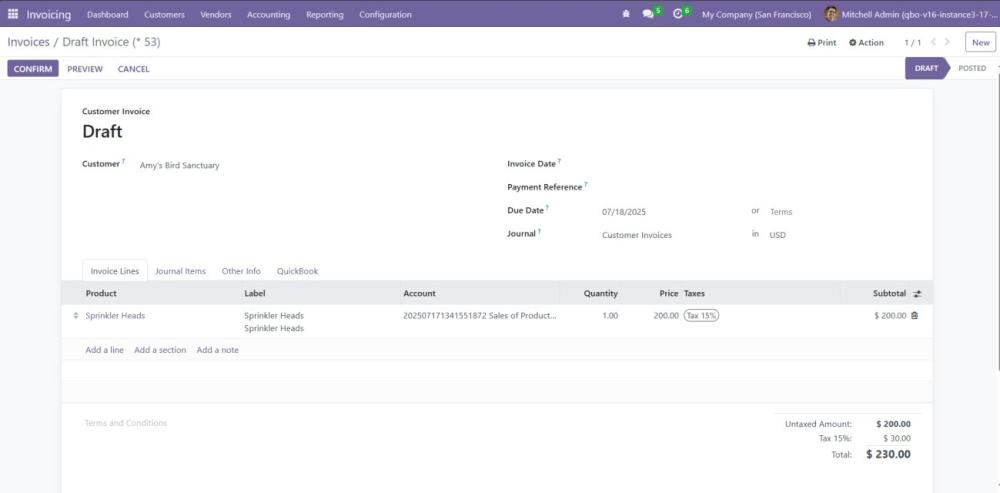
Figure 56: Customer Invoice in Odoo
QuickBooks Data:
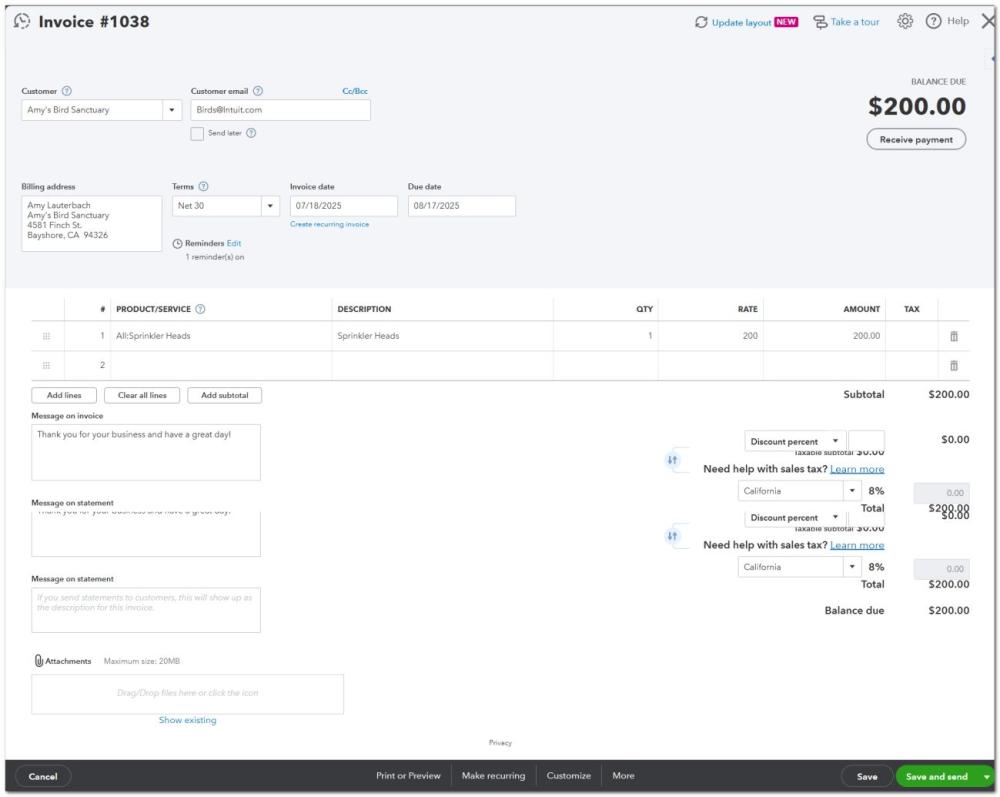
Figure 57: Invoice Data in QuickBooks
p. Customer Payments
Payments from QuickBooks will be successfully imported into Odoo, and the journal in Odoo will be determined by the Payment Method. If the 'Payment Method' or 'Deposit To' fields are not mapped in QuickBooks, the 'Deposit To' field data will be used to map the journal in Odoo. If both the 'Payment Method' and 'Deposit To' fields are missing, the system will use the default journal defined in the company's configuration.
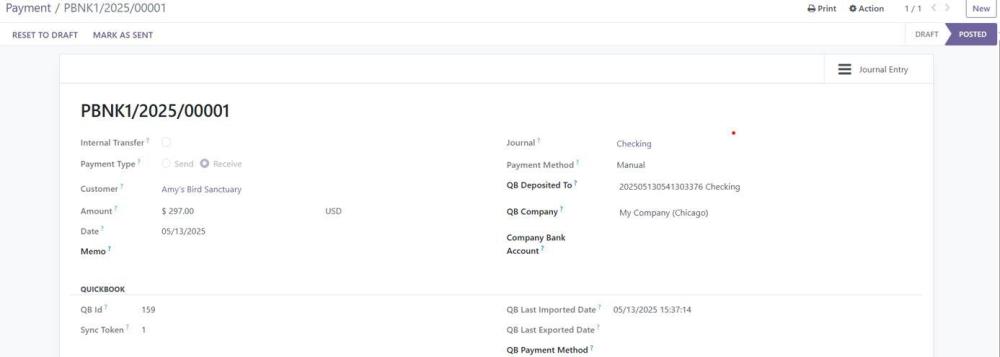
Figure 58: Customer Payment Odoo
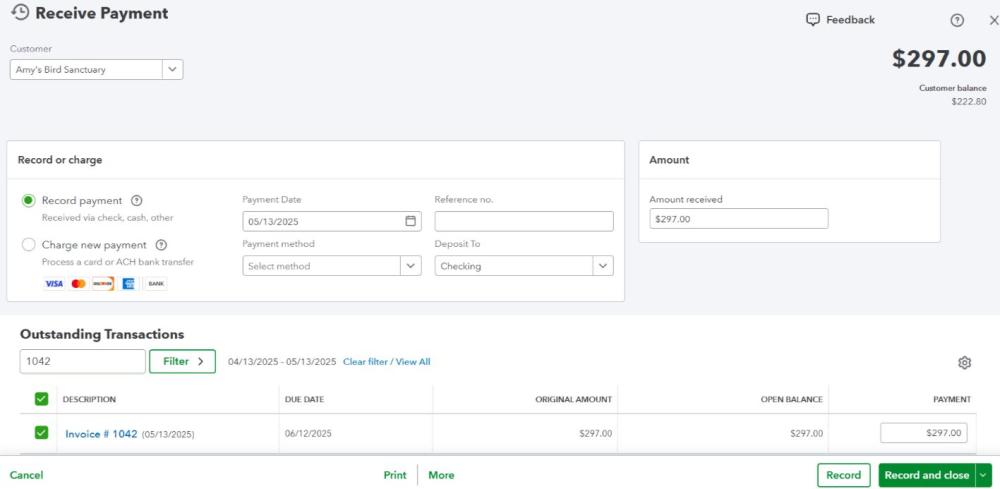
Figure 59: Customer Payment QBO
Limitations
- Credit Note Linking
- We can only link payments to invoices; credit notes cannot be directly linked to invoices during export.
- In Odoo, applying a credit note to an invoice does not create a payment record.
- In contrast, QuickBooks requires a payment to be created when a credit note is applied to an invoice.
- Due to this fundamental difference in workflows, credit notes applied in Odoo will not be reflected as linked in QuickBooks upon export.
- Automatic Credit Application by QuickBooks
- When exporting an invoice from Odoo to QuickBooks, QuickBooks may automatically apply any existing credit (credit memo or vendor credit) for that customer or vendor.
- If the corresponding credit has not yet been exported from Odoo, QuickBooks may still apply available credits, potentially leading to incorrect reconciliation.
- When the credit is eventually synced, it may appear unlinked, resulting in mismatches between the two systems.
- Unfortunately, our plugin cannot override or control QuickBooks’ auto-application behavior.
Suggested Solution
To maintain consistency between Odoo and QuickBooks and avoid reconciliation issues:
Recommended Export Order
- Export all credit memos or vendor credits from Odoo before exporting the corresponding invoices or bills.
- This ensures QuickBooks has the necessary credit available before attempting to apply it.
Manual Correction (if needed)
- If QuickBooks prematurely auto-applies a credit:
- Open the relevant credit memo in QuickBooks.
- Unapply it from the invoice.
- Reapply it manually after the credit has been synced from Odoo.
Optional Configuration in QuickBooks
- Disable the “Auto-apply credits” setting to prevent premature application:
- Navigate to Account and Settings > Advanced > Automation.
- Turn off “Automatically apply credits”.
- This ensures that credits are only applied when explicitly instructed, helping maintain synchronization integrity.
q. Time Frame Sync
The Timeframe Sync functionality in the QuickBooks Connector module provides a specific data model between Odoo and QuickBooks within a defined date range. This feature is designed for targeted synchronization operations and is particularly useful for Import/export data from specific period.
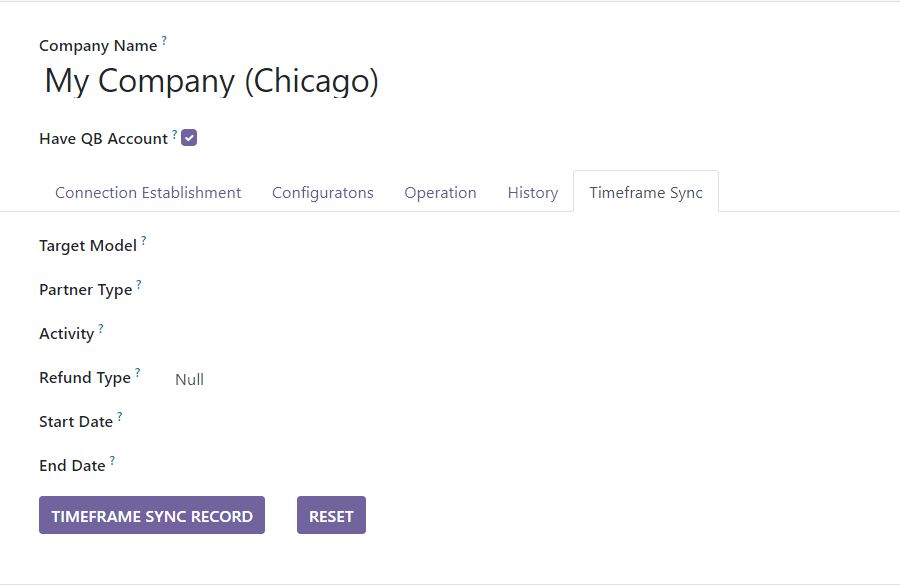
Figure 60: Time frame sync
Navigate to Quickbook → Import/Export → Company → Timeframe Sync tab
- Target Model: Select the Odoo model you want to synchronize with QuickBook
- Partner Type: Specify whether to sync customers or vendors
Required for: Partner, Account Move, Payment, Sale order, Purchase order - Activity: Choose the synchronization direction
Import - Import data from QuickBooks to Odoo
Export - Export data from Odoo to QuickBooks - Refund Type: Specify the refund type for invoice synchronization
Required: Conditional (Only for Invoice/Bill model) - Start Date & End Date: The beginning date of the synchronization timeframe The ending date of the synchronization timeframe
4. Technical Requirements / Compatibility:
- Compatible with Odoo 16.0 Community Edition.
5. Changes Log / Release Notes
- Version 1.0.0: July 2025
- Initial release
6. Support
If you have questions, use our contact form at webshopextension.com or email at support@webshopextension.com