WP OpenStreetMap Cluster
Categories
Magento
WordPress
SAP Commerce
Odoo
Shopify
Typo3
Shopware
nopCommerce
Pimcore
Hyvä
OXID eShop


1.0 About Plugin
WP OpenStreetMap Cluster is a plugin to create cluster-based maps using OpenStreetMaps and it is made with Leaflet JS, a JavaScript toolkit for creating mobilefriendly interactive maps.
Shortcode characteristics and plugin settings can be used to set this map.
This plugin's main feature is to display popups, based on the clusters mapped on a single location. Any post type can be assigned as a map cluster and populate on the map.
The user can create maps in two ways,
- Location Based Cluster
- Post Type Based Cluster
More information about these clusters are given below in the upcoming chapters.
2.0 Requirements
To install and configure WP OpenStreetMap Cluster in WordPress, the WordPress version should be 5.7 and above and the PHP version should be 7.4 and above.
3.0 Installation
3.1 Install using zip file
To install WP OpenStreetMap Cluster Plugin, follow the steps below.
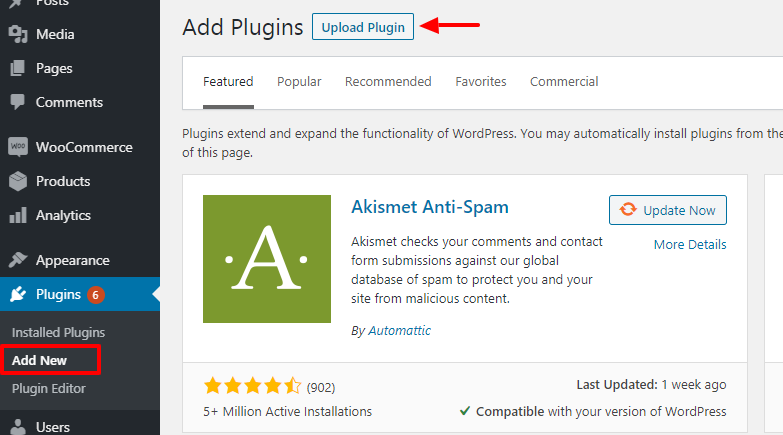
- Choose to add a new plugin, then click upload.
- Go to the WordPress admin dashboard and visit Plugins » Add New. After that, click on the ‘Upload Plugin’ button on top of the page.
- Then a plugin upload form will appear. Here you need to click on the ‘Choose File’ button and select the plugin file you downloaded earlier.
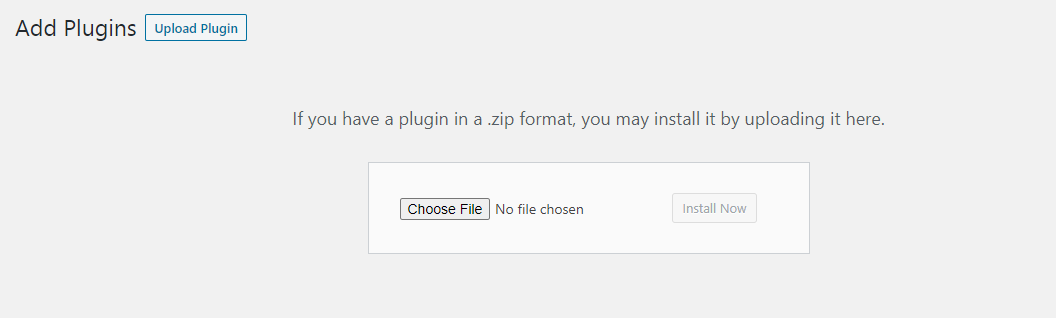
- Upload the wp-openstreetmap-cluster zip file
- After you have selected the file, you need to click on the ‘Install Now’ button. WordPress will now upload the plugin file from your computer and install it for you. You will see a success message after the installation is finished.
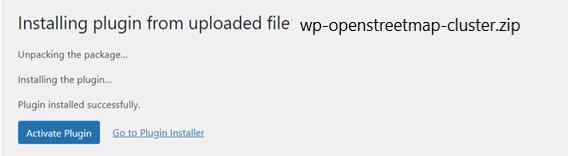
- Once installed, you need to click on the Activate Plugin link to start using the plugin.

- Go to WP OSM Cluster Menu » Settings. Do the necessary configurations like zoom level, position latitude and longitude to the corresponding map type.
3.2 Manual Installation via FTP
In rare cases, your WordPress hosting provider may have file restrictions that could prevent you to install a plugin from the admin area. In this situation, the best way is to install the plugin manually using FTP.
First, you will need to download the plugin’s source as a zip file. Next, you need to extract the zip file on your computer. Open the FTP client on your computer and connect to your website using the login credentials provided by your web host. Once connected, you need to go to the /wp-content/plugins/ folder on your website, and then upload the extracted plugin folder to that path.
After uploading the files, you need to visit the WordPress admin area and click on the Plugins link in the admin menu. You’ll see the WP OpenStreetMap Cluster plugin successfully installed on the plugins page. You need to click on the Activate link below the plugin to start using it.
After successfully installing the plugin, you can configure the settings right away.
3.3 Plugin Update
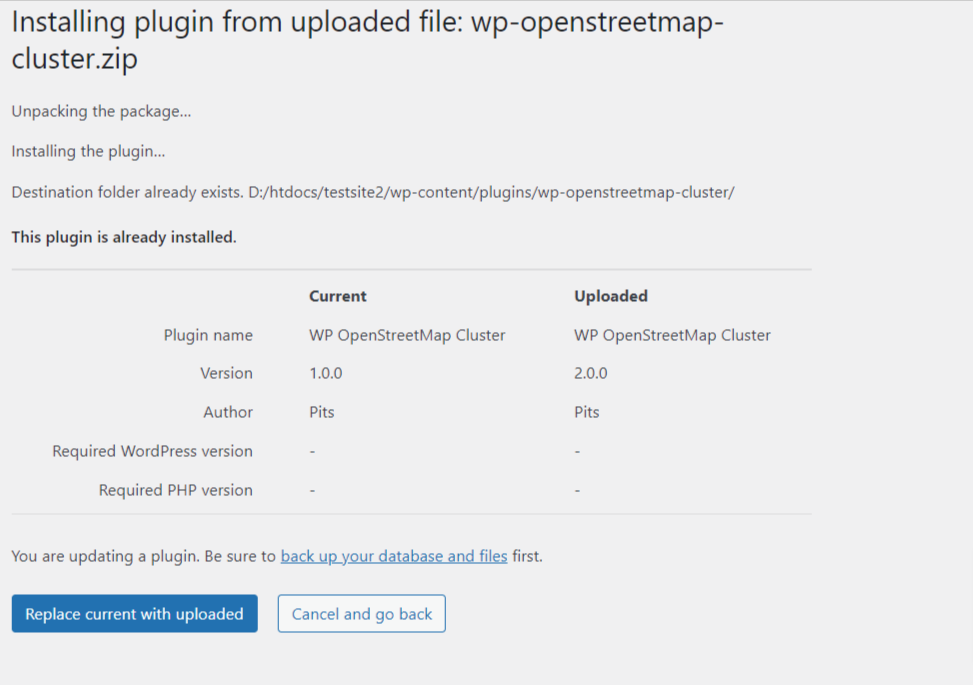
To update the plugin, either you can follow the above-mentioned steps to upload a new version or you can simply click the update now link under the WP OpenStreetMap Cluster plugin on the plugins page.

If you are trying to upload the new version file manually, please make sure you have selected replace current with the upload.
4.0 Configurations
By using WP OpenStreetMap Cluster Plugin you can create maps in two ways
- Location based map cluster
- Post type based map cluster
4.1 Location Based Map Cluster
The cluster maps can be formed by locations. This means you don’t have to link this location with other post types to make a cluster.
To do this you need to follow a few steps given below,
- Create Locations
Go to the Locations menu under WP OSM Cluster menu and create a new location by
clicking add new
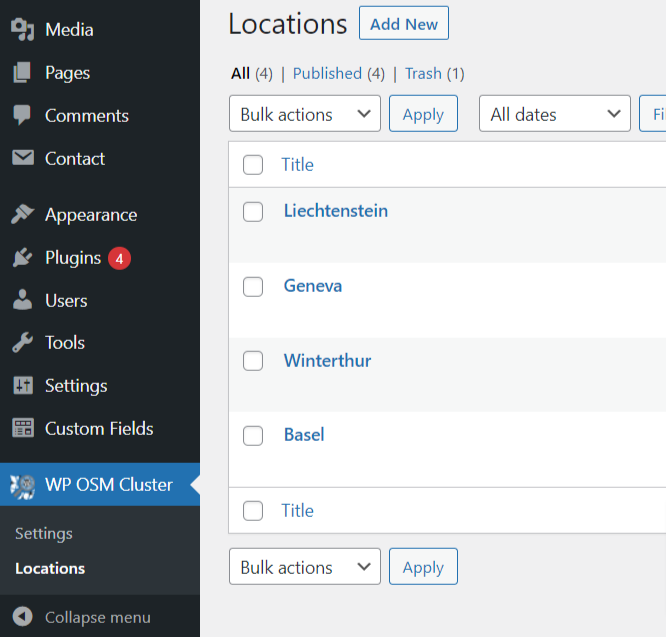
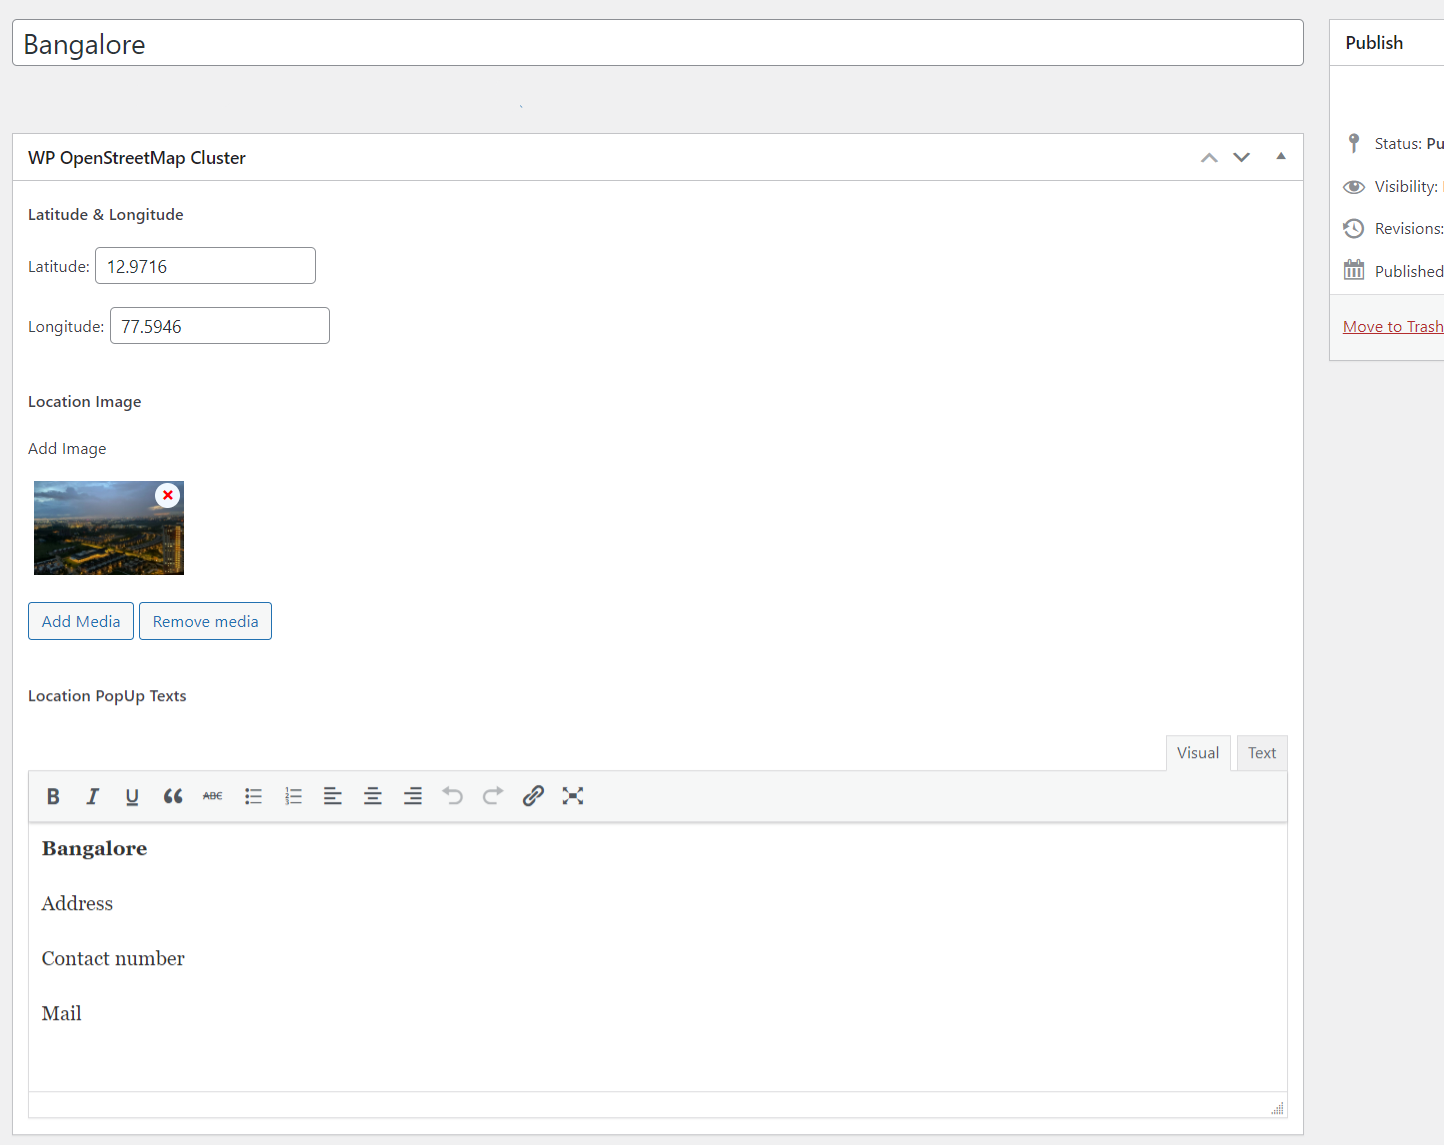
Then fill out all the location data like location name, latitude, longitude, location image and the popup text.
After creating locations, we can show that as a map in the front end. Before that, we need to configure some common settings.
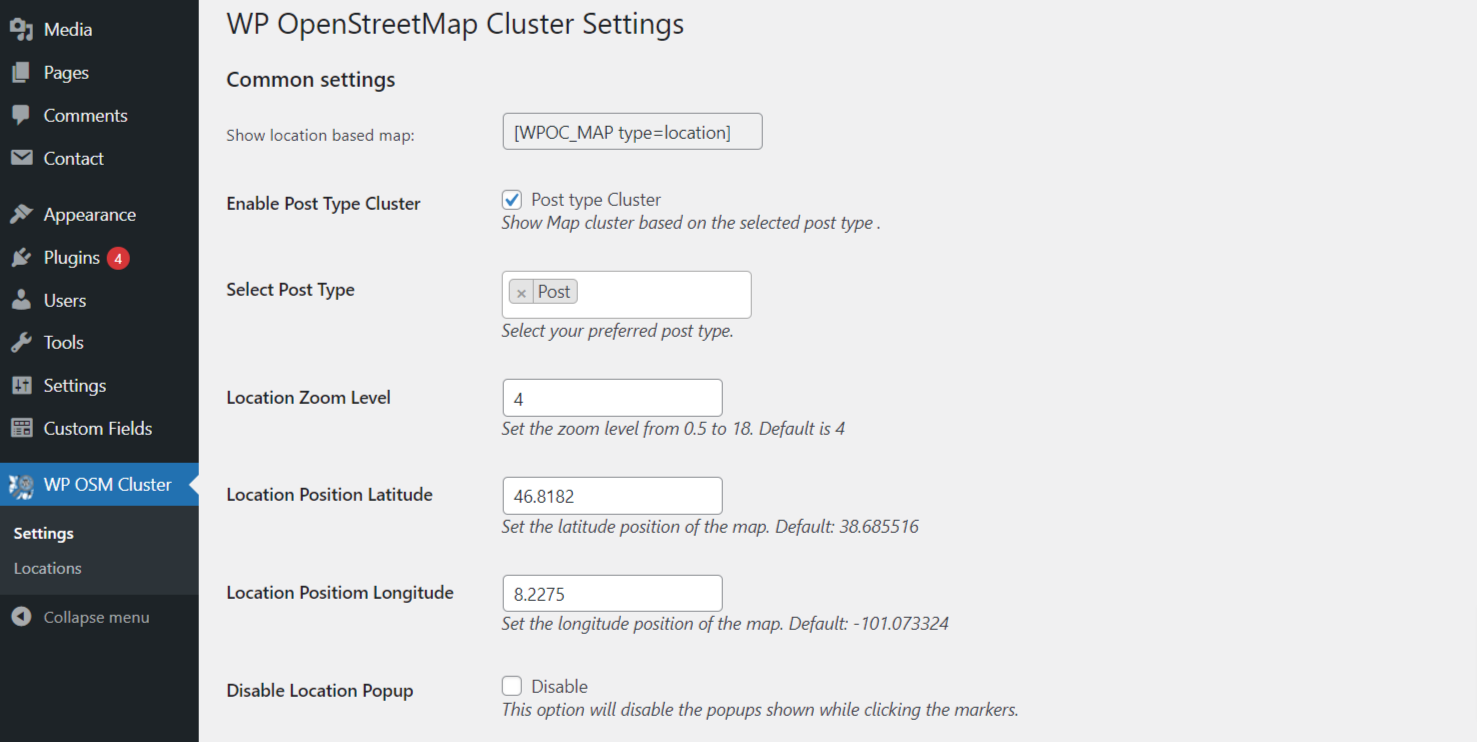
Go to WP OSM Cluster Menu » Settings
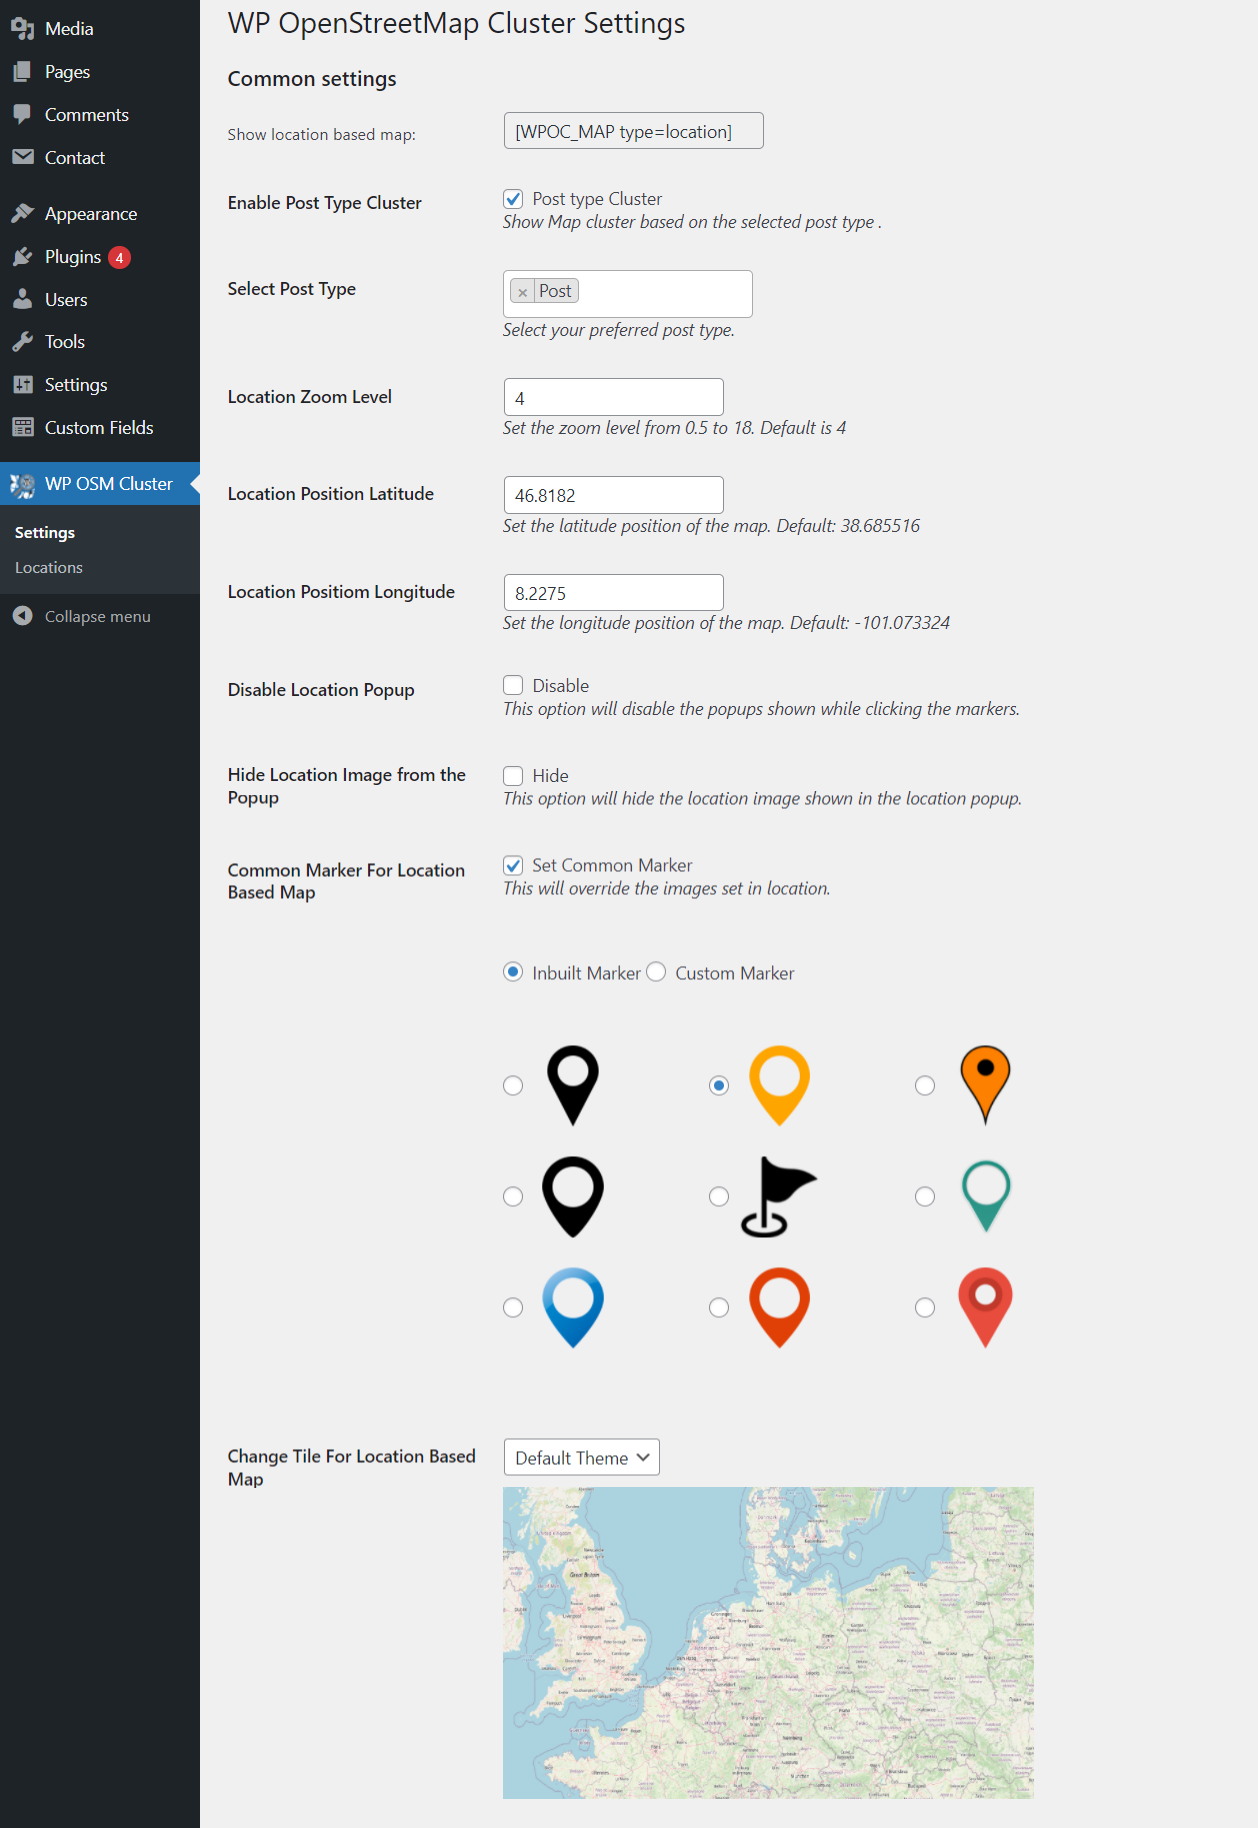
Here you can find some options that can be used to configure the location based map and those options are explained below,
- Enable Post Type Cluster:
This is used to enable the post type based cluster map. By default, it will be unchecked. Further details about this option will be given in the next chapter. - Location Zoom Level:
This is an option to adjust the default map position zoom level. You can set the zoom levels from 0.5 to 18. The least zoom level is denoted as zoom out and the higher zoom level is denoted as zoom in. - Location Position Latitude & Longitude:
This option is used to point out which location the map should be in default. Here you can mention the latitude & longitude of the outer area of the location. For example, if you are creating locations like London, Amsterdam, Berlin and Paris in Europe then you can fill out the latitude and longitude of Europe that is 54.525963, 15.255119. - Disable Location Popup:
This is an option that is used for disabling the popup shown while clicking the markers - Hide Location Image from the Popup:
If this checkbox is enabled then the location image which is shown in the popup will be hidden. - Common Marker for Location Based Map:
This option is used to make a common marker for all the locations on the map. In default, the map will assign the location image as the marker which is uploaded in the location. You can change that and make a common marker. Here we have two options that are, the user can select the markers which are provided as inbuilt or the user can upload a custom common marker. - Change Tile for Location Based Map:
The user can change the map tile theme. There are four themes are available. This will just change the look of the map not the functionalities of the map.
Finally, the map is ready to be rendered in the front end. To display the map in the front end, just copy the shortcode [WPOC_MAP type=location] which is shown at the top of the WP OpenStreetMap Cluster settings page.

The above image is the representation of location based map.

This is the representation of an individual location popup.
4.2 Post type Based Map Cluster
Post type based map cluster is nothing but assigning the already created locations to a separate post type and populating a map cluster.
In simple words, Let’s consider you have an MNC and your offices are in different locations so you need to display a cluster map with the locations and also the employees who are working in that location. Let’s assume you have a separate post type for employees. So, what you have to do is create the office locations under the locations menu. Then assign those locations inside the employee post edit page. In that way, map will be displayed based on the office locations and also employees will be populated in a slider.
The following steps will give you more detail about how to implement this.
- Go to WP OSM Cluster Menu » Settings
- Enable the option Post type cluster and select the post type you want to use as a cluster. If you have a post type called “employee” then you have to select employee here.
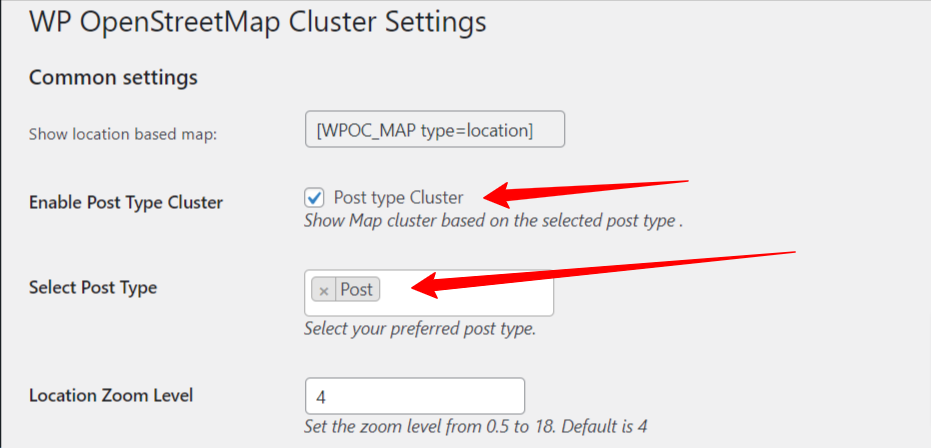
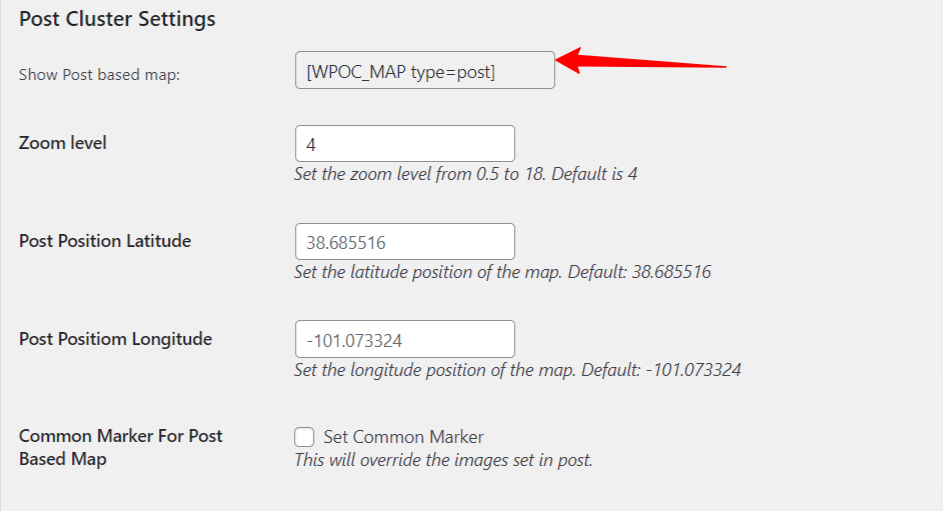
Once you select the post type do save the changes. After that you can see new options have displayed under the location settings like this,
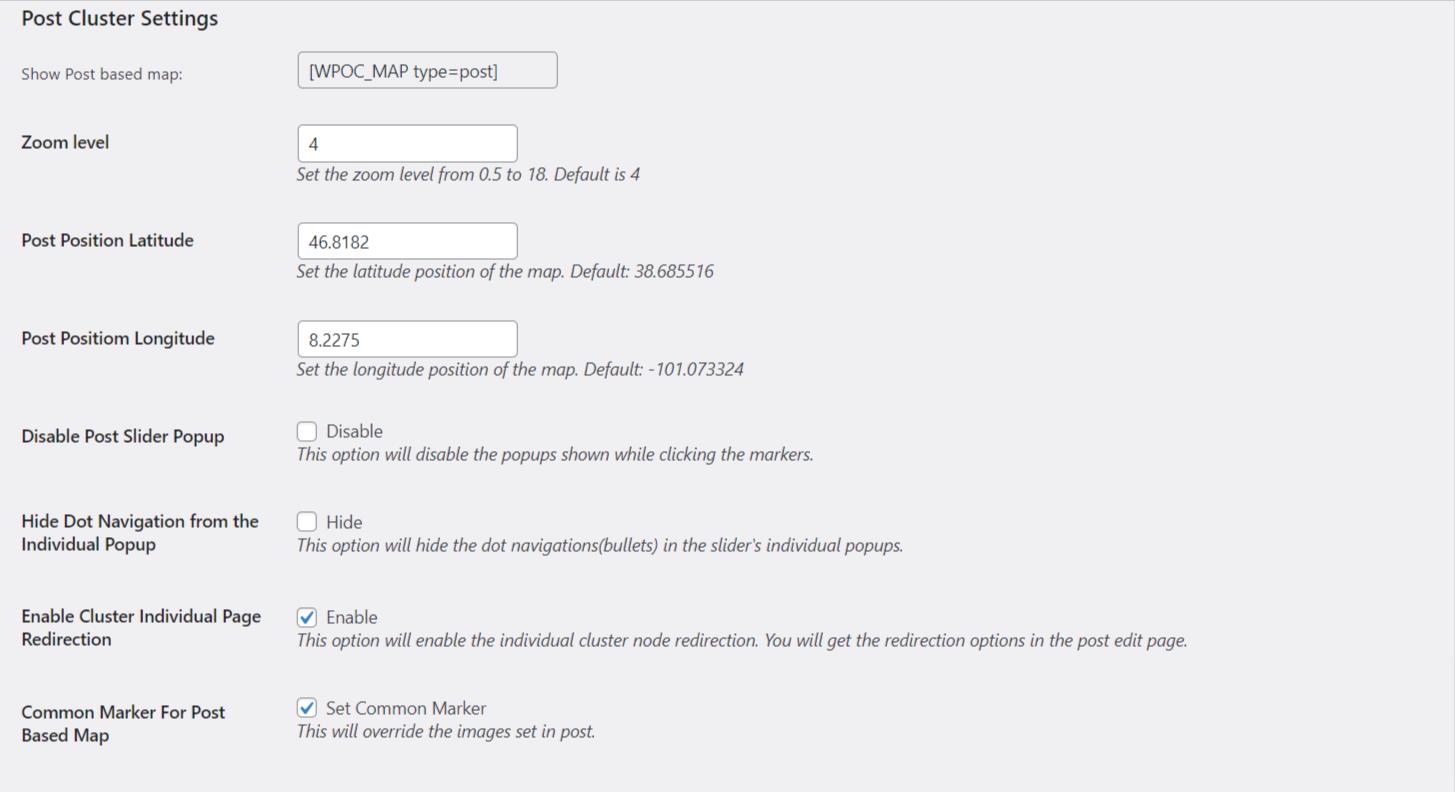
This is a post type specific setting. In my case, I have chosen the “post” as a post type that is why it shows Post Cluster Settings. Whatever configuration you do in this section will be affected only by that specific post type based map. These options will work the same as explained in the location based map configuration.
In addition to the location options, here you can find two more options
Hide Dot Navigation from the Individual Popup:
This option will hide the dot navigations(bullets) under the individual cluster posts

Enable Cluster Individual Page Redirection:
By enabling this option, the above-mentioned individual cluster post can be redirected to that specific page. This also can be redirected to a custom link that is given in the post.
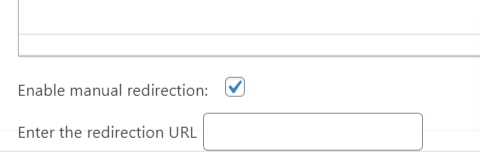
This textbox can be found under the post and only when the checkbox is enabled.
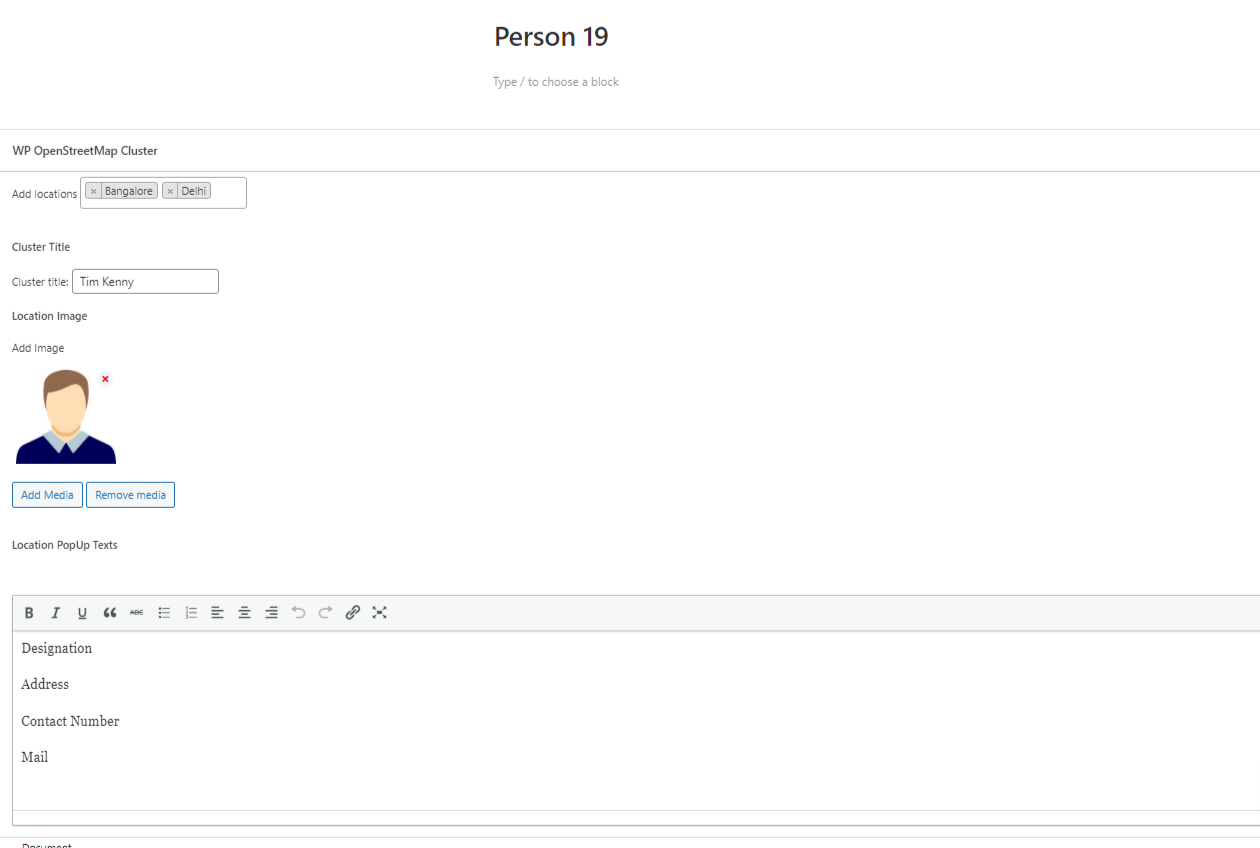
After configuring this, you can go to the post edit page and do the following things,
Under each edit page, you can find the section WP OpenStreetMap Cluster. There you can add locations, Cluster title, Cluster image and contents that need to be displayed beside the image.
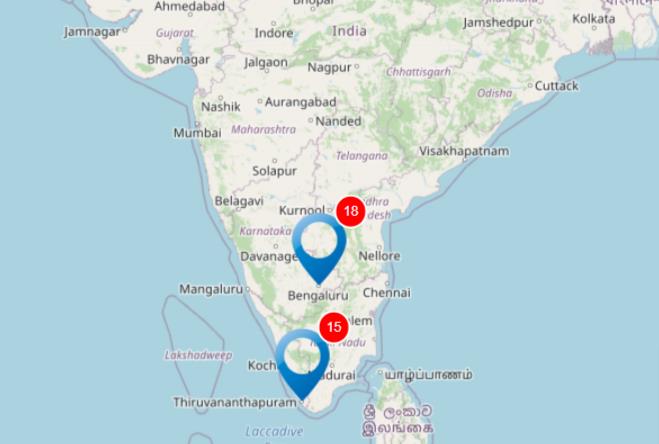
Once this process is done you can simply copy the shortcode which is shown under the Post Cluster Settings. In our case, that is [WPOC_MAP type=post]
And this will be the final output of the map.
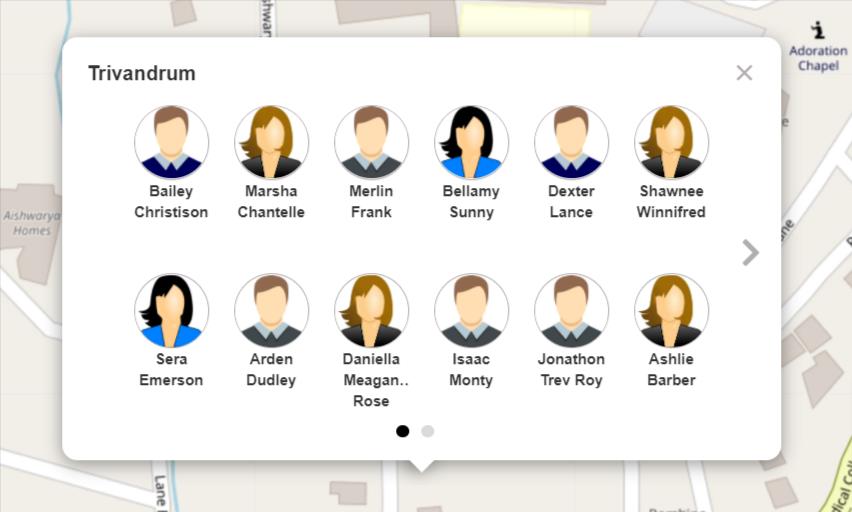
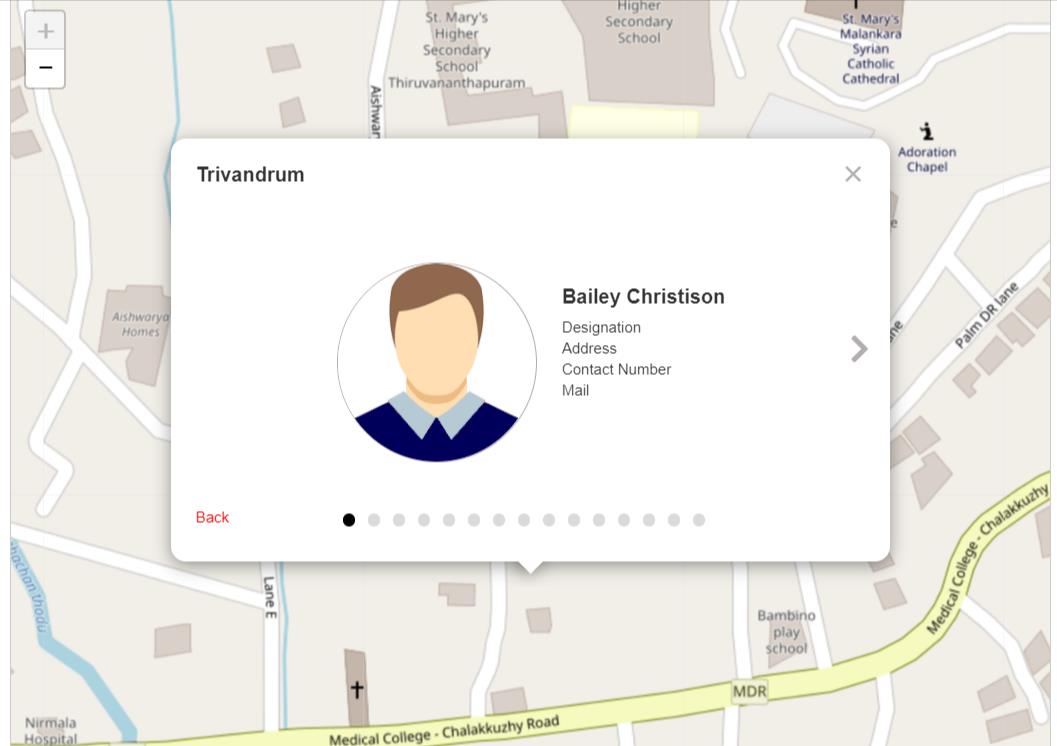
When you click on a single person and that will give the following result.
If the user doesn’t want to show cluster and only needs to show the locations then the user can create locations and adjust the zoom options based on to avoid the cluster.
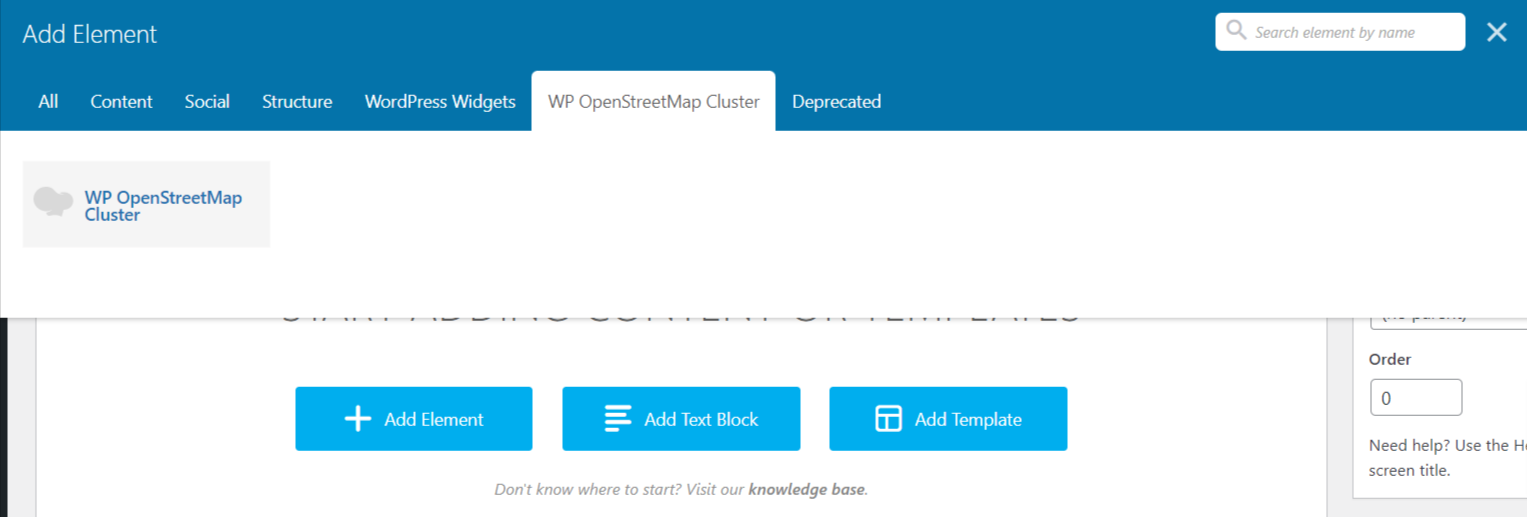
5.0 WpBakery Page Builder Support
WP OpenStreetMap Cluster provide the support to use the element to populate the map. You can find the element under the WP OpenStreetMap Cluster.
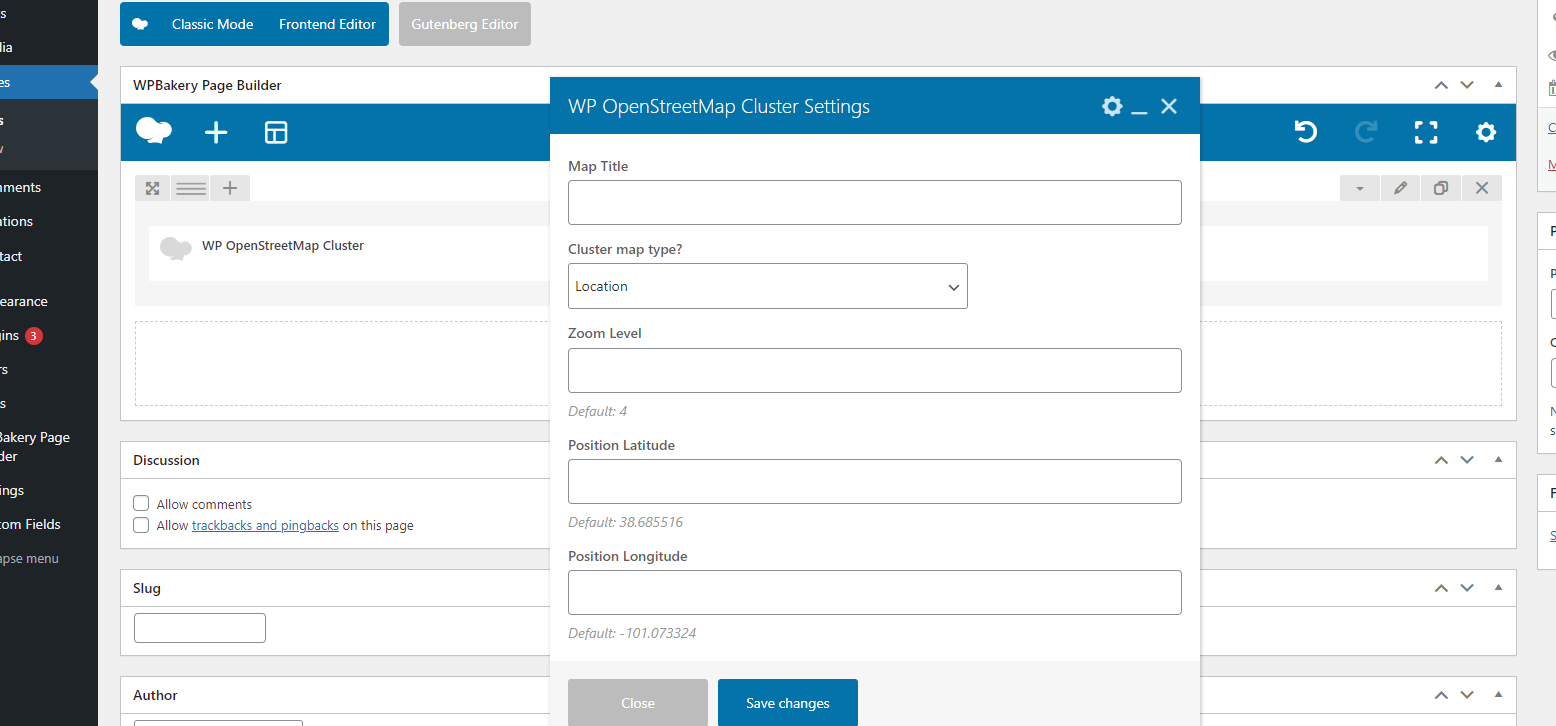
Here you can add Map title, Map type, Zoom level and Position latitude and longitude. This will automatically display the map.
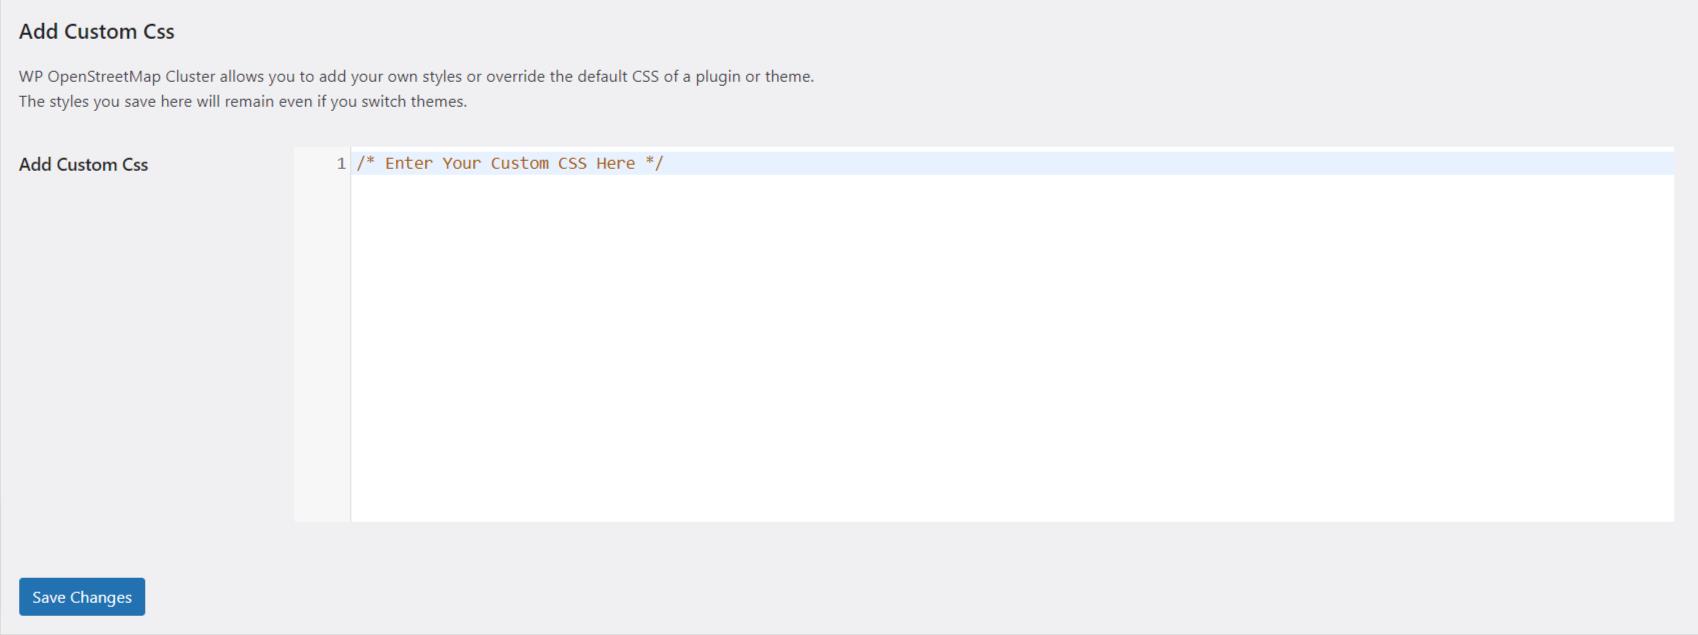
6.0 Add Custom CSS
In WP OpenStreetMap Cluster, it is possible to add your own CSS that will overwrite the existing styles.
7.0 Map Licences
As per the WordPress Plugin Guidelines we didn’t provide any option to remove the map credits in the map and it is mandated to give the credits to the map provider.
8.0 Other Plugin Supports
This plugin is WPML friendly. This plugin supports Visual Composer.
9.0 Support
If you need support, please write to us at pitscustomersupport@webshopextension.com
10.0 Version Details
| Sl. no | Version | Details of Changes |
| 1 | V1.0.0 |
|
| 2 | V1.1.0 |
|