Categories
Magento
WordPress
SAP Commerce
Odoo
Shopify
Typo3
Shopware
nopCommerce
Pimcore
Hyvä
OXID eShop


1. Introduction
The Wallee payment provider extension from PIT Solutions acts as a bridge between Wallee and the Odoo Web Shop, offering a standardized solution for accepting payments through a wide range of global payment providers.
Key Characteristics include:
- Unified Payment Gateway: This extension centralizes payments through a single gateway, enabling transactions with numerous providers including Credit/Debit Card, PostFinance E-Finance, PostFinance Card, TWINT.
- Comprehensive Payment Processing: Wallee goes beyond basic payment processing by providing additional features such as reconciliation services.
- Broad Payment Network: It connects Odoo Shop users to a payment hub that integrates with over 50 payment gateways and processors, ensuring a broad array of payment options.
- Efficient Integration: Utilizing REST APIs, the connector helps reduce cart abandonment by providing customers with their preferred payment methods and lowers costs through optimized payment routing.
This extension significantly enhances the payment experience for Odoo Shop users, offering flexibility and cost-effectiveness while accommodating a wide variety of payment options
2. Features
- Easy to Install: Quick and straightforward installation process.
- Flexible: Adapts to various business needs and payment requirements.
- User-Friendly: Intuitive interface and configurable settings to match individual preferences.
- Unified Payment Gateway: Centralized payment processing through a single gateway
- Multiple Payment Methods: Supports a wide range of payment options including Credit/Debit Card, PostFinance E-Finance, PostFinance Card, TWINT.
- Transaction Management: Efficiently handles and maintains transaction records.
- Customizable Notifications: Allows for tailored system notifications.
- Multi-Website and Multi-Space Support: Configurable for multiple websites and spaces
3. Installation
Follow the steps below to install the Wallee Payment Acquirer plugin in your Odoo application:
- Install Required Dependencies
- Navigate to the requirements.txt file located in the plugin directory.
- Install all the listed Python dependency packages on the target server using the following command:
pip install -r requirements.txt - Ensure that all dependencies are installed successfully before proceeding to the next step.
- Access the Odoo Application
- Log in to your Odoo instance with administrative access.
- Navigate to the Apps menu from the main dashboard.
- Install the Wallee Payment Acquirer Plugin
- In the Apps search bar, type “Wallee Payment Acquirer.”
- From the search results, locate the plugin and click the Install button.
- Wait for the installation process to complete successfully.
- Post-Installation Check (Optional)
- Once installed, ensure that the module appears in your list of installed apps.
Verify that the plugin is accessible under the Payment Acquirers section in the Invoicing or Website settings, depending on your Odoo configuration.
4. Working
The Wallee back-end offers flexible configuration options to tailor the payment experience:
Payment Method Management: Admins can define which payment methods are available to users, customizing the payment options as needed.
Payment Completion Process: Admins have the choice to redirect users to the payment service provider's site for transaction completion or handle payments within the shop site using an I-frame. The method of handling payments (redirection, I-frame, or both) depends on the capabilities of the payment service provider.
Enhanced Security with 3D Secure: Admins can enable 3D Secure functionality to add an extra layer of security during the checkout process. When enabled, users will be directed to the 3D Secure service of the payment method to handle their payment details securely.
Customizable Notifications: Admins can adjust notification contents for various payment statuses such as pending, completed, or canceled. Additionally, system notifications like help messages and order completion thank-you messages can be customized.
Editable Documents: Order emails, invoices, reminders, packing slips, and other related documents can be modified to fit specific formats and requirements.
These features ensure a flexible, secure, and tailored payment experience for both administrators and users.
4.1. Odoo Backend Configuration for Wallee
You can access the payment providers through the following menu options:
- Invoicing > Configuration > Payment Providers
- Website > Configuration > eCommerce > Payment Providers
These paths will direct you to the configuration settings for managing payment providers.
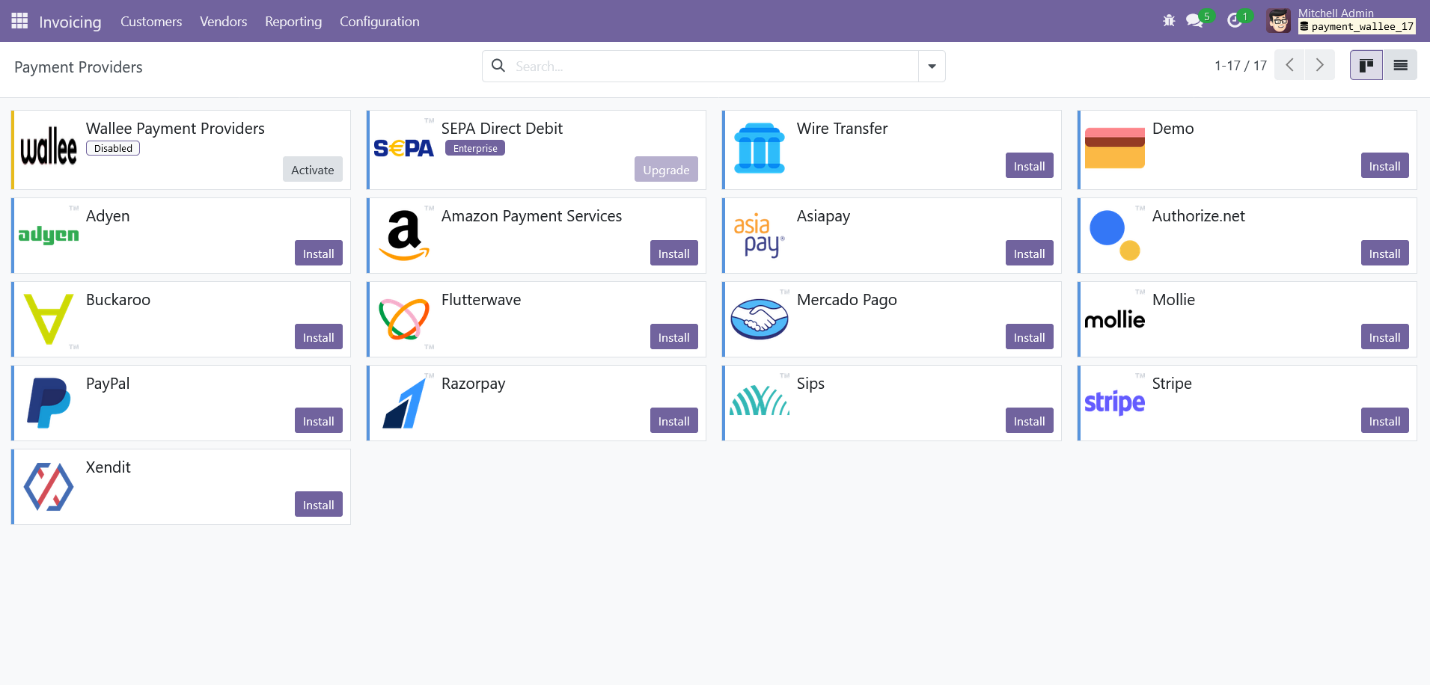
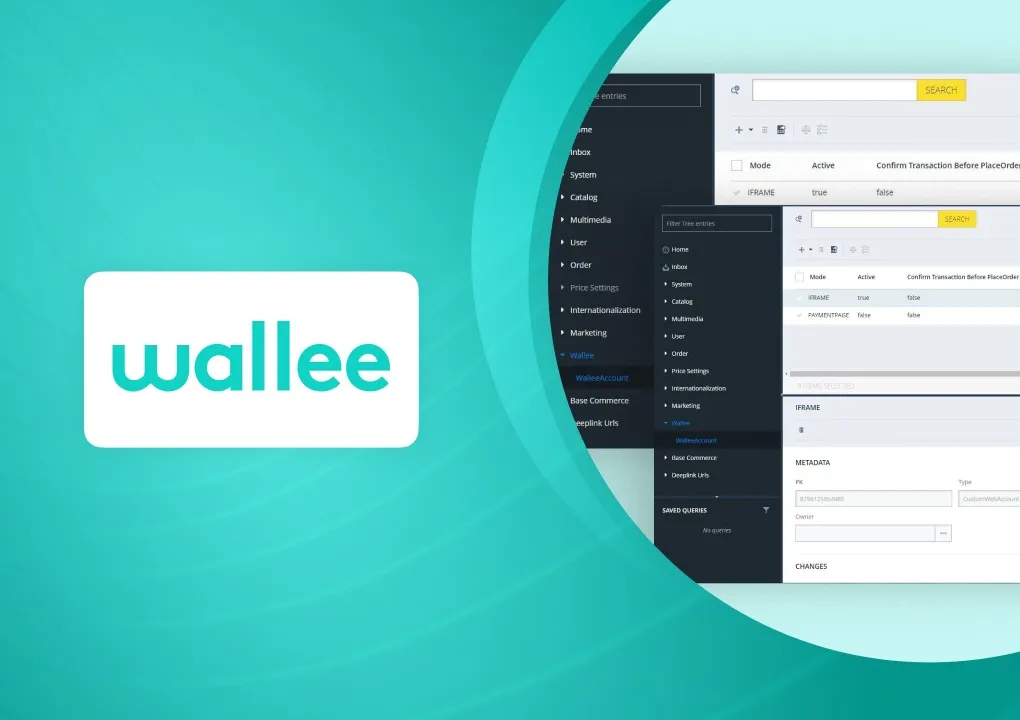
Screenshot 1: Payment Providers Listed in Odoo Backend
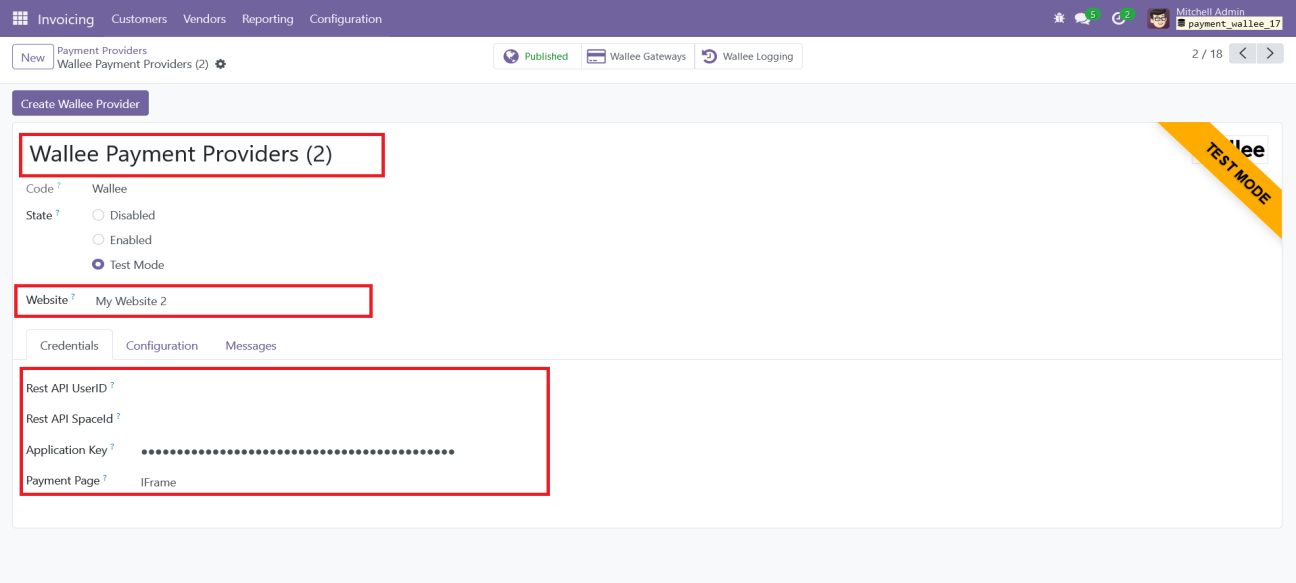
After selecting the Wallee Payment Provider from the list, navigate to the Credentials tab. In this section, you can enter the credentials for your Wallee Payment Provider space.
Additionally, you’ll have the option to select the payment page type. Choose between IFrame and Lightbox options to determine your preferred method of payment processing.
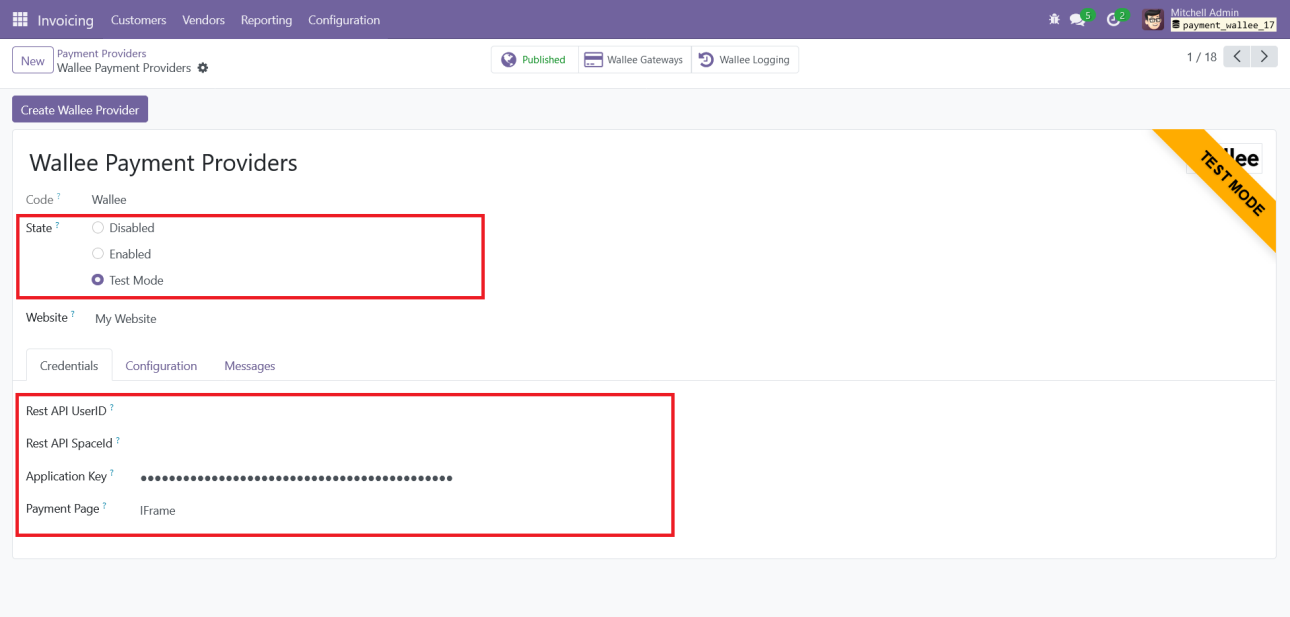
Screenshot 2: Odoo Backend Configuration of Wallee Credentials.
To configure the Wallee Payment Provider in Odoo, you will need the following details from Wallee:
- Rest API UserID: The Application User ID created in app.wallee.com.
- Rest API SpaceID: The Space ID obtained from app.wallee.com.
- Application Key: The Application Key generated in app.wallee.com.
After entering these details, you can set the status to 'Enabled' for live transactions or 'Test Mode' for testing purposes.
Additionally, you can customize the payment form and payment follow-up settings within the Configuration tab to tailor the payment experience to your needs.
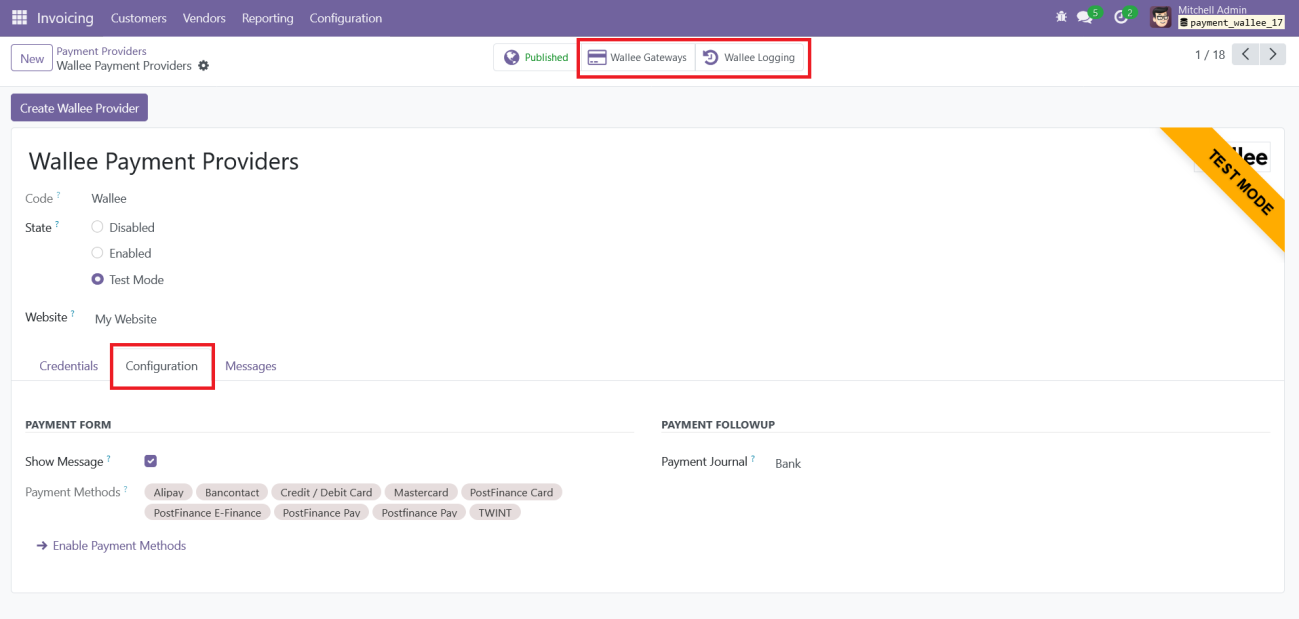
Screenshot 3: Odoo Backend Configuration
After successful configuration, you can view the payment methods and logs related to the Wallee Payment Provider as follows:
- Payment Methods: Click on the 'Wallee Gateways' button to view and manage the available payment methods.
- Logs: Click on the 'Wallee Logging' button to access and review logs related to the Wallee payment provider
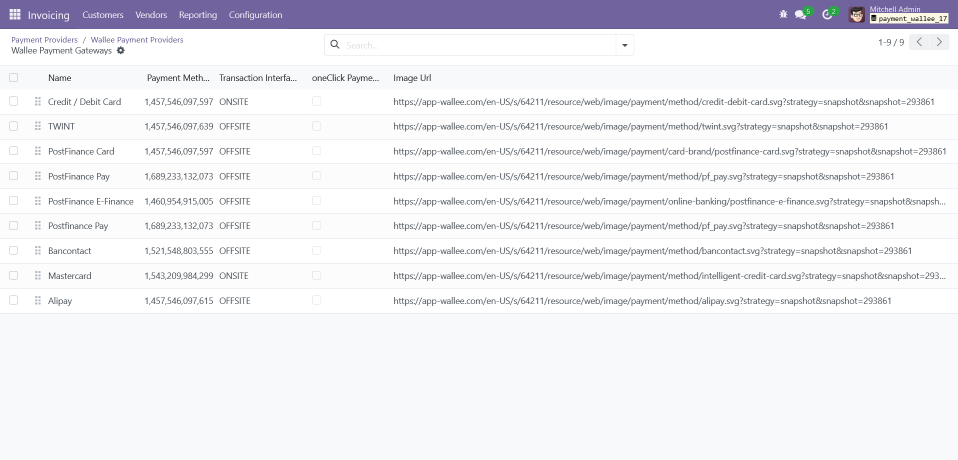
Screenshot 4: Wallee Payment Methods
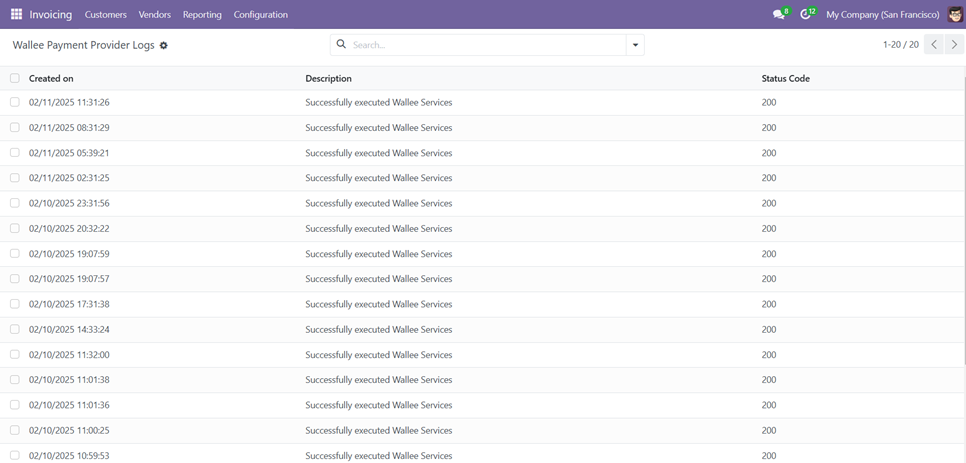
Screenshot 5: Wallee Payment Provider Logs
4.2. Payment Processing from Website
Choose your preferred payment method from those listed on the payment screen based on your currency. Then, click the 'Pay Now' button on the Odoo eCommerce payment screen to proceed to the Wallee payment interface and complete your payment.
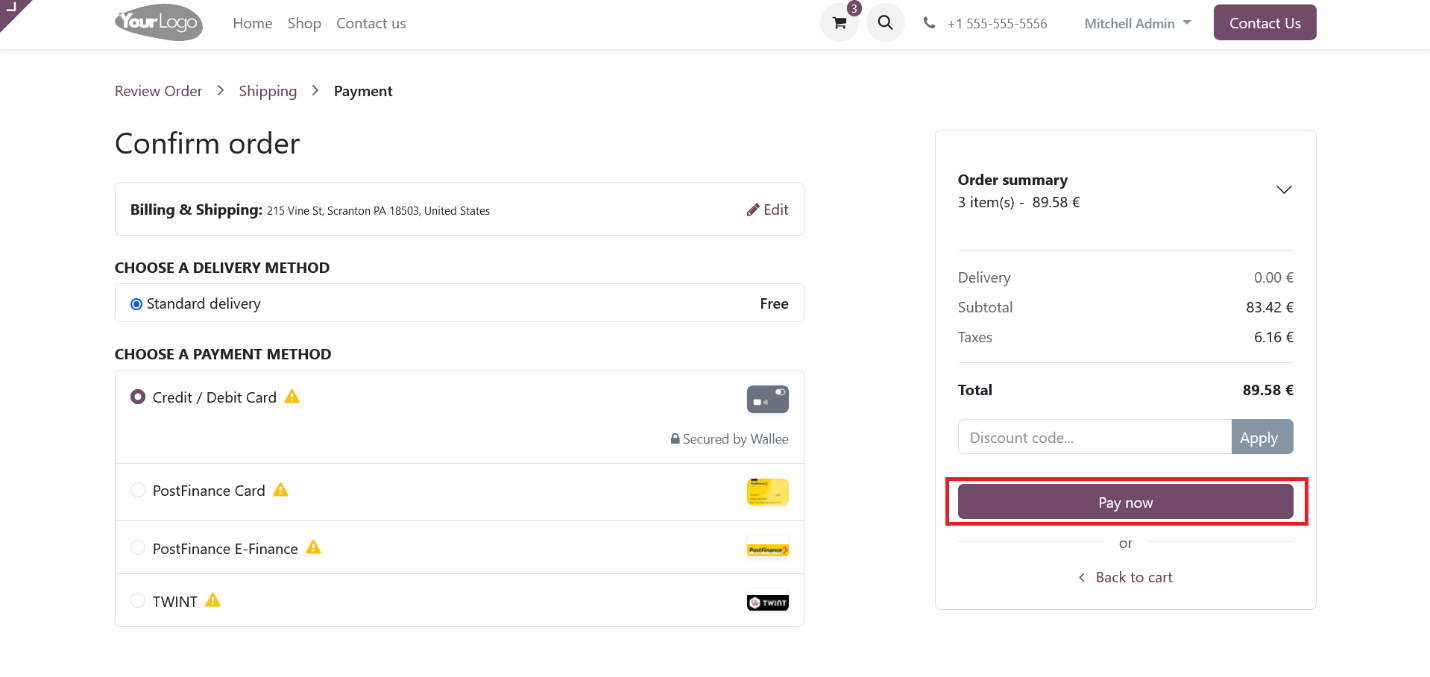
Screenshot 6: Multiple Payment Methods Listed in the Payment Screen
Screenshot 7: Wallee Payment Interface – I-Frame
Screenshot 7: Wallee Payment Interface - Lightbox
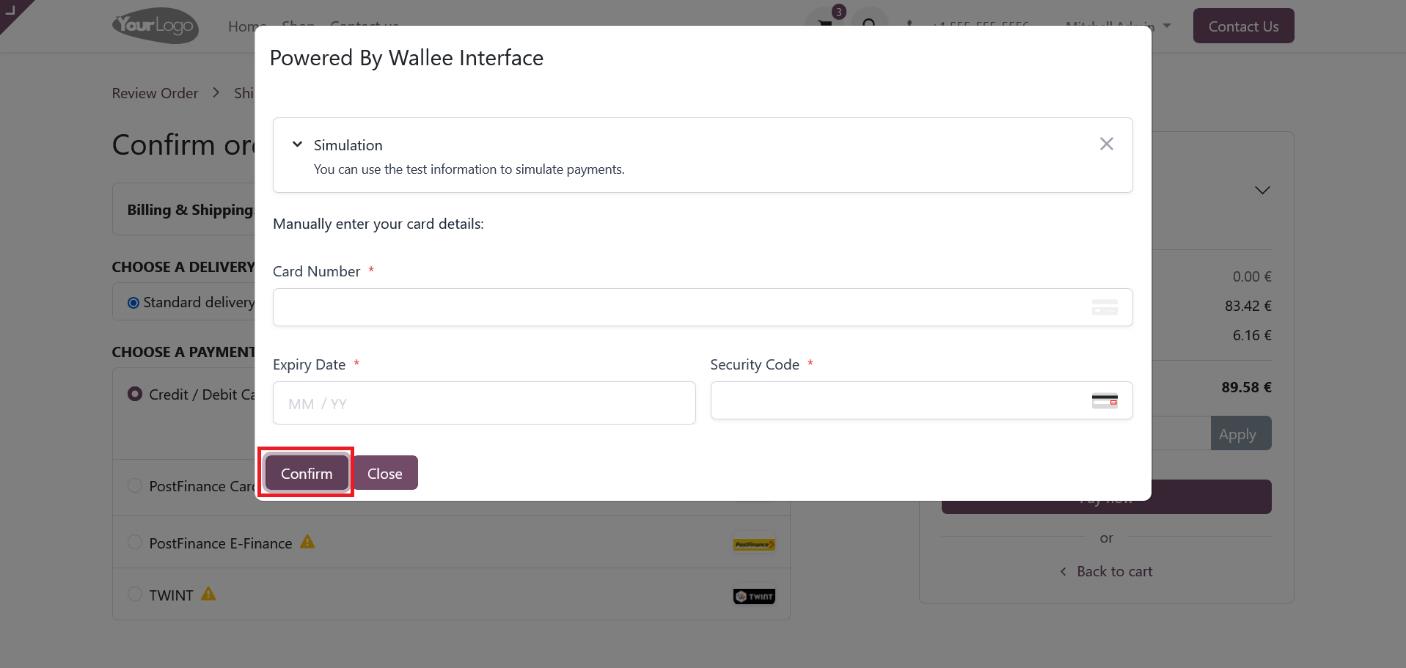
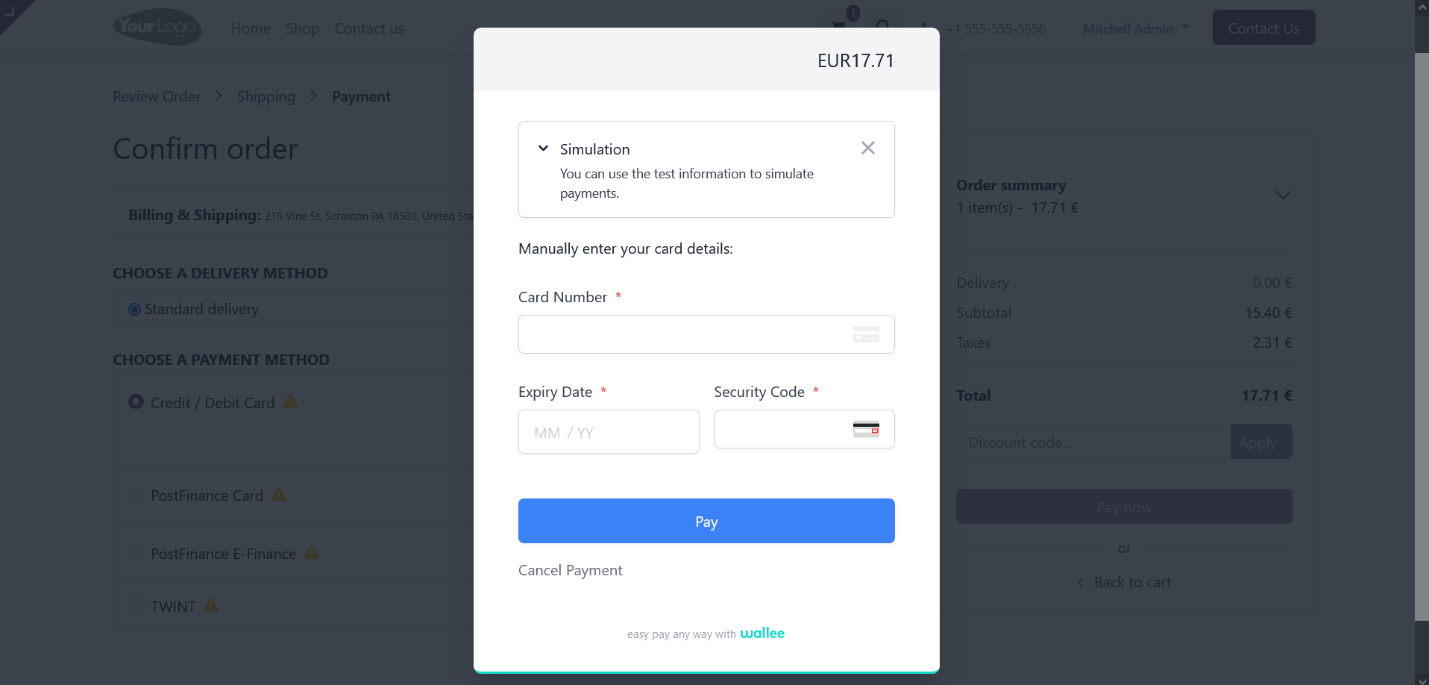
On this screen, enter your card details and click the 'Confirm' button. You will then be redirected to the payment status page on the Odoo eCommerce website.
4.3. Order Status
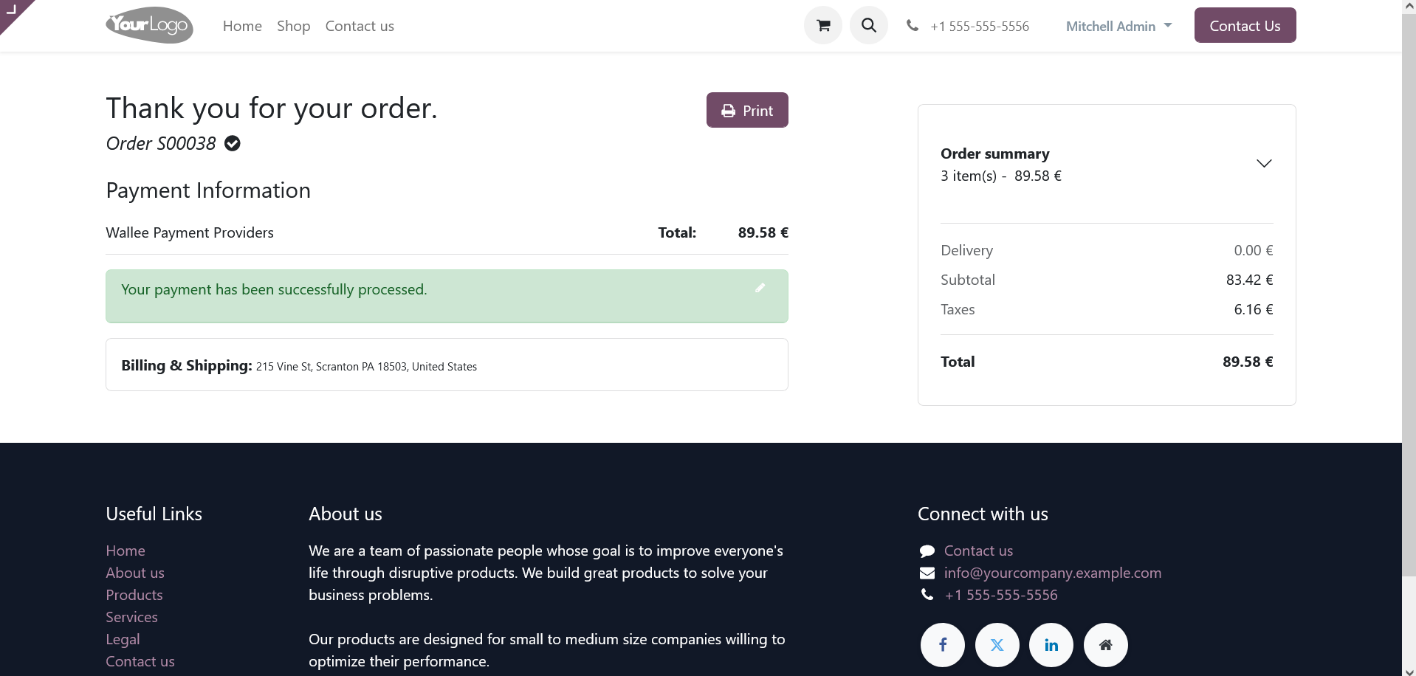
Screenshot 8: Order Confirmation
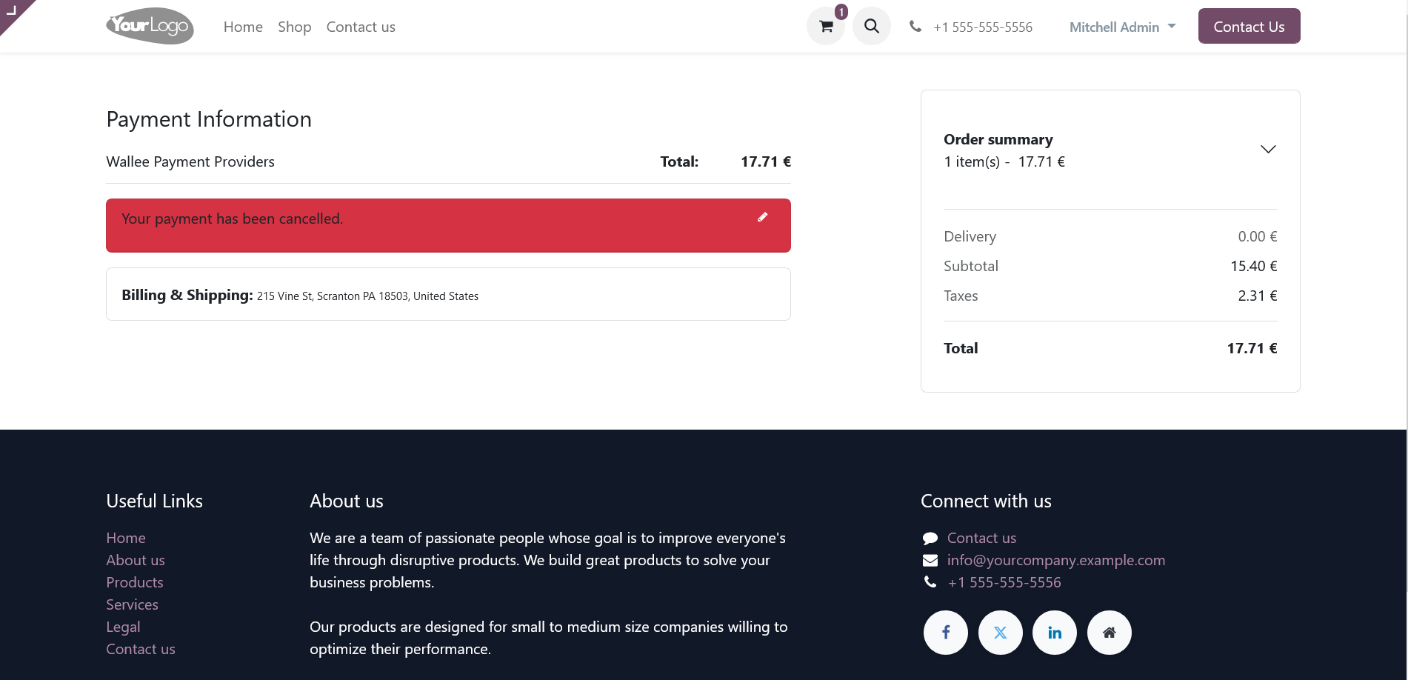
Screenshot 9: Order Cancelled
4.4. Wallee Multi-Website for Multi-Space Backend Configuration
For multi-website configuration, you need to create separate Wallee payment providers for each website. To do this, use the “Create Wallee Provider” button to set up individual payment providers for each site.

Screenshot 10: Creating new Wallee Provider
Clicking the “Create Wallee Provider” button will create a new Wallee Provider in Odoo with a unique name. Next, you’ll need to associate this provider with the desired website and input the credentials for the Wallee space that isn’t already configured in Odoo.
Screenshot 11: Mapping Website to Wallee Provider
If you attempt to save the Wallee provider without associating it with a website, or if you try to map it to a website that’s already assigned, the system will prevent this action and display error messages, as shown in the screenshots below.
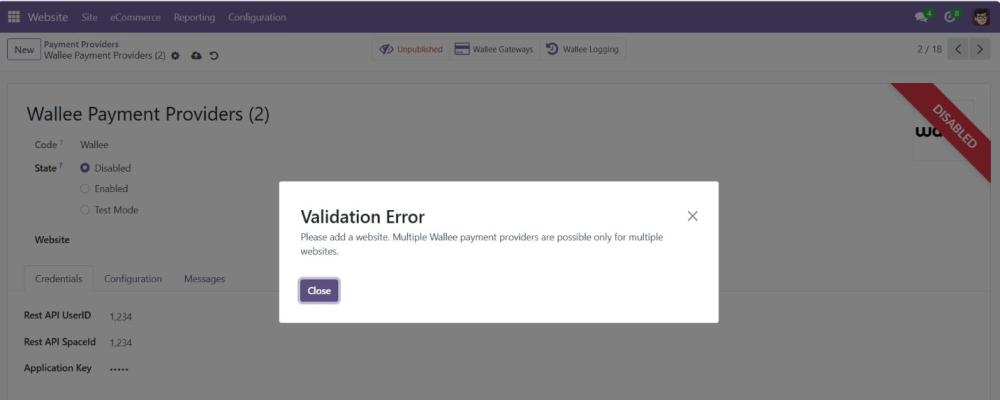
Screenshot 12: Message Displayed without Mapping to a Website.
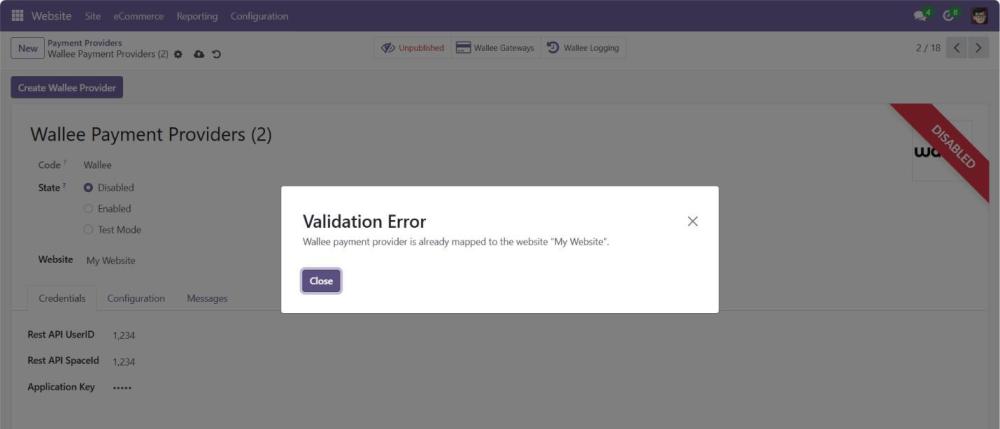
Screenshot 13: Message Displayed the Website is already Mapped to a Wallee Provider.
To enable multi-website functionality, you must configure the domain names for each website.
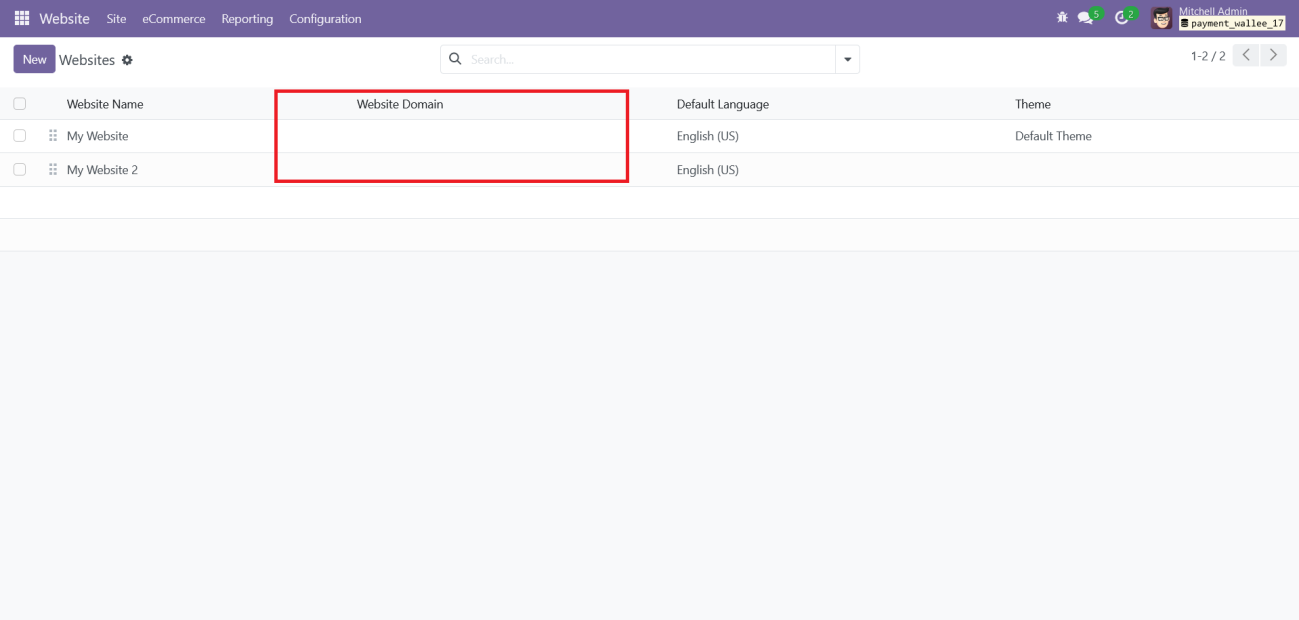
Screenshot 14: Mapping Domain to Websites.
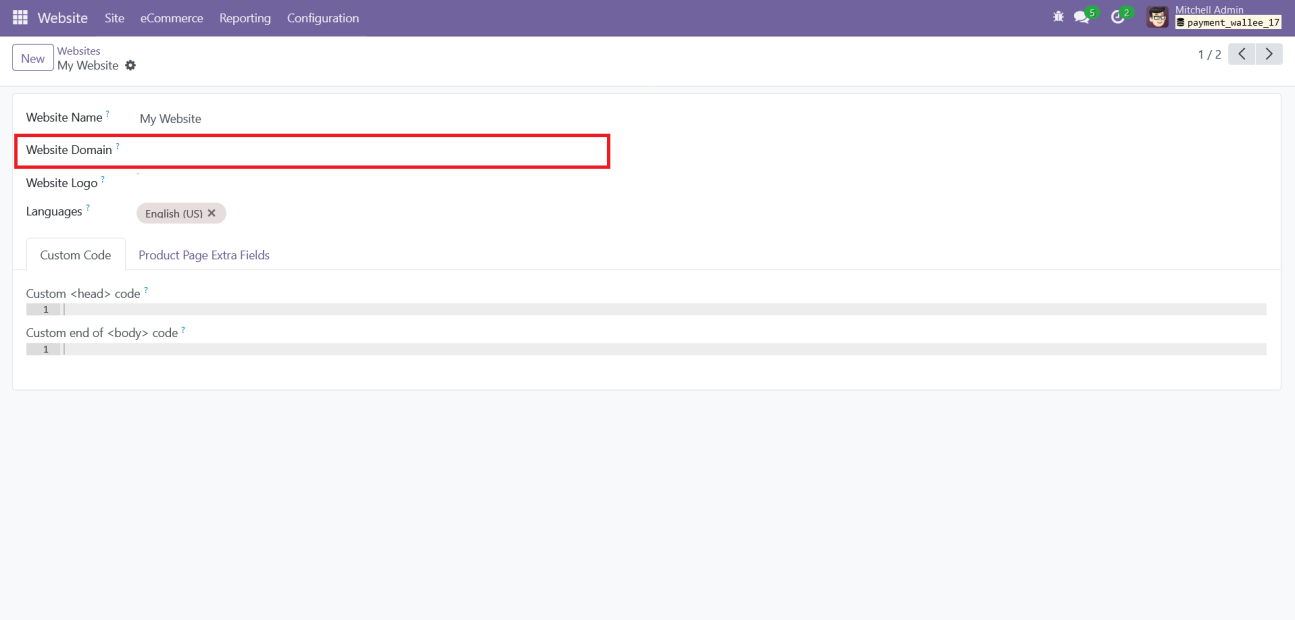
Screenshot 15: Mapping Domain to Websites
4.5. Invoice Payment Process
By clicking on the My Account menu, users can view documents such as invoices and sales orders associated with their account.
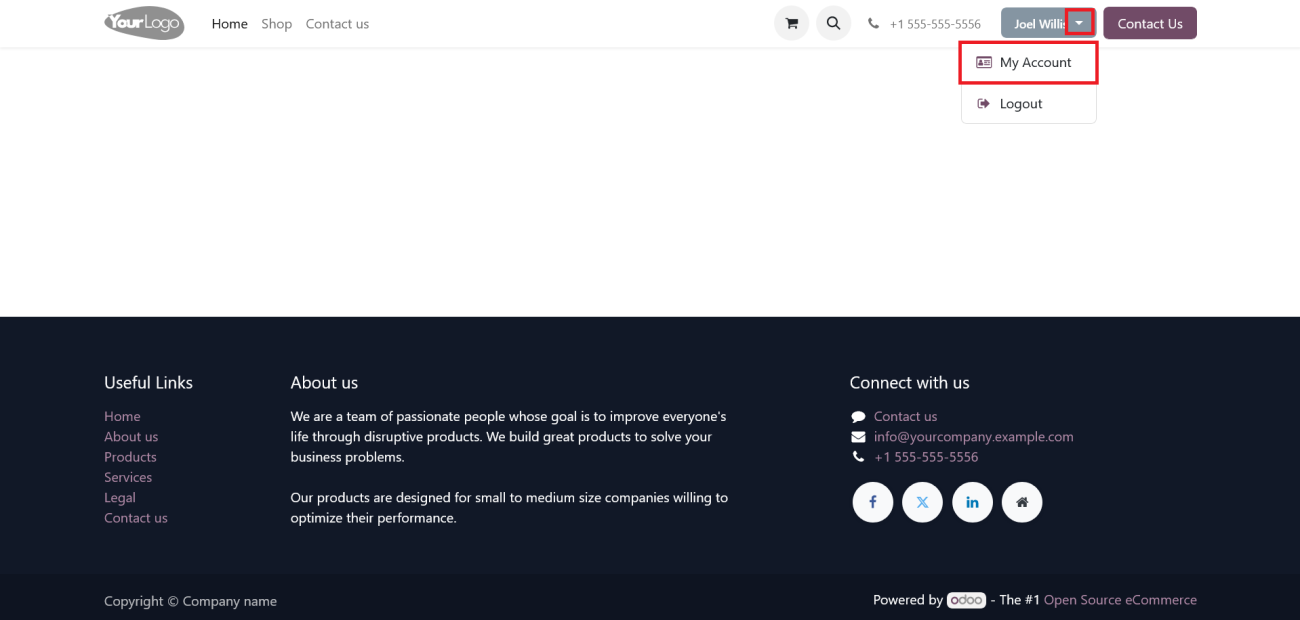
Screenshot 16: Portal User Dashboard
By clicking the Invoices menu, users can view all their invoices.
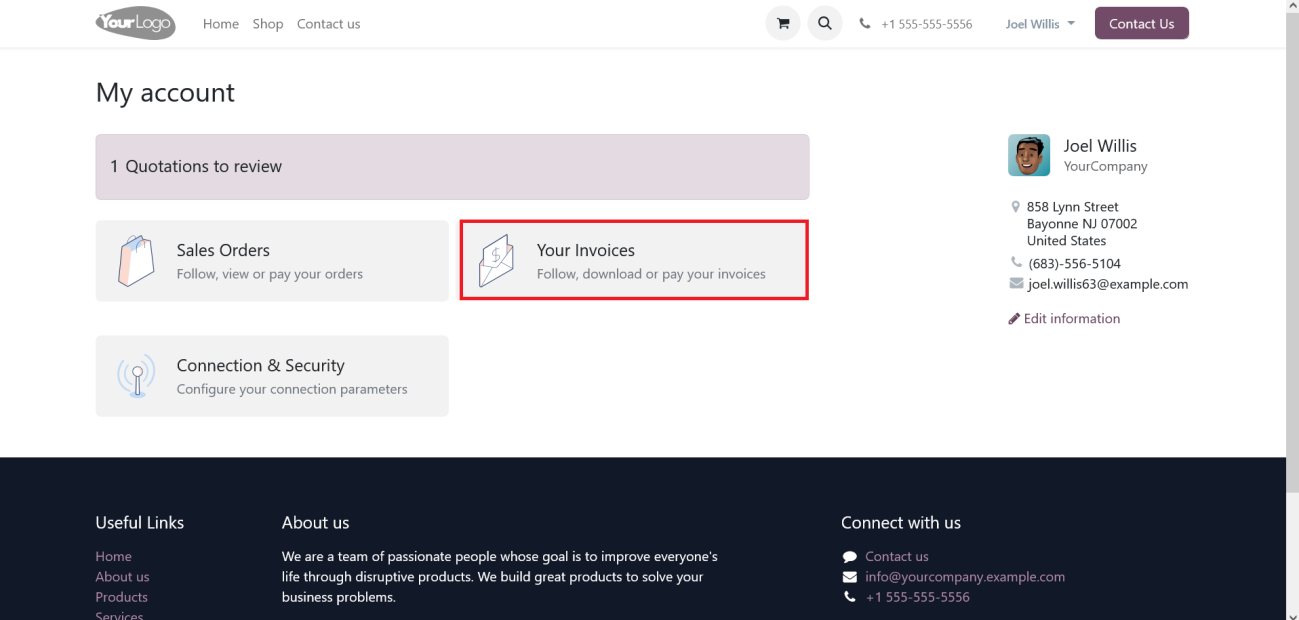
Screenshot 17: Portal User Account Dashboard
Here, users can view all their invoices. From this list, they can select an invoice to proceed with the payment.
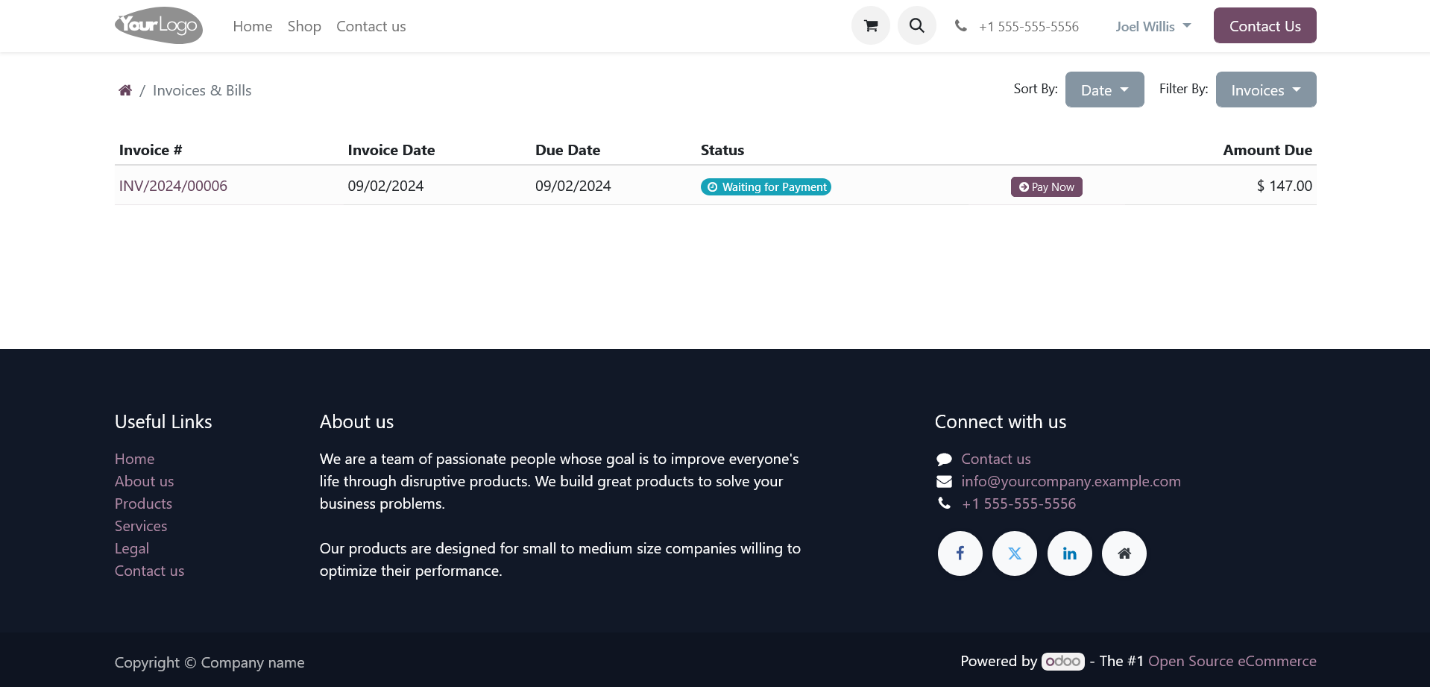
Screenshot 18: Invoices List
Click the ‘Pay Now’ button to proceed with the payment.
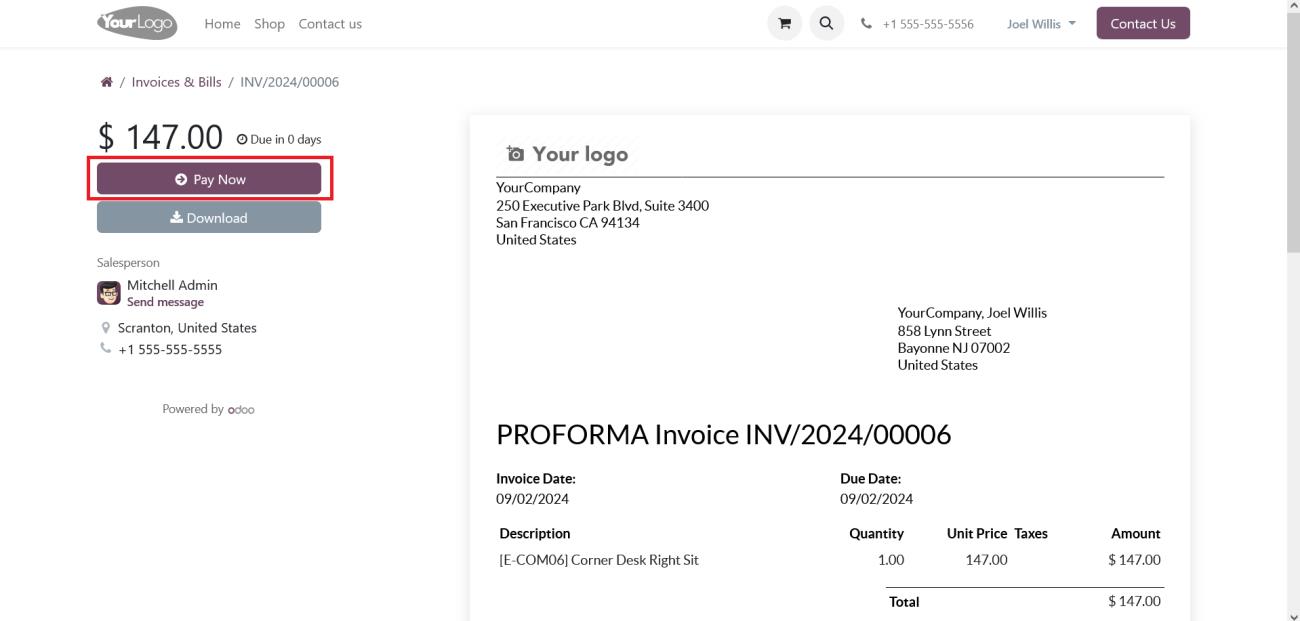
Screenshot 19: Invoices Payment Process
Select your preferred payment method to proceed with the payment, and then click the ‘Pay’ button to access the Wallee provider interface.

Screenshot 20: Payment Methods Listing
Based on the Wallee provider's payment page configuration, users will see either the Wallee IFrame or Lightbox payment interface.
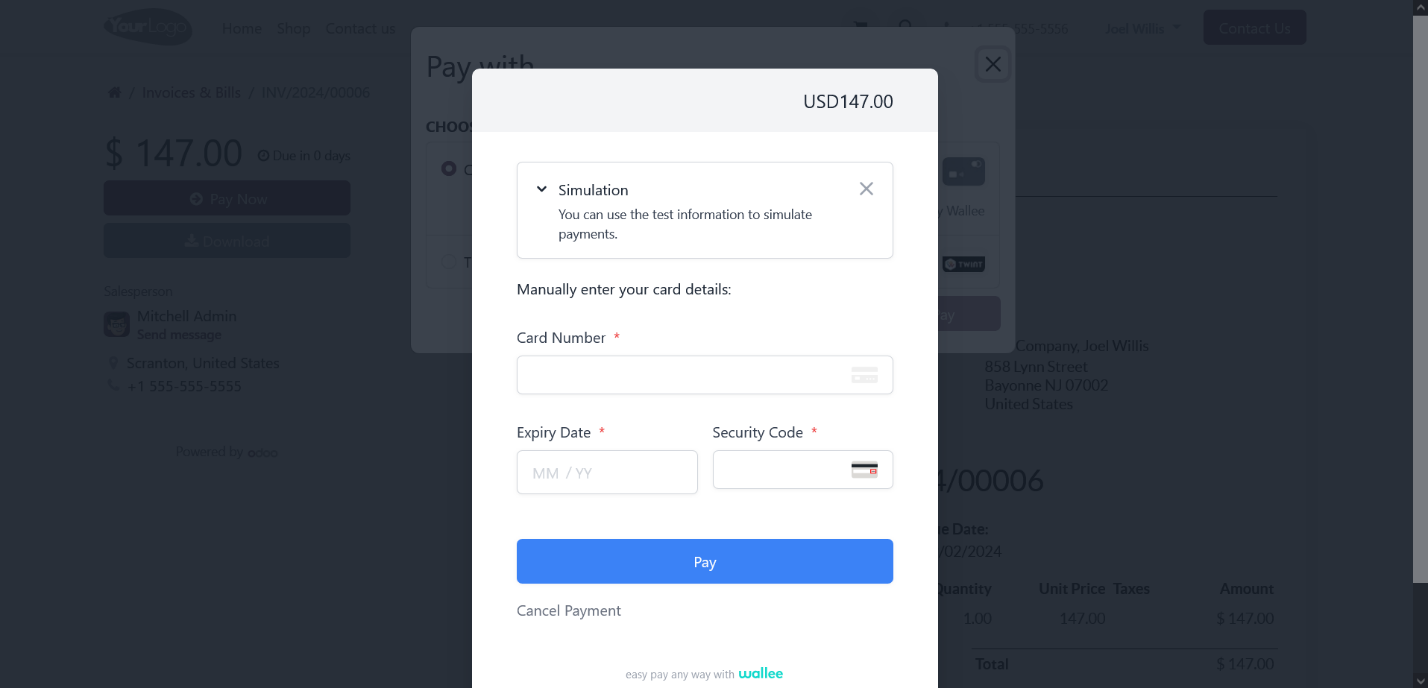
Screenshot 21: Wallee Payment Interface
Once the payment is successful, users will see the confirmation message below:
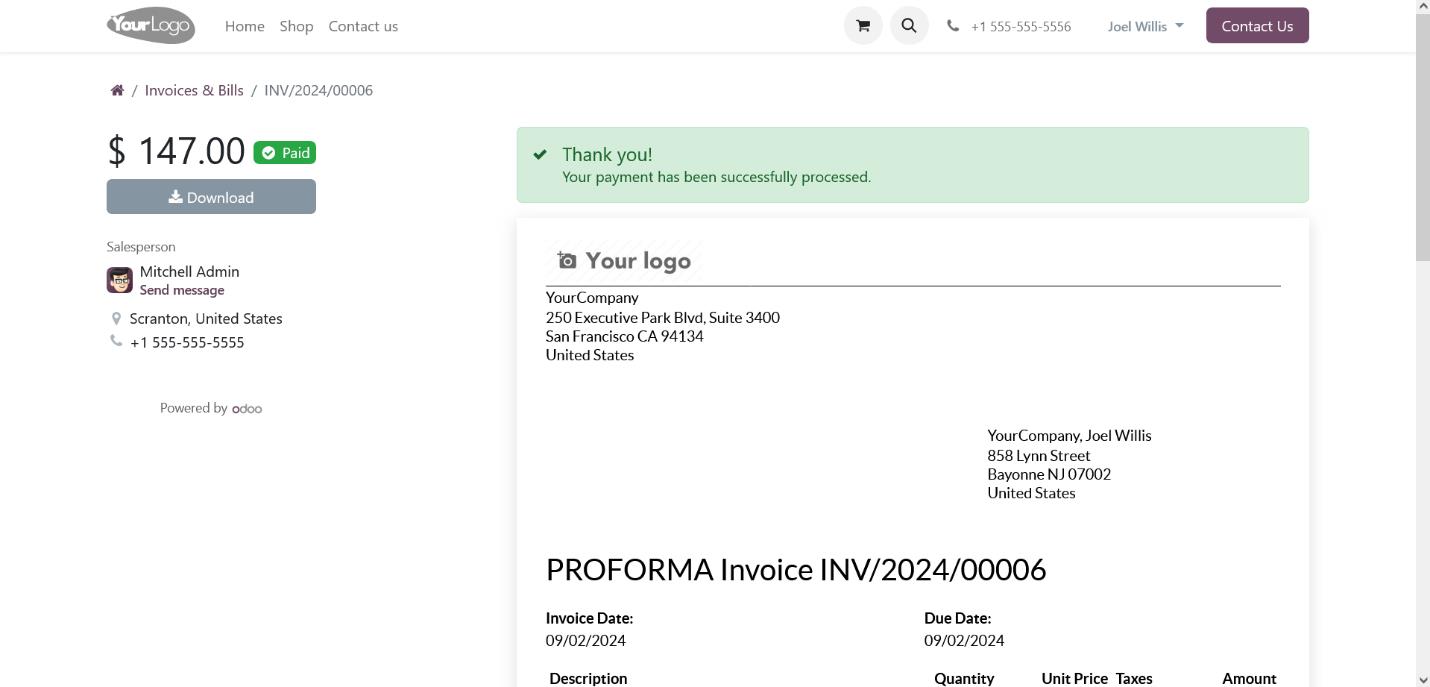
Screenshot 22: Payment Success Page
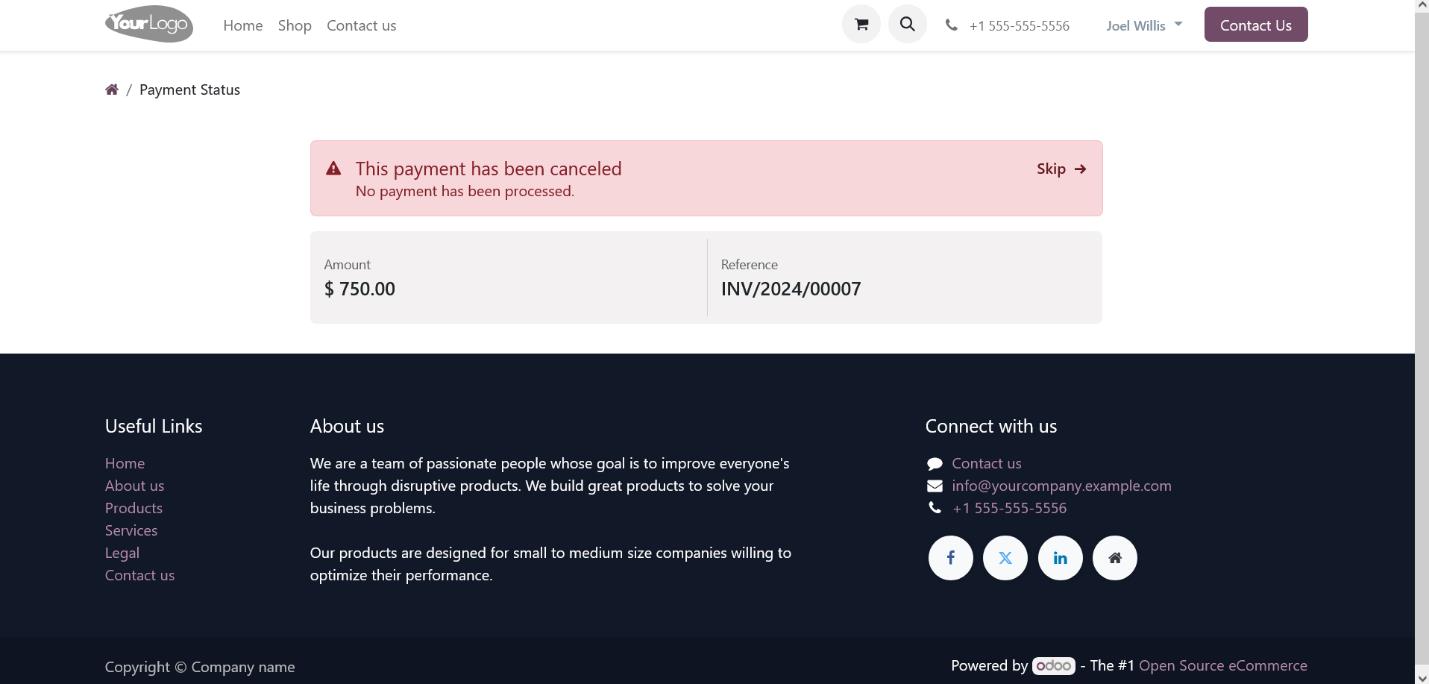
Screenshot 23: Payment Failed/Cancelled Page
Once you generate and confirm an invoice in the Odoo backend, a ‘Preview’ button will appear. Clicking this button will redirect you to the portal page, where you will find a ‘Pay Now’ button. Clicking the ‘Pay Now’ button will open the payment interface as explained earlier.
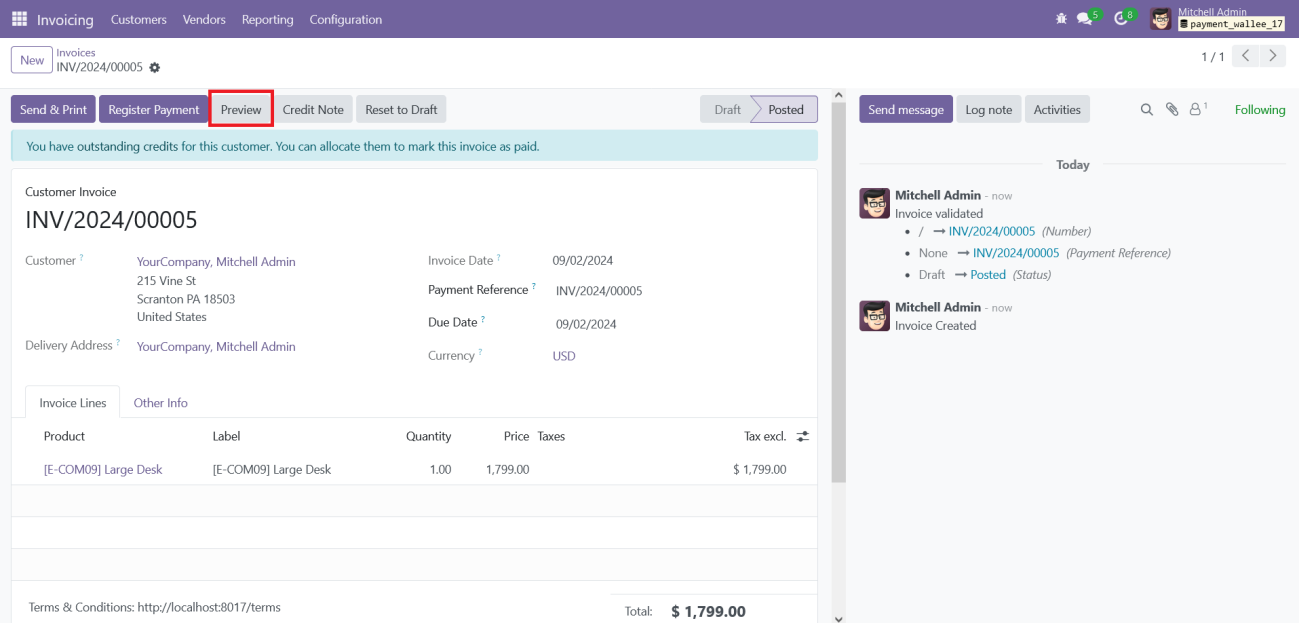
Screenshot 24: Invoice Payment Process from Odoo Backend
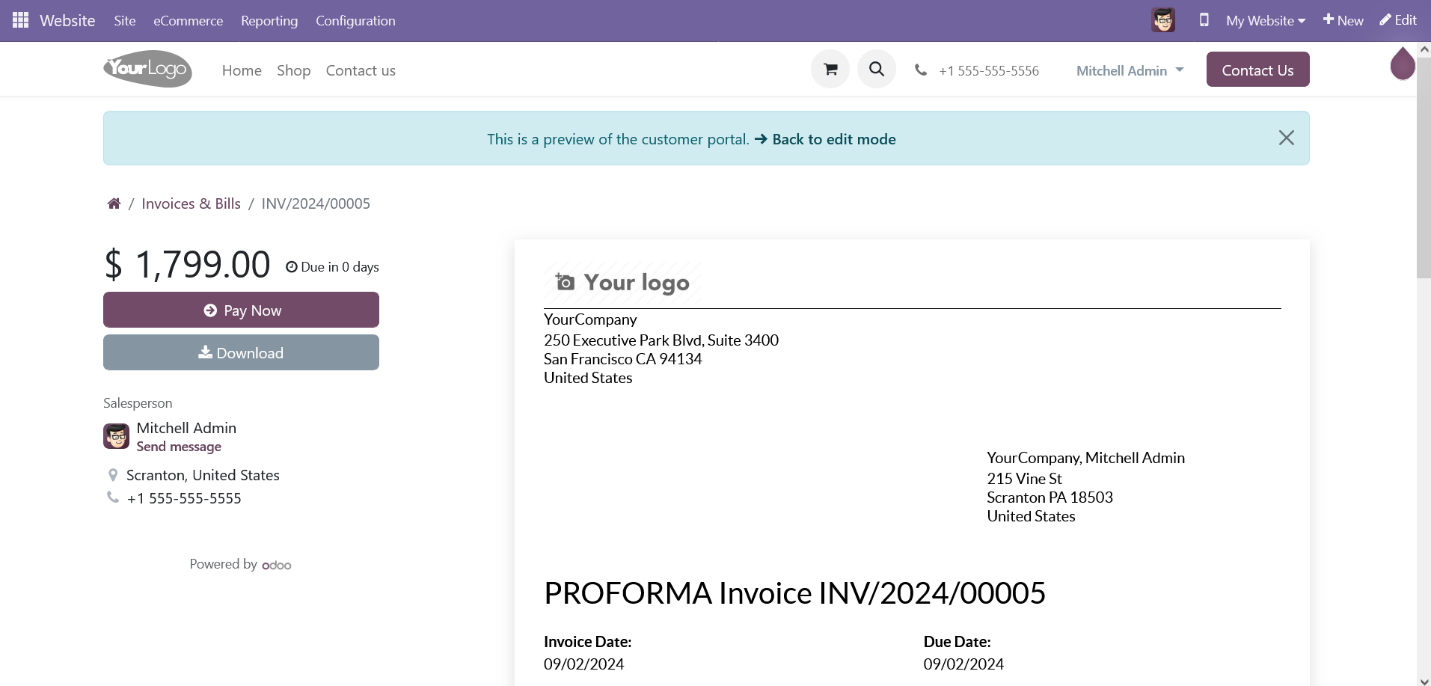
Screenshot 25: Invoice Payment Process Portal Page
5. Technical Requirements / Compatible With:
- Technical Requirements: Odoo Sales, Payment and Website Module.
- Compatible with ODOO version 17.0.
6. Changes Log / Release Notes
Version 2.1.2: February 2025
- Refinement of payment transaction logging feature.
Version 1.1.2: January 2025
- Bug Fixes and improvements.
Version 1.1.1: August 2024
- Added multi-website compatibility.
Version 1.0.0: April 2023
- Initial release
7. Support
If you have questions, use our contact form at webshopextension.com or email at support@webshopextension.com.